Uploading Extensions
Flogo Enterprise gives you the ability to make use of your own extensions.
You can create extensions for Flogo Enterprise or you can upload a Project Flogo extension into Flogo Enterprise.
Uploading Flogo Enterprise Extensions
You can create and contribute extensions for the following:
- activities
- triggers (you can define custom triggers that you can upload and use to create a flow)
- connectors (a connector provides configuration details to connect external apps, for example, Salesforce )
- functions (to be used inside the mapper when mapping elements)
After creating your extension, you upload its
.zip file using the upload dialog.
The extension you upload must follow the guidelines found on the GitHub page, https://tibcosoftware.github.io/tci-flogo/.
Before you Upload
Keep the following in mind before you upload your extension:
- When uploading your activity or trigger extension, by default
Flogo Enterprise compiles your extension before uploading it. If you would like to skip the compilation process, make sure to compile all the
*.tsfiles in your extension and generate a.jsfile for each.tsfile. The.jsfile must have an identical name as its corresponding.tsfile. - You are responsible for the lifecycle (uploading, updating, deleting) of the extension that you contribute. Any extension that you contribute is visible and available for use only to you.
- When creating your activity or trigger extension, if you did not specify a category for the extension, the extension is placed in the Default category.
- The category name for an extension must be unique. If a category by the name already exists, the upload completely overwrites the category. Out-of-the-box contributions cannot be overwritten.
- Special characters are not supported in activity and trigger names. A validation error is displayed while uploading, if any names contain special characters.
- Uploading new extension(s) to an existing category overwrites the entire category and all its contents. So, to add a new extension to an existing category while keeping the extension(s) that already exist in that category, be sure to include the existing extension(s) along with the new activity, connection, or trigger when creating the
.zipfile to be uploaded. - You cannot delete a single extension from any category other than the Default category. To delete a single trigger, activity, or connector from a category, you must re-upload the whole category which includes all the extensions you want to keep minus the extension you want to delete. The same applies when editing an extension within a category - after editing an extension on your local machine, make sure to re-upload the whole category, the edited extension plus all the existing extensions in the category. Uploading only the edited extension overwrites the category causing you to lose the other extensions in the category.
An extension that you upload to Flogo Enterprise is available for use in any flow that currently exists in your app or any flow that you create later.
To upload an extension:
.zip file for your extension available for upload.
- On the Apps page, click Environment and Tools tab.
- Under Connector Management & Extensions, click Extensions.
- If this is the first extension, click the
Upload an extension button.
If there are existing extensions, click the Upload button on the upper-right corner:

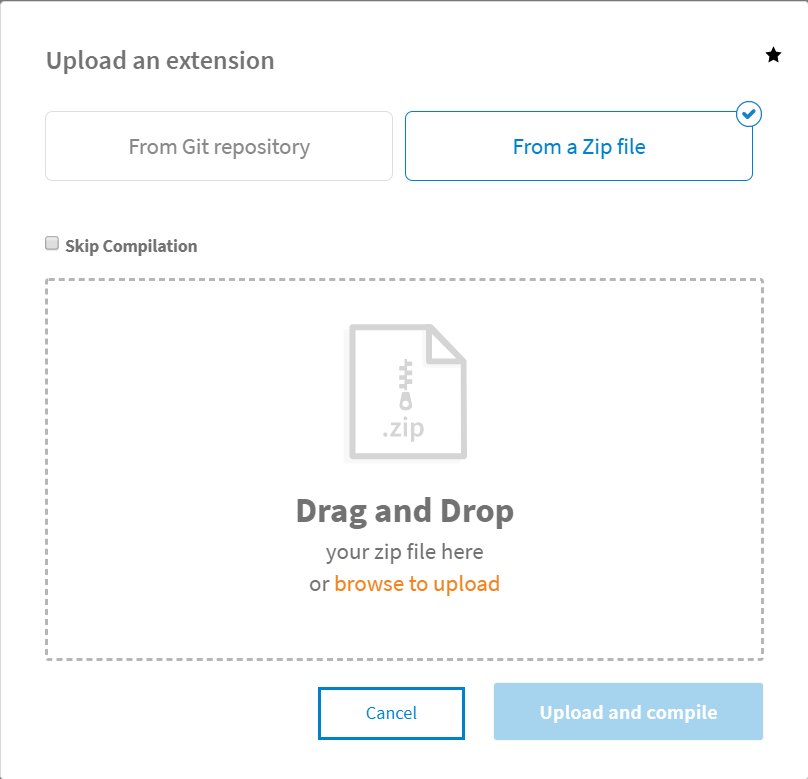
The Upload an extension dialog opens. If you want to upload from the Git repository select From Git repository. See the section, Pulling Extensions from an Open Source Public Git Repository for more details on this.
To upload an extension residing in a
.zipfile locally, click From a Zip file.
- Click the
browse to upload link and navigate to your extension
.zipfile. Alternatively, drag and drop the.zipfile from your local machine to the area defined by a dotted line in the Upload an extension dialog. - If you would like to skip the compilation process, select the
Skip Compilation check box. If the check box is selected,
Flogo Enterprise performs a check before uploading to make sure that every
.tsfile has a corresponding.jsfile present. If a .ts file does not have a .js file, the validation fails, and your extension does not upload. - Click
Upload and compile.
Flogo Enterprise validates the contents in the
.zipfile. If the.zipfile contains a valid folder structure, it compiles the extension code. Once the code is compiled successfully, it uploads the extension to Flogo Enterprise. You can view the progress of the upload or any errors that occur in the logs: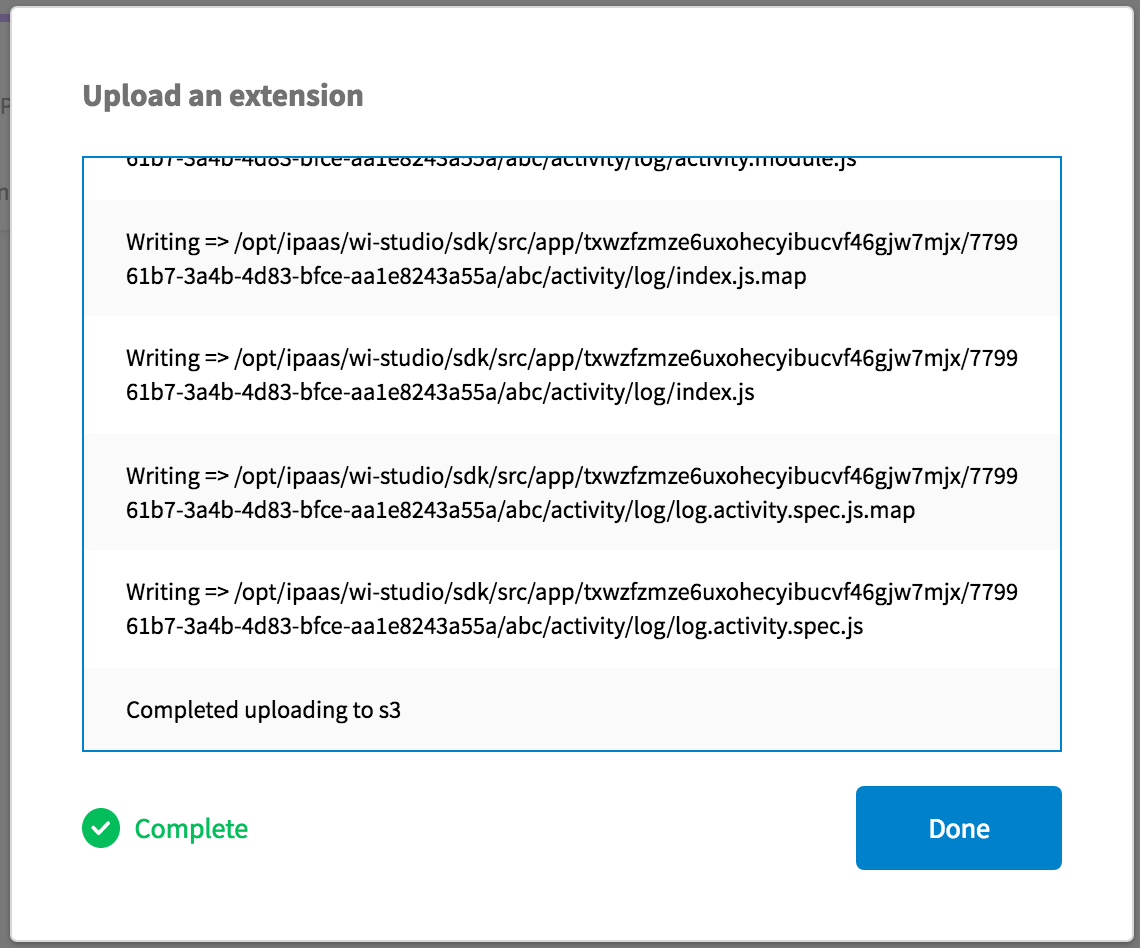
You will see a Complete message after the extension is successfully uploaded. If there were any compilation errors during the upload, you see an error message and the upload exits. You can copy-paste the error message if need be.
- Click
Done to close the dialog.
You can view your extension on the Extensions page. The newly added extension appears under the category that you specified. If you had not specified a category for the extension, it appears in the Default category. The activities are denoted by the
 symbol and the connectors have the
 symbol next to them.
The new extension displays the following:
- timestamp when the extension was loaded
- name of the extension contributor
- version of the extension
The Search field that appears above the category searches within the categories for the activity, trigger, or connector you specified in the search text box. You can filter the displayed extensions by clicking the Triggers, Connectors, or Activities buttons.
The extension is now available for you to use. If you uploaded an activity, the activity is available for use when creating a flow or editing an existing flow. The activity appears under the category you defined for it when creating the extension. The output of the activity is available in the mapper just as it is for any default activities that come with the Flogo Enterprise.
If you uploaded a connector, the connector is available for creating new connections on the Add Connections > Select connection type dialog.
If you uploaded a trigger, the trigger is available for you to select in the Create a Flow dialog. If you select the trigger, it creates the flow with your trigger.


Uploading Project Flogo Extension
You can upload the following extensions created in Project Flogo to Flogo Enterprise:
- activities
- triggers
- functions
To use an extension created in Project Flogo, get the GitHub URL for the extension and upload it using the method described in Pulling Extensions from an Open Source Public Git Repository.
Changing Log Levels
When uploading an extension, you can see the logs on the screen. You can set the
FLOGO_LOG_LEVEL engine variable to alter the log level at runtime. Be sure to do so
before you begin uploading your extension.