Using App Tags
You can use app tags to provide additional information and organize your apps. For example, you can specify whether it is a REST app, whether it is running in Kubernetes, and so on. One or more tags can be added to an app. You can view and filter the tags from the list of apps on the Apps page. The tags are preserved after exporting a Flogo app.
Adding Tags
To add or change tags in an app:
-
Click the Apps tab.
-
Click the app you want to modify. The App Details page opens.
-
Click Tags or +Tags (if the app has no tags). Tags that have already been applied to this app are shown.
For example, the following screenshot shows that the app FE has no tags. Click +Tags to view the tags in the organization.

-
To add a new tag, enter a name in the search control, then click Create New. Tags are case-sensitive.
-
If you enter text in the search box, all matching tags in your organization are shown. This search is case-insensitive. Click a tag to add it.
-
Click close (×) next to a tag to remove it from the app.
-
-
Click outside the dialog box to save the changes.
The same set of tags is used across your organization. A tag is deleted from your organization when it is removed from the last app using it.
Filtering Tags
To filter the apps list on the Apps page:
-
In the filters shown on the left side of the apps list, the Tags filter shows the total number of tags and a search control. Enter text in the search filter to show buttons for each tag containing the text. This search is case-insensitive.
For example, the following screenshot shows the tags starting with the letters "Che".

-
Click a tag button to limit the list of displayed apps to only apps with that tag. Click a selected tag button to clear it. You can select multiple tags.

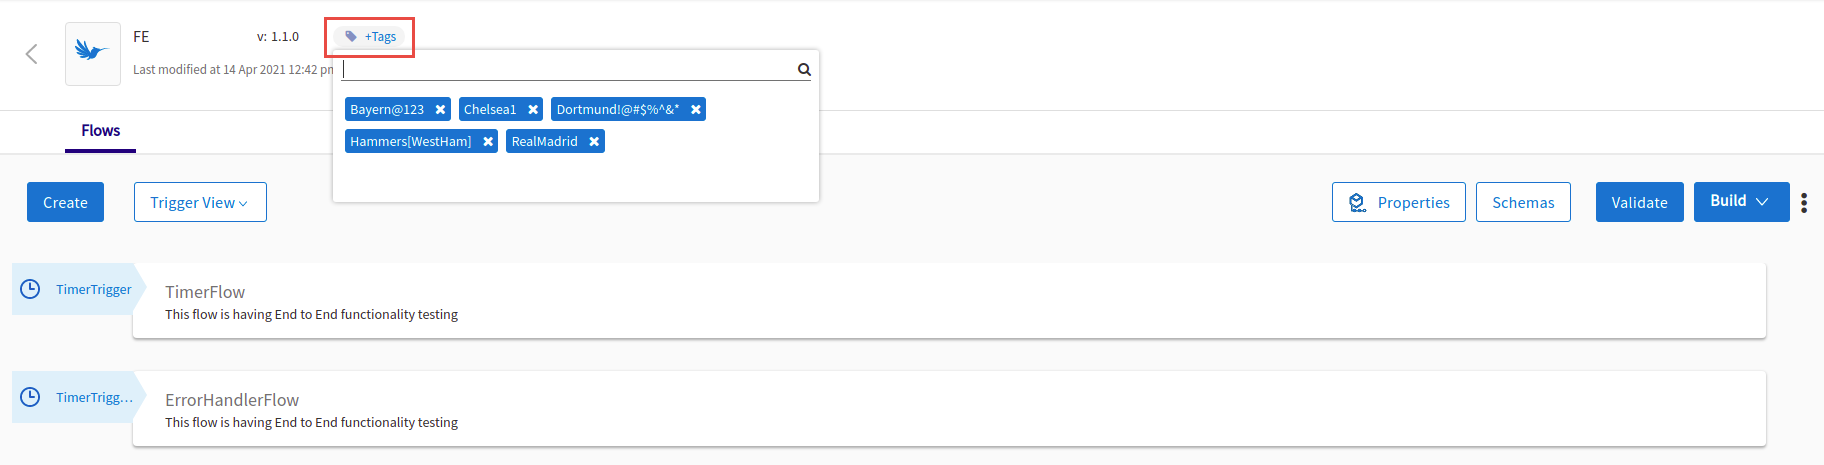
A tag icon ![]() is next to each name in the Name column on the Apps page. Hover over the tag icon to see a list of all tags in that app. The following screenshot displays the tags for the app FE.
is next to each name in the Name column on the Apps page. Hover over the tag icon to see a list of all tags in that app. The following screenshot displays the tags for the app FE.

Notes
-
When you export a Flogo app, its app tags are not retained in the Flogo JSON app archive file.
-
When you create tags, they are case-sensitive, but the tag filter search is case-insensitive. For example, you can create unique app tags for
abcandABC, but when you search forain the search control, both are shown.
Role Requirements
-
Admins can edit tags for any app in their organization.
-
Users can only edit tags on apps they own.
-
Read-only users cannot change tags on any app.