REST Trigger - ReceiveHTTPMessage
Use the ReceiveHTTPMessage REST trigger when creating flows that are going to be invoked by an external REST call. The ReceiveHTTPMessage trigger exposes your flow as an API, making it accessible to other apps running on TIBCO Control Plane™ or elsewhere. This trigger must be configured to set up the fields for a request that the server receives from a REST client.
-
If you add or delete path or query parameters in the trigger, you must click Sync for the changes to be propagated to the flow input schema
-
REST trigger does not support authentication.
-
The authorization header is added by default in request headers under Map to Flow Inputs. But, it can be used only for passing through received headers to the flow.
Trigger Settings
| Field | Description |
|---|---|
| Trigger Settings | |
| Port | By default, the trigger listens on port 9999. You can change this to use another open port.
Important: If the app has multiple triggers that require a port to be specified, specify a unique port number for each trigger. Two triggers in the same app cannot run on the same port.
|
| Configure Using API Specs |
While creating a REST trigger, you can configure it by uploading an API specification file. To do this, click True (by default, it is set to False) and specify the following: API Spec: Click Browse and then select the specification file to be used for configuring the trigger. Supported specifications are Swagger Specification 2.0 and OpenAPI Specification 3.0. Click the Use app level spec toggle to select an API uploaded on the SPECS tab. Once you select the API Spec, the other fields, such as Path and Method, are populated per the spec. |
| Authentication Type |
You can select the type of authentication for the REST trigger. This field has the following options: None: This is the default option. If you select None, no authentication is applied. Basic: If you select Basic, you must provide the username and password for the service.
|
| Secure Connection | By default, it is set to
False. If you set this field to
True, you can create a secure endpoint by providing
Server Key and
CA or Server Certificate.
Server Key - A PEM encoded private key file Note: When uploaded as a file, Server Key is encrypted and stored in the app. CA or Server Certificate - A PEM encoded CA or self-signed server certificate file |
| Handler Settings | |
| Path |
The resource path for the operation. If you upload an API specification file, select a path from the dropdown list. The path parameters are parsed from the API spec file and the data types displayed are string, integer, or boolean as specified in the file. For manual configuration, the data type for the resource path is string. By default, the path displayed here is the resource path you had entered when you created the flow. The Path field is editable if you have not uploaded an API specification file. For example, if you want to add a path parameter for a GET operation, you can do so by editing the resource path in the GET flow. If you edit the path in the Path field for a particular REST operation flow, the edited resource path applies only to the flow in which it was edited. The Path field supports wildcard characters, allowing flexible matching of URL path segments. This enables an endpoint to handle dynamic or variable parts of a URL. For example, Two resource paths with the same base path should not contain the path parameters at the same location. For example, you cannot have the following paths in the same app:
|
| Method | The REST operation which the flow implements. Supported HTTP methods are: GET, PUT, POST, DELETE, and PATCH. |
| Request Type |
This field appears only when Method is POST, PUT, or PATCH. Select one of the following types from the dropdown list:
Default: Note: If you create a Flogo app using an API specification file having Request Type as
application/x-www-form-urlencoded or multipart/form-data, then you must click Sync to update the request parameters with the Flow Input. |
| Output Validation |
When set to True, the incoming data (body, headers, and query parameters) is validated against the configured JSON schema. Default: False |
Output Settings
| Field | Description |
|---|---|
| Query Parameters | Query parameters to be appended to the path. To add the query parameters, click  and press
Enter to save your changes. and press
Enter to save your changes.
|
| Path Parameters | Path parameters that are appended to the path. |
| Headers | Header values for the trigger. To add the header parameters, click and press Enter to save your changes.
Note: Custom headers can be added when a REST trigger is configured or flows are implemented from an API specification file. These added headers show under Headers in Map to Flow Inputs. |
| Request Schema | Enter a request schema here. This field is visible only if you selected the POST, PUT, PATCH, or DELETE method on the
Settings tab. Note:
|
| Multipart Data |
This field is displayed in place of the Request Schema field if you select
Note: The file content received by the trigger is converted into a byte array. This is passed to the Activity as a Base64-encoded value in an array. If you want to fetch the content of the file, coerce the first element of the array to a string.
|
Map to Flow Inputs
This tab allows you to map the trigger output to the flow input.
Reply Settings
| Field | Description |
|---|---|
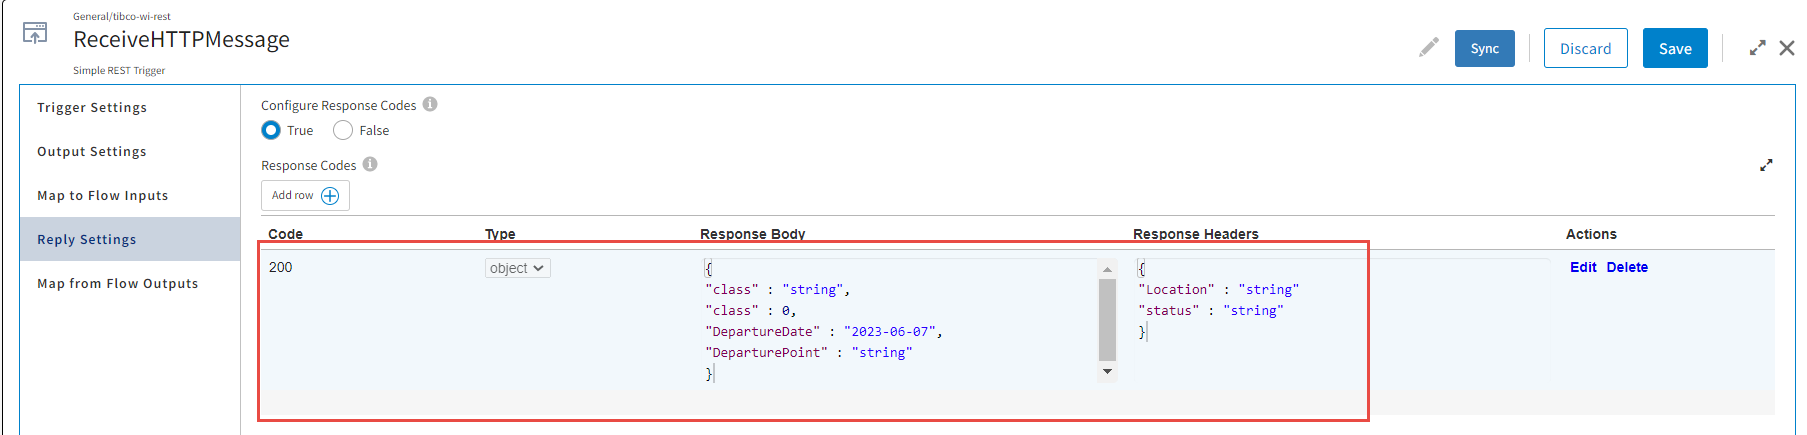
| Configure Response Codes | Allows you to configure response codes.
Default: False (See "Reply Data Schema" in this table.) Response Schema: Enter a JSON data or JSON schema in the Response schema that you want to be returned by the service. You can also attach a schema by using the app level schema toggle. If any schema is not defined in the Response Schema, then Response is of type String. To specify a response code, select
True and click
The response codes appear on the Map from Flow Outputs tab. Note: The REST reply data type is by default set to data type
any. For multiple response codes, use the
ConfigureHTTPResponse Activity in the flow to map
Response Body and
Response Headers from the REST trigger with the
Input in the Activity. To configure theConfigureHTTPResponse Activity, see
ConfigureHTTPResponse.
The image shows the Reply Settings with multiple response codes.
Caution: If you modify the response code schema in the table, the corresponding
ConfigureHTTPResponse activities within that flow do not change appropriately. This happens specifically when removing fields from the
Reply Settings tab. Redo the mappings for the
ConfigureHTTPResponse activities.
|
| Reply Data Schema |
Note: This field appears only when
Configure Response Codes is set to
False.
The schema is used for the reply data of the trigger. Be sure to use straight quotes for element names and values in the schema. |
Map from Flow Outputs
Map the flow output to the trigger reply on this tab.
-
To update these settings for a trigger configured from the Swagger 2.0 or OpenAPI 3.0 specification, update the API specification file and upload it to the Trigger Settings. Do not update the settings, except adding custom Headers, as manual updates are removed and the settings sync with the API specification configuration values.
- If you are using a REST trigger in your app:
The endpoint URL contains the app name if the app has one trigger.
The endpoint URL contains the app name and trigger name for more than one trigger.
If you add a REST trigger to an existing app, you must reconfigure the client app.