Creating a Delimited Flat File Guideline with EDISIM
Steps include:
2. Setting Guideline Properties
4. Setting Guideline Properties
6. Adding Records to the Layout
Starting the Guideline
-
Open EDISIM Standards Editor.
-
Choose File > New > Empty Guidelines.
-
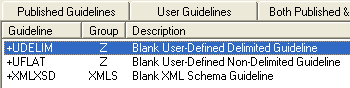
For data that will have delimited fields, choose +UDELIM:
-
Click Open.
-
Click Save and use this Name and Description:
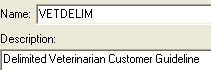
Save.


Setting Guideline Properties
-
Choose File > Properties > User-Defined Standard.
-
Type these delimiters:
Record $
Field |
Sub-Field #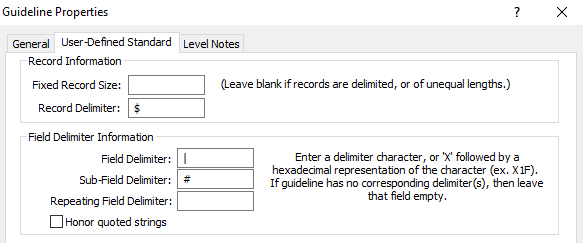
-
Click OK and then save.

Creating the HEAD Record
Header and trailer records are optional but our particular file format has them.
Creating the Fields in the HEAD Record
We will now create the fields in the first record in the file. In this guideline, we are labeling it HEAD:

-
Open Dictionary Objects and click Fields:
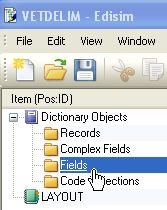
Dictionary objects are pieces that can be assembled to create file layouts.
-
Choose Edit > Create new item > Dictionary Field.
-
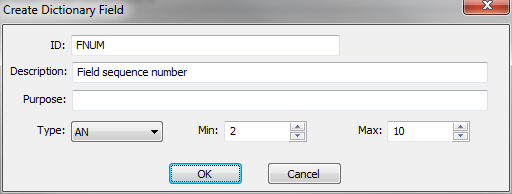
Fill out the following information about the FNUM field and then click OK. The field ID can be up to 128 alphanumeric characters and underscores. Do not use spaces or other special characters in the ID.
-
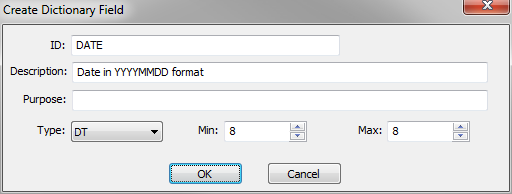
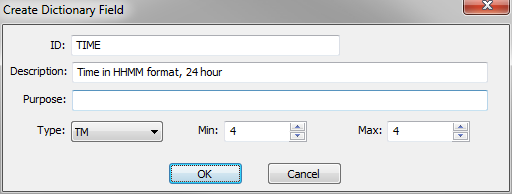
Click on Fields again, and create DATE and then TIME:
-
Save.


Assembling the HEAD Record
We now assemble the HEAD record itself:

-
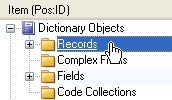
Under Dictionary Objects, click Records:
-
Choose Edit > Create new item > Dictionary Record.
-
For ID, type HEAD.
For Description, type Start of each file.
Click OK.Record IDs can be up to 20 alphanumeric characters with no spaces or other special characters except underscores.
-
With HEAD highlighted, choose Edit > Add Item > Field.
-
From the list of fields, select FNUM and click OK.
-
With FNUM highlighted, choose Edit > Add Item > Field and choose DATE.
Be sure it says After:
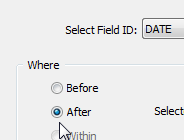
Click OK.
-
Add TIME below DATE.
-
Save.


Creating the TRLR Record
-
Click on Records.
-
Choose Edit > Create new item > Dictionary Record.
-
For ID, type TRLR.
For Description, type Trailer record.
Click OK. -
With TRLR highlighted, choose Edit > Add Item > Field and chose FNUM.
-
Save.
Assembling other Records
We will now create fields needed for the other records, and then assemble them into records.
-
For each field in the table below, click on Fields under Dictionary Objects and choose Edit | Create new item | Dictionary Field.
-
Fill out the information for these fields:
|
ID |
Description |
Type |
Min |
Max |
|---|---|---|---|---|
|
FNAM |
First name |
AN |
1 |
100 |
|
LNAM |
Last name |
AN |
2 |
100 |
|
ADDS |
Street address |
AN |
5 |
100 |
|
CITY |
City name |
AN |
2 |
100 |
|
STAT |
State - 2 character |
AN |
2 |
2 |
|
ZIPC |
5 or 9-character ZIP, no hyphen |
N |
5 |
9 |
|
SPEC |
Pet Species |
AN |
2 |
20 |
|
COLR |
Color |
AN |
3 |
20 |
|
BYER |
Birth year in YYYY format |
N |
4 |
4 |
-
Highlight Complex Fields:

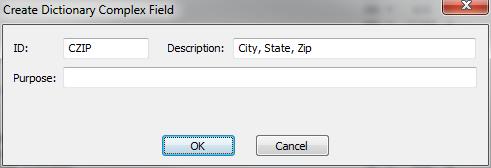
We are going to assemble the CZIP complex field, which includes CITY, STAT, and ZIPC. This is a typical example of a complex field, which is a set of fields that always appear in the same order.
-
Choose Edit > Create new item > Dictionary Complex Field, fill out this information, and click OK:
-
With CZIP highlighted, choose Edit > Add item > Field and choose CITY. Click OK:.
-
With CITY highlighted, choose Edit > Add item > Field and choose STAT and be sure After is selected. Click OK.
-
Add ZIPC below STAT.
-
Assemble the NAME record:
Highlight Records.
Choose Edit > Create new item > Dictionary Record and fill out the information about the NAME record:
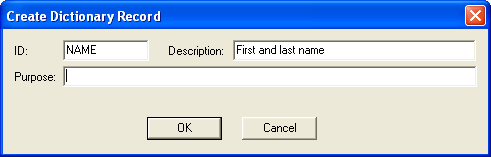
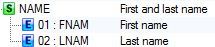
Use Edit > Add item > Field to add FNAM and then LNAM:
-
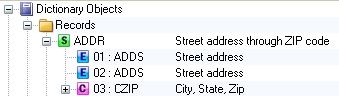
Create the ADDR record and add the ADDS field twice (to accommodate 2-line street addresses).
Then use Edit > Add item > Add Complex Field and choose CZIP.
-
Create the PETS record with these fields.
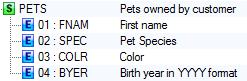
-
Save.


Adding Records to the Layout
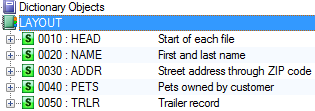
The layout is the set of records, in order, that define the flat file structure. In a flat file guideline, it includes all records including any header and trailer records.
-
Close Dictionary Objects and Click on LAYOUT:

-
Choose Edit > Add item > Record and choose HEAD.
-
Add the rest of the records in this order:

Setting Requirements
-
Click on the NAME record and make it required:

-
Make these records and fields required.
-
Both fields in the NAME record
-
SPEC field in the PETS record.
Setting Repeat Counts
To specify that the PETS record can appear multiple times:
-
Click the PETS record.
-
In the Repeat Count field in the bottom pane, type >1.
-
Be sure that View > Show Unused is selected:


Specifying Values
You can use code values or application values with flat file guidelines. Here, we specify a list of pet species.
-
Open the PETS record.
-
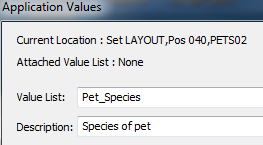
Right-click on SPEC and choose Application Values.
-
Fill out the top like this:
-
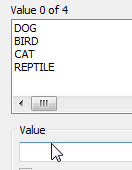
In the bottom Value line, type DOG and press Enter.
Type BIRD and press Enter.
Also add CAT and REPTILE.
-
Click Attach and then Save.

