|
|
| Copyright © Cloud Software Group, Inc. All Rights Reserved |
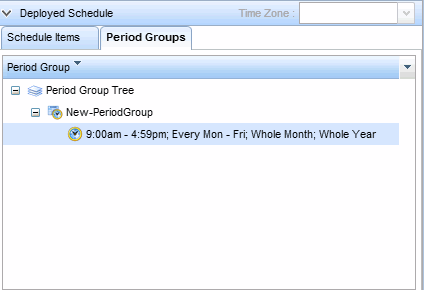
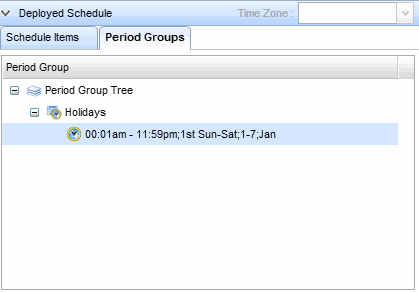
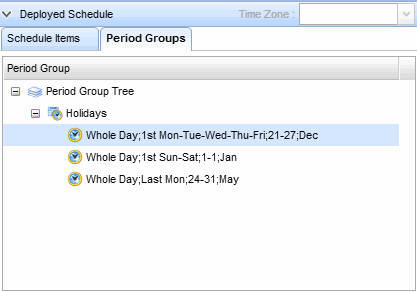
Period groups are useful when you use a set of periods regularly in defining schedules. It also eases the maintenance of those schedules because you can make a change in the period group and have it automatically reflected in all the schedules that use it.For example, you can create a period group for Holidays and use it in any schedule that is affected by holidays, such as a work schedule or a delivery schedule. If any holidays change or are added throughout the year, you only need to update the Holidays period group. All schedules that use the Holidays period group will get the updated list of holidays.Period groups can be added to an inclusion or exclusion period. When used in the inclusion or exclusion period, a period group is in-schedule only if all of its periods are in-schedule. Otherwise, a period group is out-of-schedule.When a period group is added to the list, the periods in the period group are listed indented below the period group name in the list. The period group in the inclusion or exclusion list cannot be derived but can be edited or deleted from list. Periods in a period group in the list cannot be added or be deleted.
Create new period group icon on the toolbar to create a new period group. Alternatively, click the period group name from the Period Group Tree to edit an existing period group.
Create new period item icon from the toolbar. A new period item is added to the Period Group Tree and the Period Group section of the schedules screen is enabled for editing the period item.
Deploy icon from the toolbar to deploy the period group updates to the current agent. When the period group is updated on the agent, it will take effect immediately.
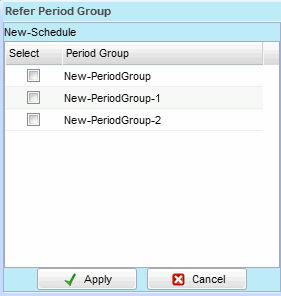
Refer to a period group icon is enabled on the toolbar.
|
|
| Copyright © Cloud Software Group, Inc. All Rights Reserved |