Installing ibi Data Intelligence
Download ibi_data_intelligence_1.1.0.zip from TIBCO eDelivery. Create a parent directory and unzip this file into the parent directory.
For example:
$ mkdir iDI
$ cd iDI
$ unzip -d . ../ibi_data_intelligence_1.1.0.zip
ibi Data Intelligence 1.1.0 is packaged as two Docker Compose projects, idi-shared, which includes common services and administration tools for ibi Data Intelligence, and ibi Data Quality which includes the component services of the ibi Data Quality application.
To configure the environment, first open install/idi-shared/.env with a text editor and set the HOSTDOMAIN for ibi Data Intelligence either to your machine’s fully qualified host name or its IP address. Other values in the .env file should not be changed except when recommended by ibi technical support.
Start the idi-shared application by running the following command from the ./install directory:
docker-compose -f idi-shared/docker-compose.yaml up --build -d
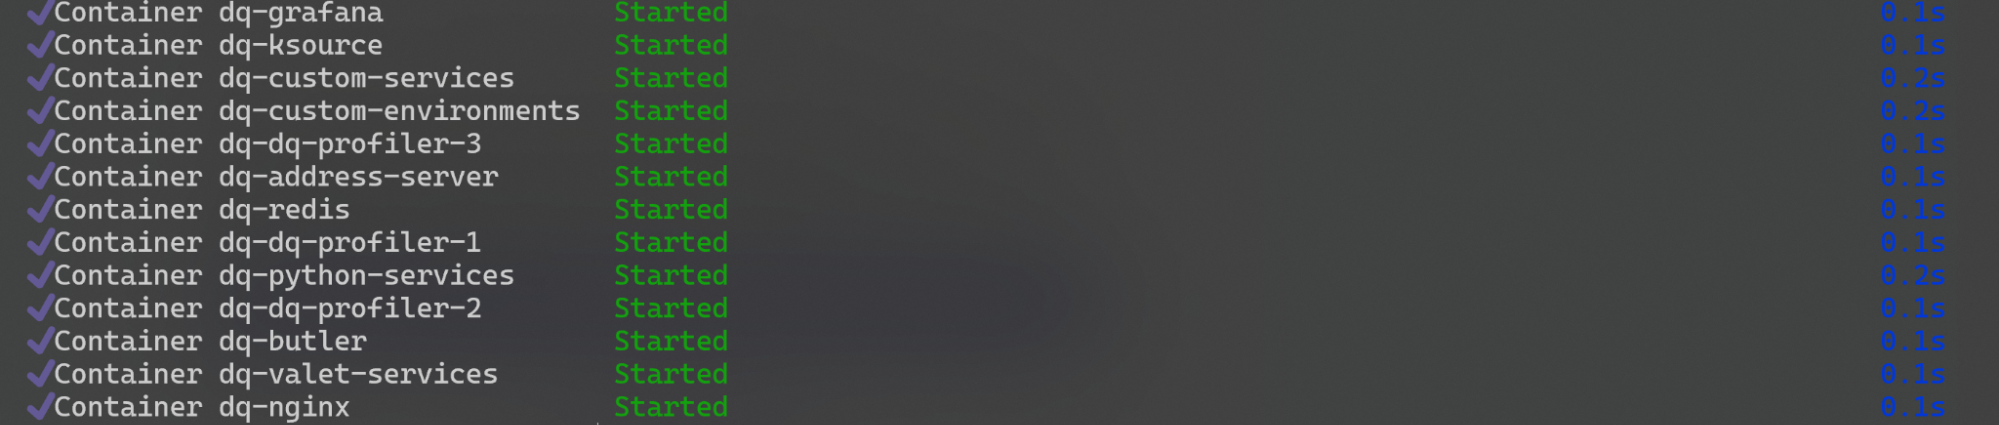
The command may take some time to run as it builds and starts the components for iDI shared services. You see logs of the build process scrolling past, and eventually, you should see:

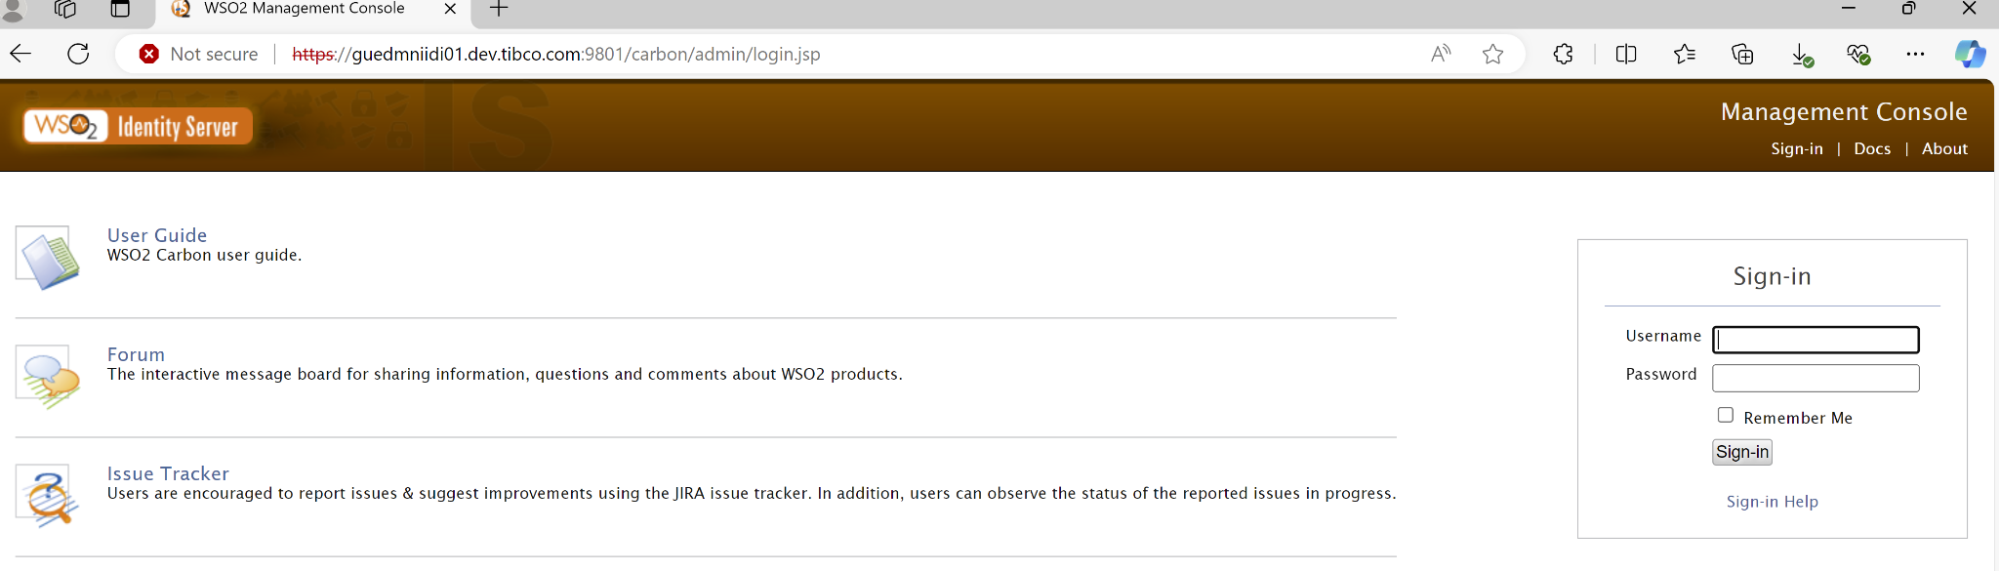
Confirm that the application has started by going to https://<HOSTDOMAIN>:9801 with a browser. You may be prompted to accept the self-signed SSL certificate that is installed by default, and then you should see the WSO2 Identity Server admin console.
Next, edit install/idq/.env and make the following changes as necessary:
-
Add your ibi license key. You must have a license key to use ibi Data Quality. You can request one from ibi customer support. Copy your license key and paste it as the value of IDI_LICENSE in the .env file. THE APPLICATION CANNOT BE USED WITHOUT A VALID LICENSE KEY.

-
Change the HOSTDOMAIN. This is necessary if you intend to access ibi Data Intelligence from a machine other than the one where it is installed.
-
Note that the LOQATE_HOME setting is no longer supported. See the Loqate installation instructions above for the steps to integrate Loqate with ibi Data Quality in Docker Compose or in Kubernetes.
By default,ibi Data Quality starts 3 replicas of the dq-profiler container. This improves performance and scalability when profiling large data sets, at the cost of increased resource use. If you do not expect to profile large data sets, you can limit resource consumption by setting PROFILER_SCALE to 1 or 2.
Note that if you are using Docker Compose 2.x and need profiler scaling, you should edit the docker-compose.yaml file.
By default, it sets the scaling properties used by Docker Compose 1.x:
dq-profiler: build:scale: ${PROFILER_SCALE}
# comment scale and use deploy section instead for compose
# version 2.x
# deploy:
# mode: replicated
# replicas: ${PROFILER_SCALE}
For Docker Compose 2.x, edit as follows:
dq-profiler: build:...
# scale: ${PROFILER_SCALE}
# comment scale and use deploy section instead for compose
# version 2.x
deploy:
mode: replicated
replicas: ${PROFILER_SCALE}
Other settings in the .env file should not be changed except at the direction of ibi technical support.
Start ibi Data Quality by executing the following command from the install directory:
docker-compose -f idq/docker-compose.yaml -f idq/docker-compose.override.yaml up --build -d
Or, if you do not require the ML data classification service:
docker-compose -f idq/docker-compose.yaml up --build -d
Again, this command may take some time as the containers foribi Data Quality are build and started. You can see logs of the build process scrolling past, and eventually, you should see:
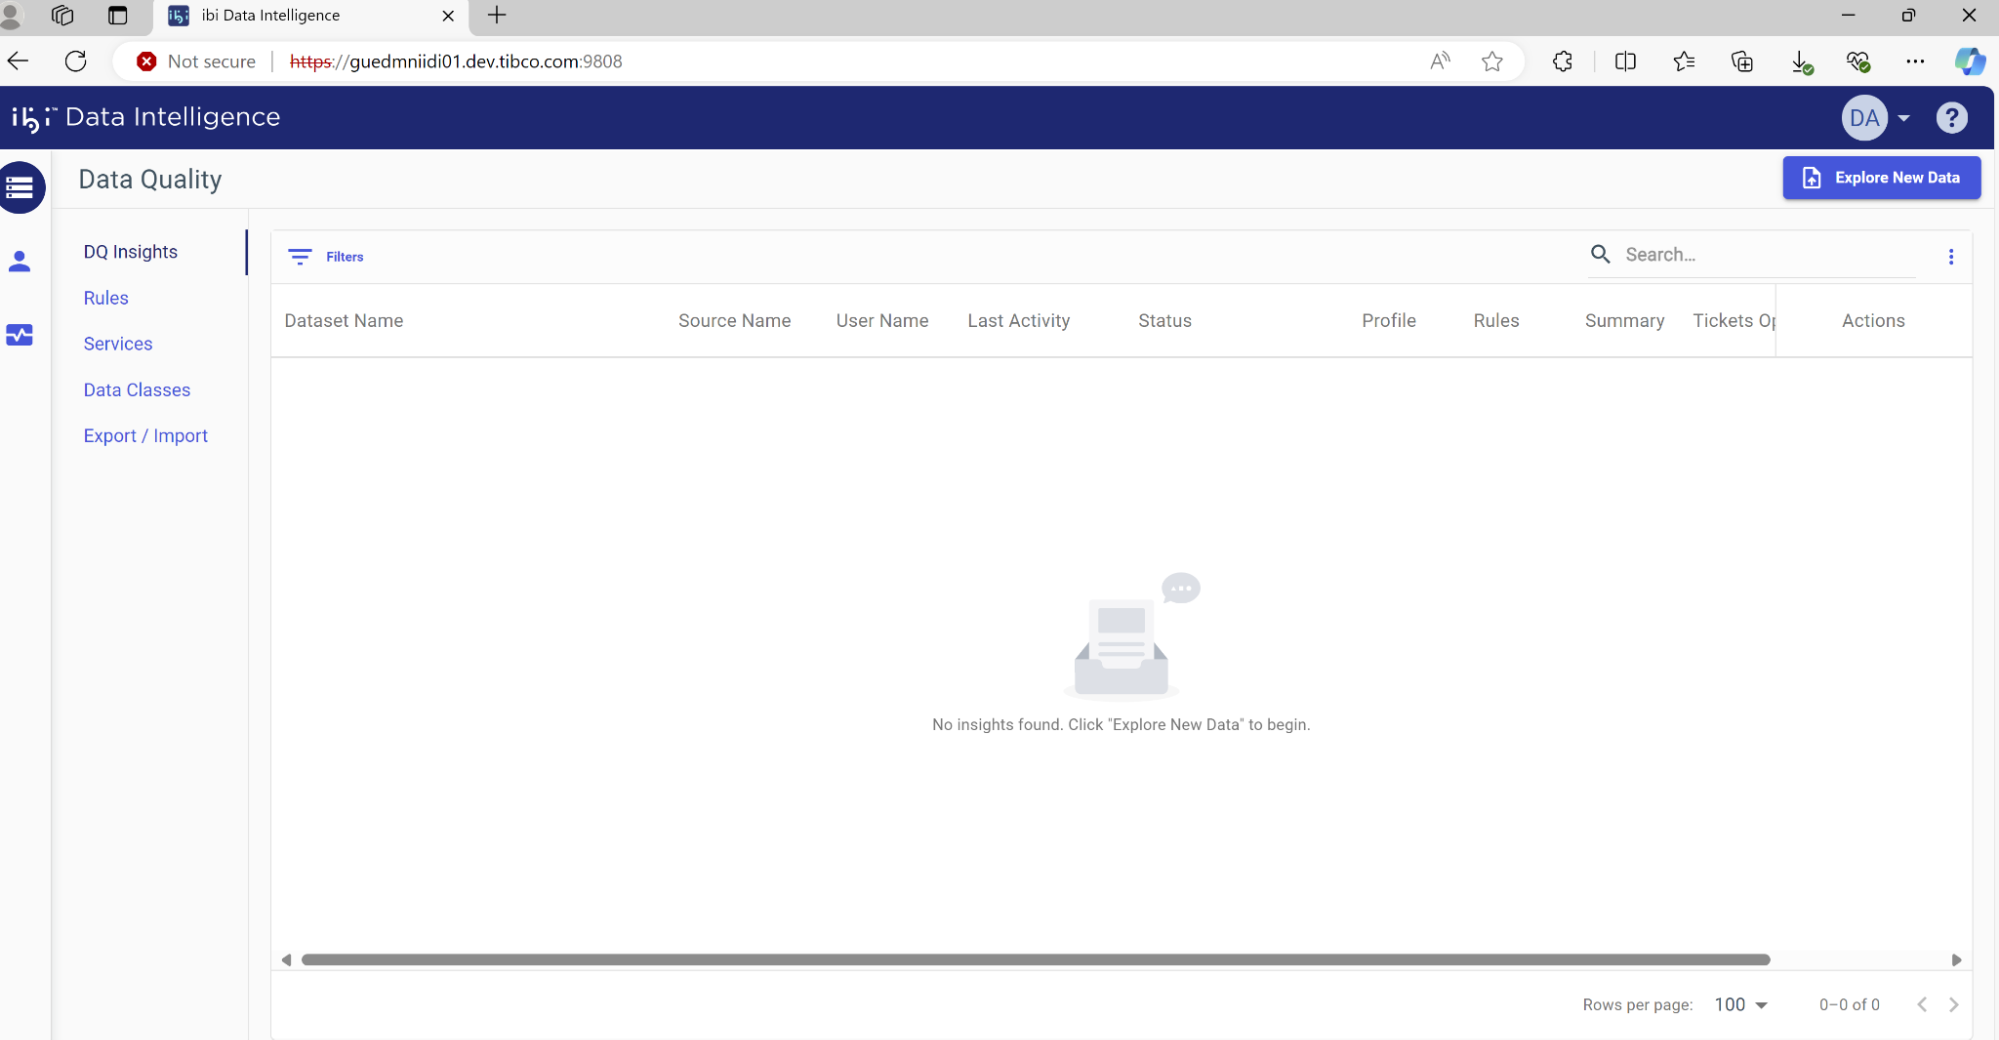
Confirm that ibi Data Quality has launched successfully by going to https://<HOSTDOMAIN>:9808 with a browser. Log in as dqadmin/dqadmin and you should see: