|
|
| Copyright © Cloud Software Group, Inc. All Rights Reserved |
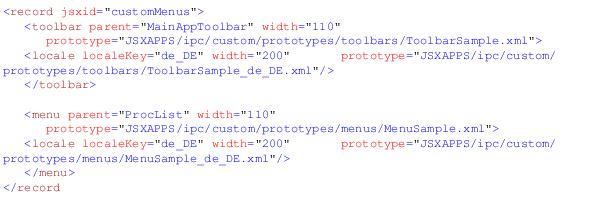
The record element that specifies a custom menu or toolbar button has a jsxid attribute value of customMenus:
The <record jsxid="customMenus"> element can have either toolbar or menu child elements. Both the toolbar and menu elements have three attributes:

Both the toolbar and menu elements may also have optional locale child elements that define prototype XML files that are localized for specific languages. If a locale child element exists, and it corresponds to the language and locale currently selected by the user, the language-specific prototype is loaded, otherwise the default prototype is loaded. For more information on customizing the client application for language localization, see Localization.Each locale child element has three attributes:
:
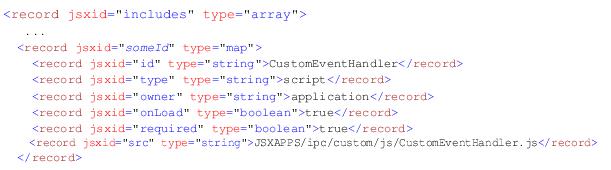
There is an example entry in config.xml for each of the valid parent attribute values. These examples make reference to the sample files that can be found under the installation home directory:InstallationHomeDir\iprocessclientbrowser\samples\CustomMenuswhere InstallationHomeDir is the directory in which the installer places administrative files, such as the uninstaller, documentation, and sample code. This defaults to C:\tibco on Windows systems, and /opt/tibco on UNIX systems, but can be specified as a different directory when the TIBCO iProcess Workspace (Browser) is installed.The files in the ...\CustomMenus directory show examples of how to use both menu and toolbar prototype XML files and handle the events using a CustomEventHandler class.The sample custom menus and toolbars can be installed using the steps listed below. These same steps can be used to install actual custom menus and toolbars, substituting the actual custom prototype, JavaScript, and image files and config.xml entries. See the TIBCO® General Interface Builder documentation for details on creating custom menu or toolbar prototype files.
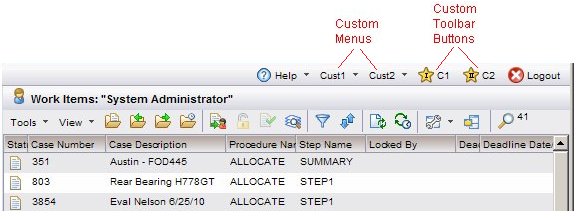
Note - The someId in the jsxid attribute can be any number as long as it’s unique among the mapping records in the config.xml file.InstallationHomeDir\iprocessclientbrowser\samples\CustomMenusTherefore, these instructions assume you have configured custom menus and toolbar buttons as described in Adding Custom Menu Items and Toolbar Buttons (i.e., you’ve copied the sample code to a custom directory in the ClientInstallDir\JSXAPPS\ipc directory).In this example, two custom menus and two custom toolbar buttons have been added to the main application toolbar by including the following record in the JSXAPPS\ipc\config.xml file: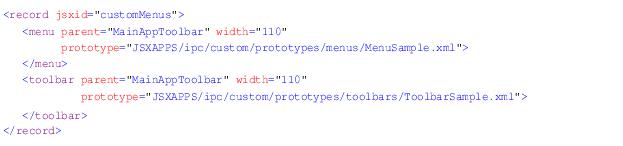

|
|
| Copyright © Cloud Software Group, Inc. All Rights Reserved |