Setting Up the ASP Form Project in IIS
Perform the following steps to set up the Microsoft Visual Studio .NET 2003 ASP form project in Microsoft Internet Information Services (IIS):
|
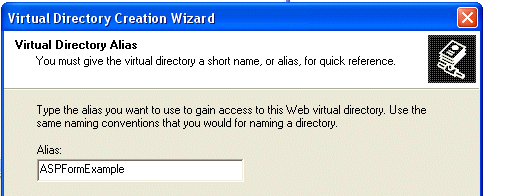
1.
|
Create a virtual directory in IIS and give it an alias name. In this example, we will use the name of the example project.
|
|
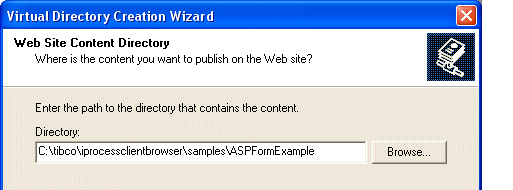
2.
|
Set the physical directory to point to the location of the ASPFormExample .NET project.
|
|
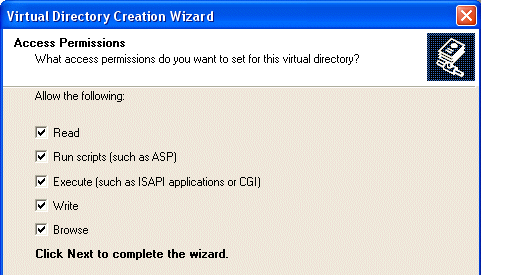
3.
|
Select all permissions for development purposes. The permissions on the finished production forms can be set to secure settings at a later time.
|
|
4.
|
Start IIS if it is not already running. |
|
5.
|
Open Visual Studio .NET 2003 and select File > Open > Project From Web, then enter the URL to the project. The path will be: |
http://Host:Port/ASPFormExample
where:
|
—
|
Host is the name of the machine on which you’ve installed the ASP form project. |
|
—
|
Port is the port used by IIS to communicate with web applications. |
The Open Project dialog is displayed.
|
6.
|
Select and open the ASPFormExample.csproj file. |
|
7.
|
In Visual Studio, select Build > Rebuild Solution. |
You will be prompted to save the solution file (.sln).
|
8.
|
Save the solution file in the ASPFormExample directory. |
|
9.
|
In Visual Studio, right click on ASPForm.aspx in the Solution Explorer window and select Set As Start Page. |
|
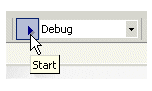
10.
|
In Visual Studio, select Debug in the Solution Configuration drop-down list, then click the start arrow to the left of the field.
|
Visual Studio will connect to IIS, allowing you to develop and debug the ASPFormExample project. (A browser window may appear with the ASPForm.aspx page displayed containing an error message — you can ignore this message and close the browser window.)