Components Dialogs
Selecting the Components check box on the Component Selection dialog causes as series of four Web Client Components dialogs to be displayed. These dialogs are described in the following subsections.
Web Client Components Dialog (1 of 4)
The first Web Client Components dialog is used to specify the location in which the iProcess Workspace (Browser) components (also known as WCC components) are to be installed.
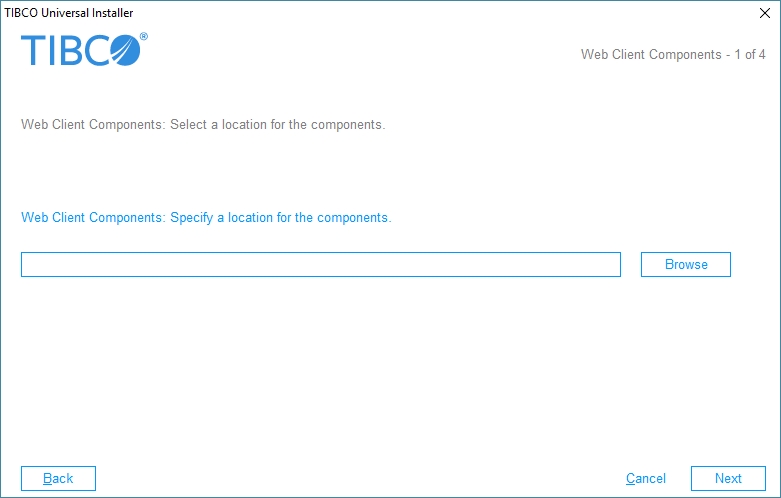
The following describes the field on this dialog:
| • | Web Client Components Directory: Specify the directory into which the installation program should install the iProcess Workspace (Browser) components. |
This should be the directory in which TIBCO General Interface was installed (that is, the directory that contains GI_Builder.html). After installing the components, they can be accessed via General Interface Builder. For information about accessing the components, see the TIBCO iProcess Workspace (Browser) Components Concepts guide.
Web Client Components Dialog (2 of 4)
The second Web Client Components dialog is used to specify the type of Action Processor to which custom applications created with WCC components will connect. It also allows you to specify the URL to the Action Processor.
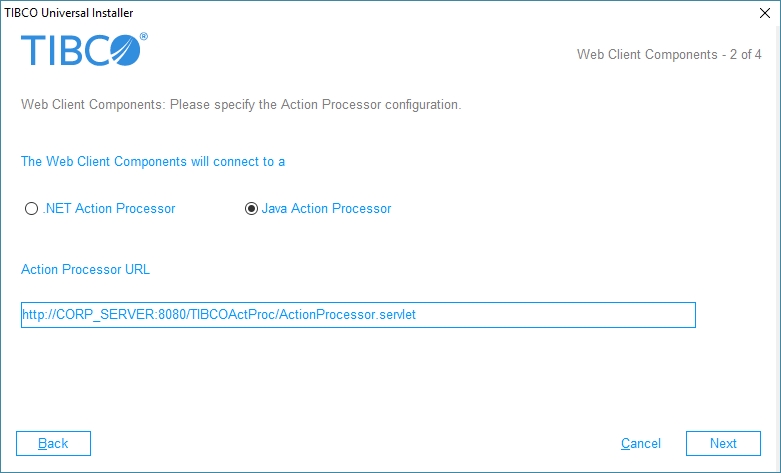
Information entered in this dialog is written to the config.xml file created for a custom application created with WCC components. For more information, see the Custom Applications section in the TIBCO iProcess Workspace (Browser) Components Concepts guide.
The following describes the radio buttons and field on this dialog:
| • | The Web Client Components will connect to a: Select the Java or .NET Action Processor. This is the Action Processor to which the custom application created with the iProcess Workspace (Browser) components will connect. |
| • | Action Processor URL: This is the URL to either the Java Action Processor or the .NET Action Processor. This must be in the form: |
http://Host:Port/APDir/ActionProcessor.ext
where:
| — | Host is the name of the machine hosting the Action Processor. Note that if you are hosting both the custom application and the Action Processor on the same machine, and they are both being hosted by Tomcat, you can specify Host as “localhost”. |
| — | Port is the port number used by the Web server to communicate with web applications. |
| — | APDir is the directory (or virtual directory alias) on Host in which the Action Processor is installed. |
| — | ext is the file name extension (this is “servlet” if it’s a Java servlet, i.e., the Java Action Processor; or “aspx” if it’s a .NET ASP web application, i.e., the .NET Action Processor). |
Web Client Components Dialog (3 of 4)
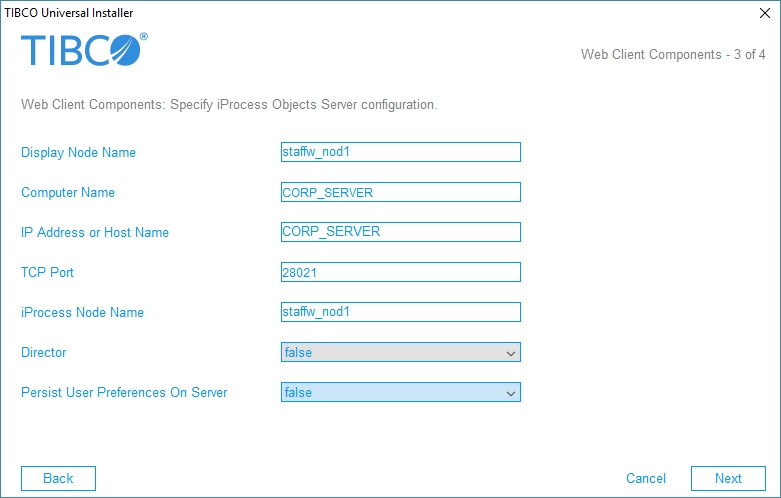
The third Web Client Components dialog specifies information about the TIBCO iProcess Objects Server that the user can log into after starting a custom application that was created with iProcess Workspace (Browser) components.
Information entered in this dialog is written to the config.xml file created for a custom application created with iProcess Workspace (Browser) components. For more information, see the Custom Applications section in the TIBCO iProcess Workspace (Browser) Components Concepts guide.
If you have already installed the iProcess Client, or you are upgrading the iProcess Workspace (Browser) components, the fields on this dialog are pre-filled with the values that were entered on the iProcess Client dialog, or from the previous components installation.
The following describes the fields on this dialog:
| • | Display Node Name: The name that you would like displayed in the custom application Server field drop-down list on the Login screen. This is the name the user would select when choosing a server to log into. |
| • | Computer Name: The name of the machine on which the TIBCO iProcess Objects Server is installed. |
| • | IP Address or Host Name: The IP address of the machine on which the TIBCO iProcess Objects Server is installed. You can enter the name of the host machine in this field, as long as that name resolves to the IP address of the machine where the iProcess Objects Server is running. Note, however, that this name must be able to be resolved by the machine on which the Action Processor is running. |
| • | TCP Port: The TCP port number used by the TIBCO iProcess Objects Server. (The TCP port used by the server is specified using the iProcess Objects Server Configuration Utility in Windows systems (SWDIR\bin\SWEntObjSvCfg.exe), or by editing the iProcess Objects Server configuration file in UNIX systems ($SWDIR/seo/data/swentobjsv.cfg). For more information, see the TIBCO iProcess Objects Server Administrator’s Guide.) |
Note that the iProcess Objects Server must be configured to use a static TCP port, so that that port number can be specified here — it cannot be configured to use a dynamic port.
If you are using an iProcess Objects Director, see the TIBCO iProcess Objects Director Administrator’s Guide for information about configuring the TCP port on the Director.
If this is a new installation, this field is blank by default, and the installer will not allow you to advance without entering a port number. You must determine the TCP port used by the iProcess Objects Server to which the custom application created with the components is going to connect.
| • | iProcess Node Name: The name of the TIBCO iProcess Engine / iProcess Objects Server to which the user can log in. This is the “nodename” that is assigned to the iProcess Engine when it is installed. |
| • | Director: Specifies whether or not the previous entries actually describe a TIBCO iProcess Objects Director, which is used to connect the client to a server). Select “true” if the specifications are for a Director, or “false” if a TIBCO iProcess Objects Director is not being used. |
| • | Persist User Preferences On Server - This specifies whether user data1 is persisted locally or on the server, as well as obtained locally or from the server upon login. Server-side persistence allows users to move to different machines and/or browser types, and pick up user preferences specified from another machine and/or browser type. |
If set to “false”:
| — | All user data is stored on the client. |
| — | User data is not cached and is persisted client-side immediately. |
If set to “true”:
| — | All user data is stored on the server. |
| — | User data is cached and is not saved to the server until the user logs out or closes the browser window. |
| — | Options values (that is, all settings on the Options dialog in the application) are stored on both the client and the server. This is required because the language setting is stored in the Options data and this is needed to set up the locale before login.
Note: The first time server-side data is accessed for a given user, the user is given the option of initializing the server-side data with any data that has previously been persisted client side (if any client-side data exists). The user’s response to this question is persisted on the server and will not be asked again. |
Web Client Components Dialog (4 of 4)
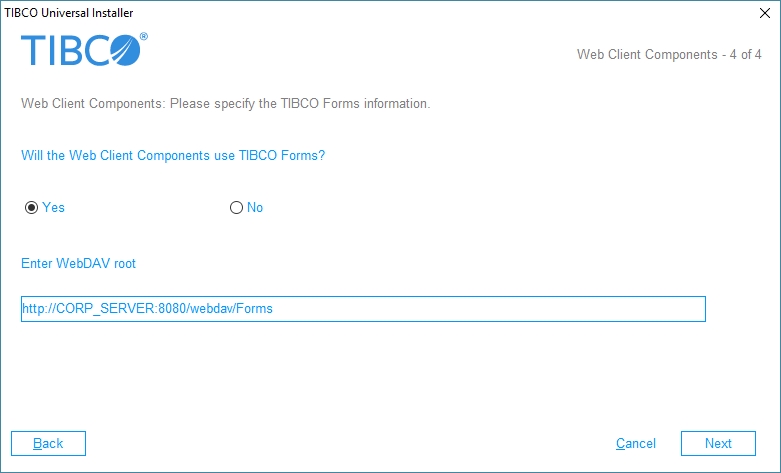
The fourth Web Client Components dialog is used to tell the installer if your custom application is using TIBCO Forms. TIBCO Forms are forms that are created and deployed with TIBCO Business Studio. For more information, see the TIBCO Business Studio Forms User’s Guide.
The following describes the radio buttons and field on this dialog:
| • | Will the Web Client Components use TIBCO Forms? - Select the Yes radio button if your custom application will be using TIBCO forms, or No if it will be using some other type of forms. |
| • | Enter WebDAV root - Enter the base URL of the location at which the TIBCO forms are stored. The installation program writes this URL to the webDAVRoot configuration parameter in the custom application’s config.xml file. This allows the custom application to find the TIBCO Forms on the server. |
If you don’t know if the custom application will use TIBCO Forms, respond No; the webDAVRoot configuration parameter can be manually updated at a later time. For more information, see the TIBCO iProcess Workspace (Browser) Configuration and Customization guide.