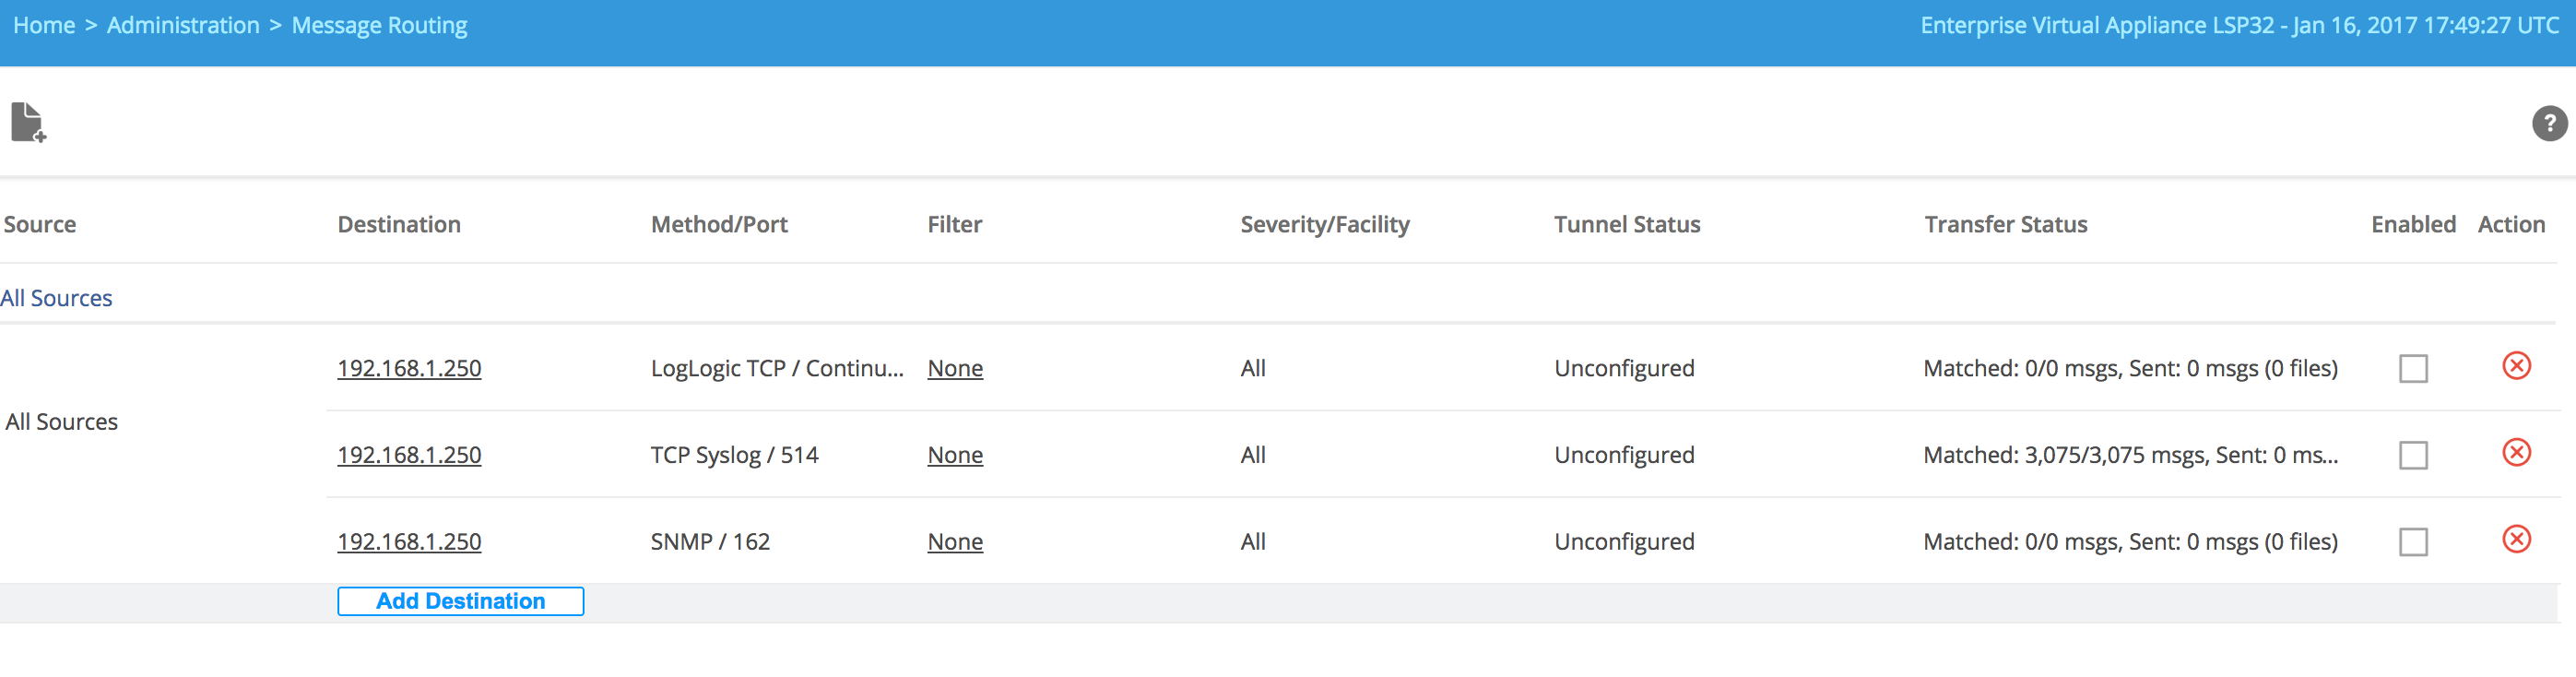
Adding Destinations to the All Sources Rule

The All Sources routing rule (All Sources) forwards a copy of all incoming log messages to multiple destinations.

For example, an ST appliance receiving messages from multiple firewalls can be configured to forward all of the messages to one or more destinations as per the All Sources rule.

If you add a new log source, it will be automatically added to this rule. You can add more destinations to the All Sources rule by using the Add Destination link. You can edit or remove the added destinations.

Procedure

  1. Click the Add Destination link.
    The Add Destination window appears. By default, LogLogic Forwarding Settings, and Other Settings options are disabled. When you specify the Destination Type and/or Protocol, some of these options are enabled.
  2. In the Destination IP field, type the IP address of the destination to which you want to forward messages.
    This can be another LogLogic appliance, a LogLogic Security Event Management (SEM) appliance, or another machine (with correct port configuration). This is a mandatory field.
  3. In the Destination Port field, type the port number to which you want to forward messages.
  4. From the Destination Type drop-down menu, select where you want to forward messages:
    • LogLogic LMI Appliance
    • LogLogic SEM Appliance
    • LogLogic® Unity
    • Other Destination
  5. From the Protocol drop-down menu, select the protocol to use for forwarding messages:
    Option Description
    UDP Syslog Traditional syslog using the UDP protocol
    TCP Syslog Traditional syslog using the TCP protocol. Also known as Syslog-NG

    New-line (\n) characters are used to break logs in the TCP stream during message forwarding. If a message contains \n, the message breaks up with only the first portion of the message being delivered to the downstream appliance. It is good practice to select a different forwarding protocol if you know your log messages contain characters of this type.

    LogLogic TCP LogLogic's buffered syslog. Uses a proprietary TCP-based protocol and uploads logs in batches every minute
    Note: If you select LogLogic TCP protocol, you can specify the Other Settings options.
    Note: Compared to the UDP protocol, the TCP protocol uses significantly more CPU processing power and hence decreases the maximum message rate the appliance supports.
  6. Select the Enable check box to activate message forwarding.
  7. Using the Format Settings:
    Note: The Insert Syslog Header option is disabled for All Sources rule.
    • Select the Destination Parsing radio button (Yes/No) to enable or disable destination parsing. When enabled, the system automatically generates default rules for each protocol for all destinations.
      Note:
      • The Destination Parsing option is enabled when you select LogLogic LMl appliance as the Destination Type. When you enable this option, and click Add, three rules are added, one for each protocol type. Based on its log source type, a message will be forwarded using one of the three routing rules. All syslog logs will be forwarded using TCP protocol. All file-pulled logs will be forwarded using LogLogic TCP protocol, and all SNMP trap messages will be forwarded using SNMP protocol.
      • If you do not enable the Destination Parsing option, only the specified rule for the selected protocol is added. In this case, messages from some of the log source type may not be forwarded if the selected protocol is not compatible with the log source type. For example, syslog source type cannot be forwarded using SNMP protocol.
      • If the Destination Parsing option is enabled, the Format Rule Definition option to format messages prior to forwarding is disabled. However, when the Destination Parsing option is disabled, the Format Rule Definition option to format messages prior to forwarding is enabled.
      • When three rules are added (after enabling the Destination Parsing option), you can go back to Edit Destination window to select the configuration rule file for the rules which are using the LogLogic TCP and TCP syslog protocols. The Format Rule Definition field is disabled for the rule using SNMP protocol.
    • Optionally, specify the Format Rule Definition configuration rule file to format messages prior to forwarding. All messages that match the forwarding rule will be formatted.

      For detailed description about defining the configuration rule file and how messages are formatted, see Appendix C: Definition of Configuration Rule Files.

      Message Routing – Newly Added Destination with Three rules
  8. LogLogic Forwarding Settings:
    You cannot specify any options. The options are disabled for All Sources Rule.
  9. Other Settings:
    • Select a Compression radio button (Yes/No) to activate or deactivate compression for message routing. For LX or MX appliances using LogLogic TCP, it is good practice to select Yes. The default is No.

      Compression is available only when using LogLogic TCP.

      Note:
      • You can enable compression or authentication and encryption in the following steps only when the routing destination is another LogLogic appliance.
      • Setting Compression to Yes or enabling Authentication and Encryption for any single source/protocol/destination configuration causes all subsequent traffic from the same source sent with the same protocol to the same destination to be either compressed or authenticated and encrypted. The system does not allow for both encrypted and clear traffic to go to the same IP via the same protocol when sent from the same source. Likewise, all traffic must be either compressed or non-compressed, but not both types.
    • Select an Enable Authentication and Encryption radio button (Yes/No) to activate or deactivate authentication and encryption for additional security.

      Using authentication ensures that the data is received by the correct LogLogic appliance.

      Note:
      • Authentication and Encryption cannot be selected separately.

      • The Authentication and Encryption option is not available when forwarding messages with the UDP protocol.

      • When you select the Enable Authentication and Encryption option, the authentication is performed using the SSH protocol. The toor user of the upstream appliance must be authorized to login via SSH to the downstream appliance without entering a password. To configure, type the CLI command system keycopy on the upstream appliance and follow the instructions displayed on screen to add the public key of the upstream appliance to the downstream appliance.
  10. Click Add to add the destination to the All Source rule.
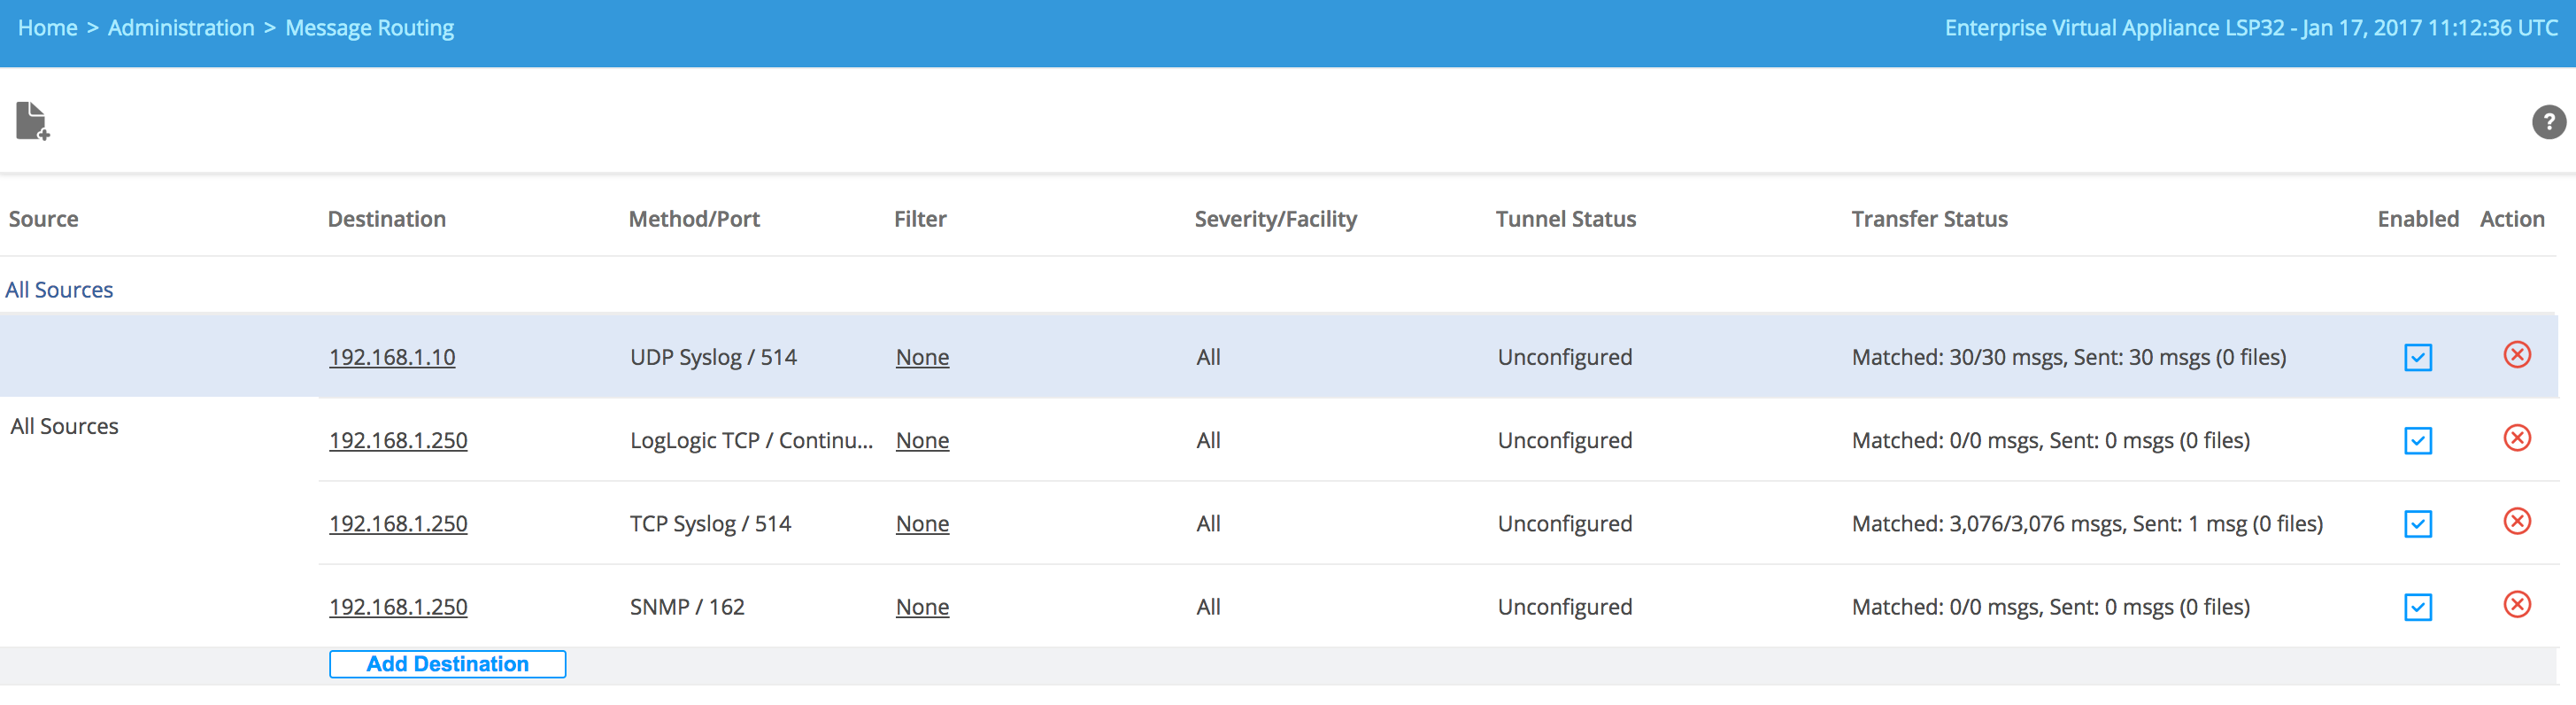
    The Message Routing screen appears showing the newly added Destination to the existing All Source rule.
    Message Routing – Newly Added Destination

Result

You can enable, disable, or delete the rules, you can also edit, add or remove destinations to the rules. For more information on how to edit destinations, refer to Editing Routing Rules. For more information on how to edit filters, refer to Editing Filters. For more information on how to delete destinations, refer to Removing Destinations.