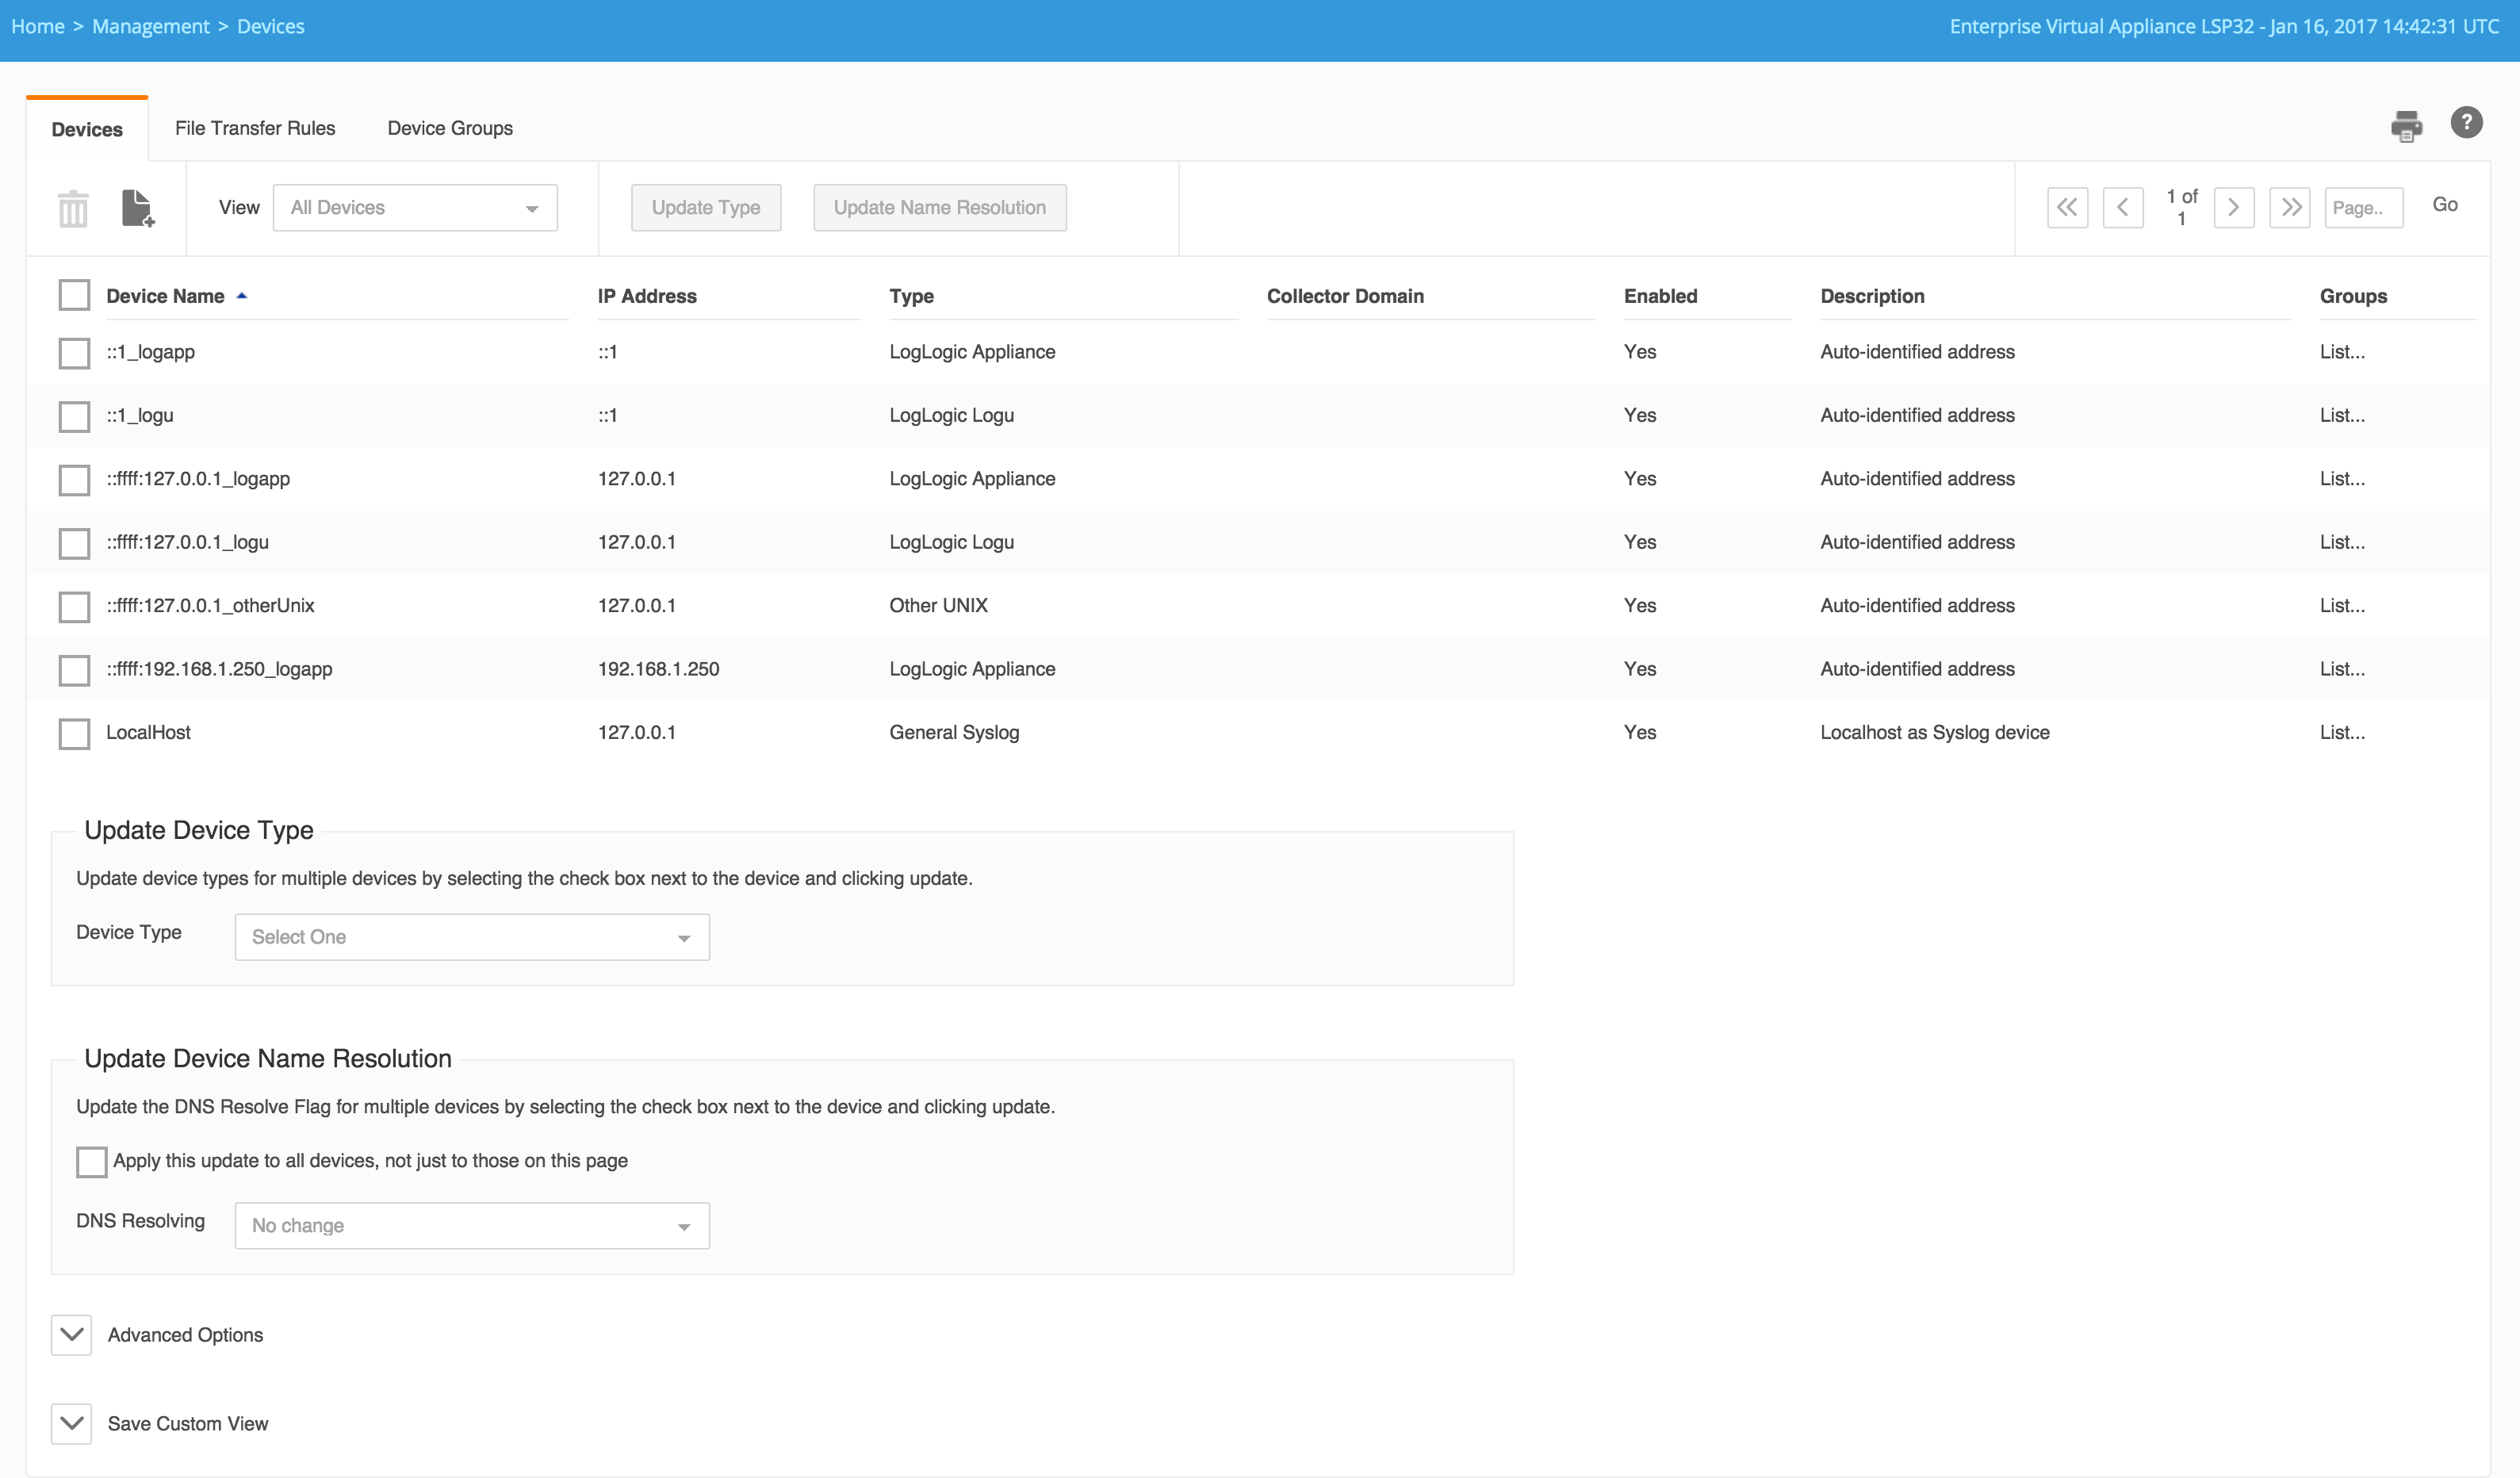
Viewing Devices
You can view devices in different ways.
- View: All Devices
- The default setting; shows a list of all available devices on an Appliance. (Click drop-down arrow to see other View options.). Click the List link from the Groups column to view the group membership information.
- View: Shared IP Devices
- Reveals multiple device entries created for a single physical device. The Appliance records different log entries from the same physical device when the log messages are of a different type. This results in same device appearing multiple times. The user may want to examine the details of the duplicated devices, and possibly remove selected ones. Click the List link from the Groups column to view the group membership information.
- View: Stale Devices (0 logs)
- Reveals devices that have no incoming log messages. The user can view details of the inactive devices, save the list, and remove selected devices.
Note: “Stale Devices” tend to be localhost or dummy test devices, no longer in use. Or they could be old devices that are not active or have been replaced.
Devices with associated logs do not appear on this list. Click the List link from the Groups column to view the group membership information.
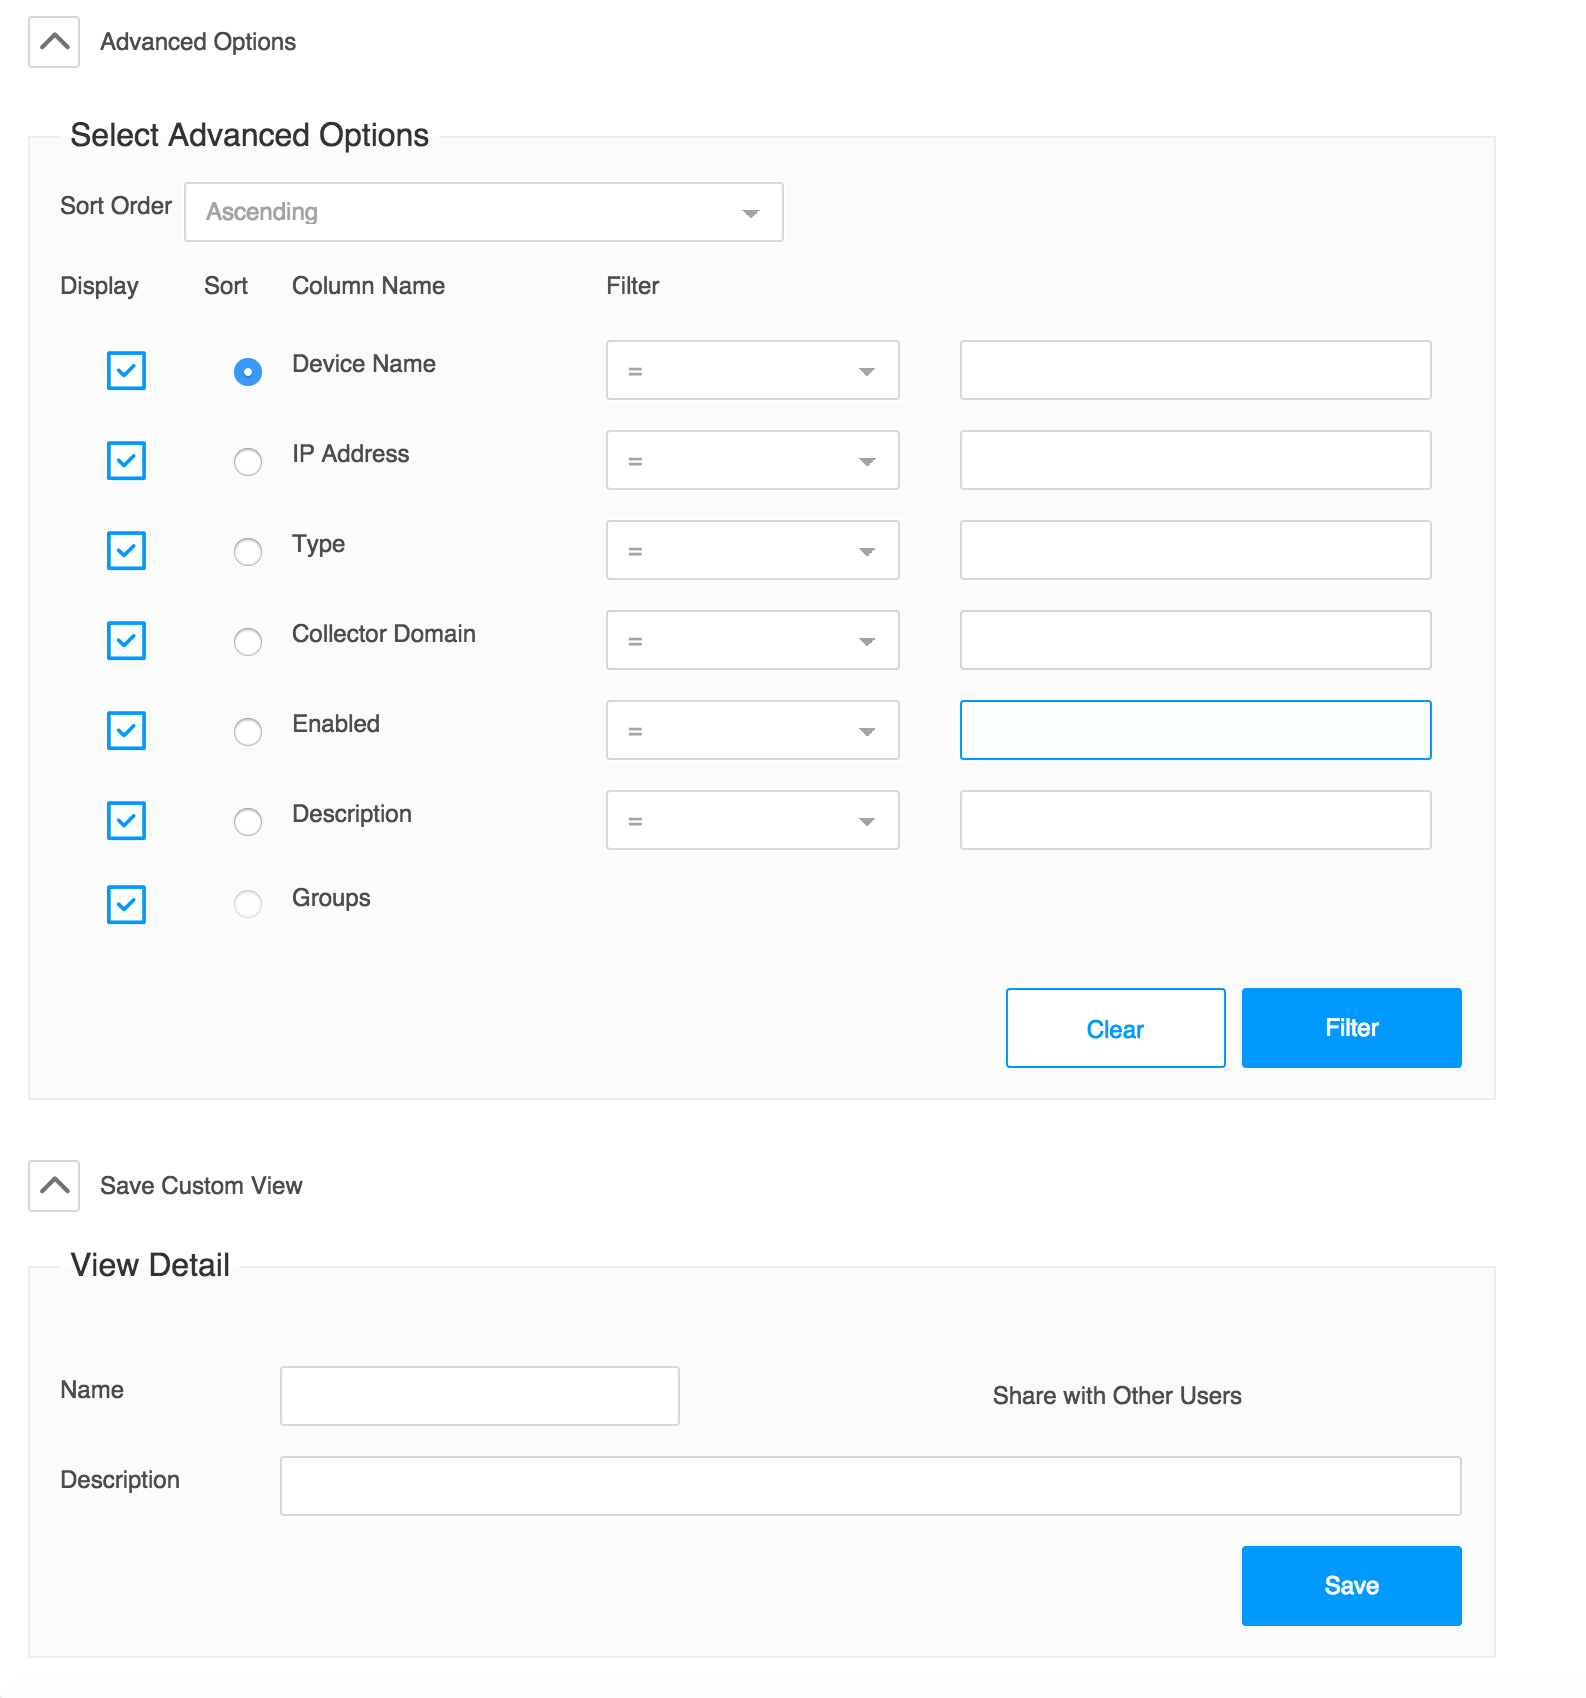
For appliances with many log sources, you can create customized views of the Devices tab that filter the log source information.
Procedure
Copyright © 2020. Cloud Software Group, Inc. All Rights Reserved.