Configuring the Instance

 The Instance Management tab allows you to configure additional settings for that particular instance. You can edit the instance name, configure instance settings, and update software and custom adapters. Additional system-level parameters can be tuned here such as application memory allocation, configuration cache size, maximum concurrent connections, and connection pool size for the database.

To configure an instance:

Procedure

  1. On the Mashery Cluster Manager tab, click Instance Management.

  2. Click the Management Options for which you want to configure the settings.
    A text box is displayed for the selected Management Options.
  3. Enter the details for the following fields to configure the instance.

    Field Description

    Use NTP (recommended)

    NTP server address.

    Memory Allocation

    Specify application memory size as a fraction of the available memory.

    Concurrent Connections

    Sets the maximum number of concurrent connections to the service instance.

    Database Connector

    Sets the maximum number of concurrent connections the instance will make to its database.

    Configuration Cache

    Specify the memory (in MB) to use for configuration cache.

    Disable IPv6

    Select this option to disable IPv6 if IPv6 traffic should not be allowed to the backend. By default, Mashery Local supports both IPv4 and IPv6.

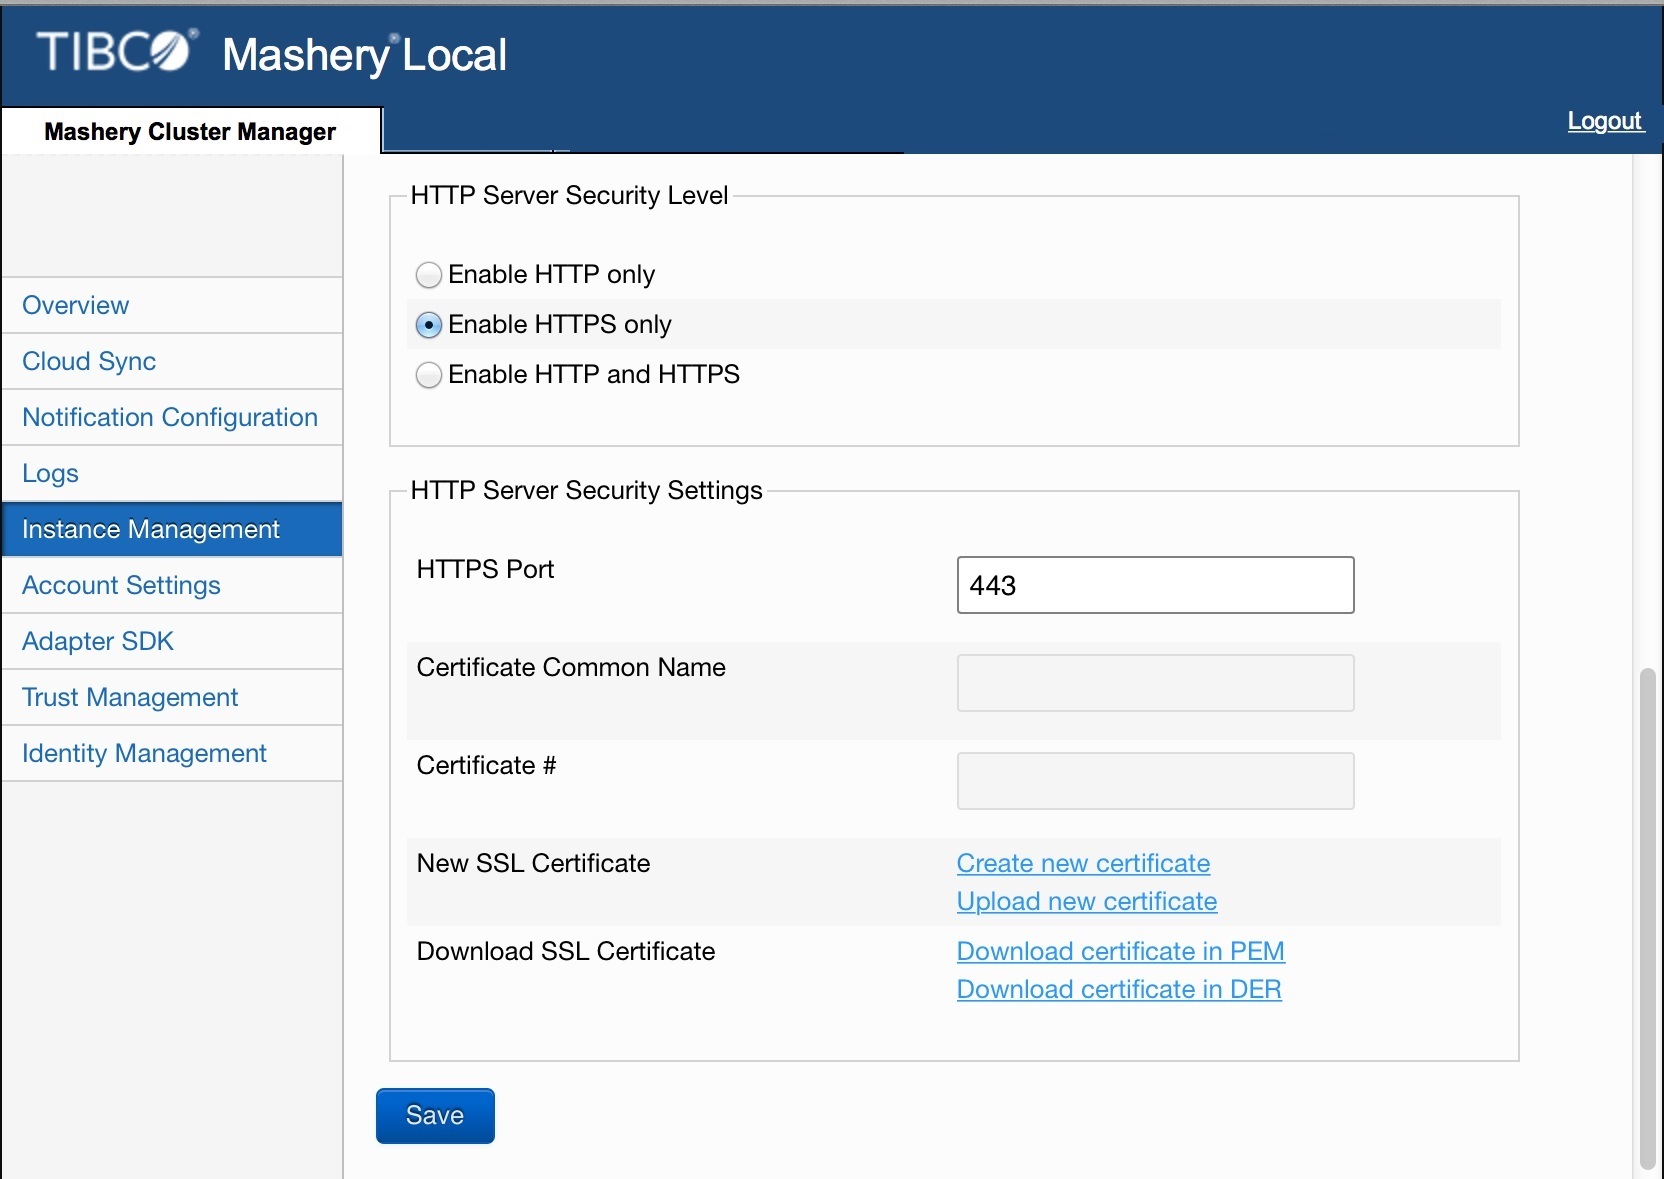
  4. Select the appropriate HTTP Server Security Level:

    • Enable HTTP only: If selected, the default HTTP Port for HTTP Server Security Settings is 80.


    • Enable HTTPS only: If selected, enter the details for the following fields:
      Field Description

      HTTPS Port

      Specify the HTTPS port. The default is 443.

      Certificate Common Name (display only)

      Automatically displays the name of the selected certificate.

      Certificate # (display only)

      Automatically displays the number of the selected certificate.

      New SSL Certificate

      Select from:
      • Create new certificate: If selected, enter a Certificate Common name in the Create SSL Certificate window, then click Create.

      • Upload new certificate: If selected, in the Upload SSL Certificate window, browse to the SSL certificate using the Click here to select file link, enter the Password for Certificate, then click Upload.

      Download SSL Certificate

      Select from:
      • Download certificate in PEM: downloads the current certificate in PEM format.
      • Download certificate in DER: downloads the current certificate in DER format.


    • Enable HTTP and HTTPS: If selected, enter the details for the following fields:
      Field Description

      HTTP Port

      Specify the HTTP port. The default is 80.

      HTTPS Port

      Specify the HTTPS port. The default is 443.

      Certificate Common Name (display only)

      Displays the name of the selected certificate.

      Certificate # (display only)

      Displays the number of the selected certificate.

      New SSL Certificate

      Select from:
      • Create new certificate: If selected, enter a Certificate Common name in the Create SSL Certificate window, then click Create.

      • Upload new certificate: If selected, in the Upload SSL Certificate window, browse to the SSL certificate using the Click here to select file link, enter the Password for Certificate, then click Upload.

      Download SSL Certificate

      Select from:
      • Download certificate in PEM: downloads the current certificate in PEM format.
      • Download certificate in DER: downloads the current certificate in DER format.
  5. Click Save.
    Note: You may be reminded that Mashery Local needs to restart proxy service.
    The instance is configured for the specified settings.

What to do next

For detailed steps on setting up HTTPS Server, please refer to the following sections in the Appendix: