Installing and Running Mashery Local for Docker in Kubernetes on Azure Container Service
The following section describes how to deploy Mashery Local for Docker edition in Kubernetes on Azure Container Service (AKS).
Prerequisites
The following steps assume that your Kubernetes cluster has already been created and configured.
-
Modify the azure-env.sh file located at /examples/azure/kubernetes, set the following variable and run the script:
export ML_STORAGE_PROVISIONER="kubernetes.io/azure-disk"
export ML_REGISTRY_NAME="<acrName>"
export ML_REGISTRY_HOST=<acrName>.azuecr.io
- Login into the container registry
az acr login --name <acrName> and execute the following script to load images to the Azure Container Registry:
source azure-env.sh
./upload-images.sh
- Before login into Azure Container Registry, remove any previous configurations:
rm ~/.docker/config.json
- Enable the Access Keys from the Azure portal for your Registry.
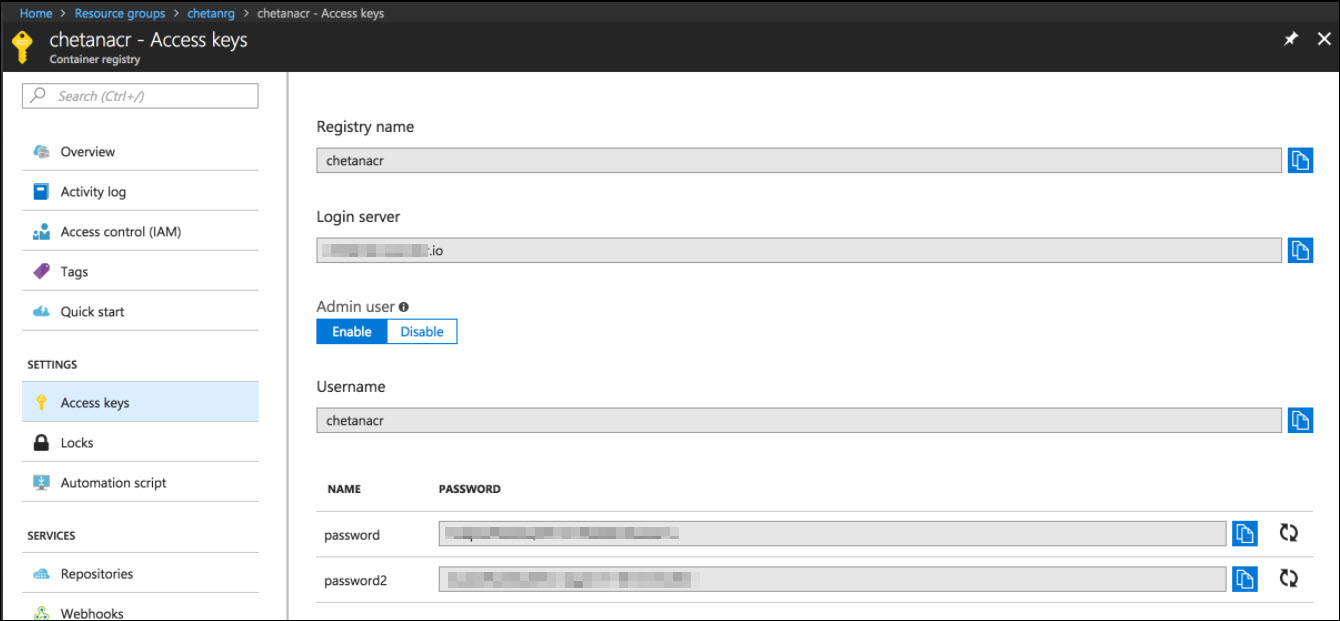
- Login into Azure Container Registry using admin user name and password from the Azure Portal:
docker login <Azure Container Registry) -u <Admin UserName> -p <Password> (Note - Any one of the password from the password list in Access keys)
Once you login, please ensure that ~/.docker/config.json has credentials, under auth:cat ~/.docker/config.json { "auths": { "<acrName>.azurecr.io": { "auth": "XXXXXXX" } }, "HttpHeaders": { "User-Agent": "Docker-Client/17.12.0-ce (darwin)" } - To check the Kubernetes dashboard, run the following command:
az aks browse --resource-group <resourceGroupName> --name <AKSClusterName>
- Execute the following script to store the Docker registry key as Kubernetes "Secret":
./set-registry-key.sh
The output creates the secret "mlregistrykey". - Execute the following script to store MOM host and key as Kubernetes "Secret":
./set-mom-secret.sh create <MOM_KEY> <MOM_SECRET> <MOM_HOST>
The output creates the secret "mlmomsecret". - To create storage classes for Mashery Local for Docker persistent stores, run the following command:
./set-storage-classes.sh
The output creates storage classes "mldb-storage" and "mldata-storage". - To create Mashery Local Traffic Manager service and Mashery Local Master service, run the following command:
./set-ml-services.sh
The output creates the services "ml-traffic-manager" and "ml-master". - To check the ml-traffic-manager service, run the following command:
kubectl describe service ml-traffic-manager
- To check the ml-master service, run the following command:
kubectl describe service ml-master
- The ml-traffic-manager is configured with load balancer. To find the load balancer DNS name, run the following command:
kubectl describe service ml-traffic-manager|grep Ingress|awk -F' ' '{print $3}' - To deploy the Mashery Local Master instance, run the following command:
./deploy-master.sh
- To check the status of the pods, run the following command:
kubectl get pods
- Deploy Mashery Local Slave instance:
./deploy-slaves.sh
The output creates service "ml-slave" and statefulset "ml-slave". -
This deployment does not assign public IP to the application nodes. To access the Mashery Local UI, you need to assign public IPs to the respective nodes and open the port 5480 on the node. This requires the following steps:
- Execute the following command to get deployment details of pods along with the node:
kubectl get pods -o wide
- Look in the Node column in the output of above command for the desired pod, for example, ml-master or ml-slave.
- Go to the desired node/VM on the Azure portal and assign a public IP. If you have not created public IP, create one first and then associate with the desired node.
- Add an inbound rule to open the port 5480 on the node/VM under
Networking as shown in the following screenshot.
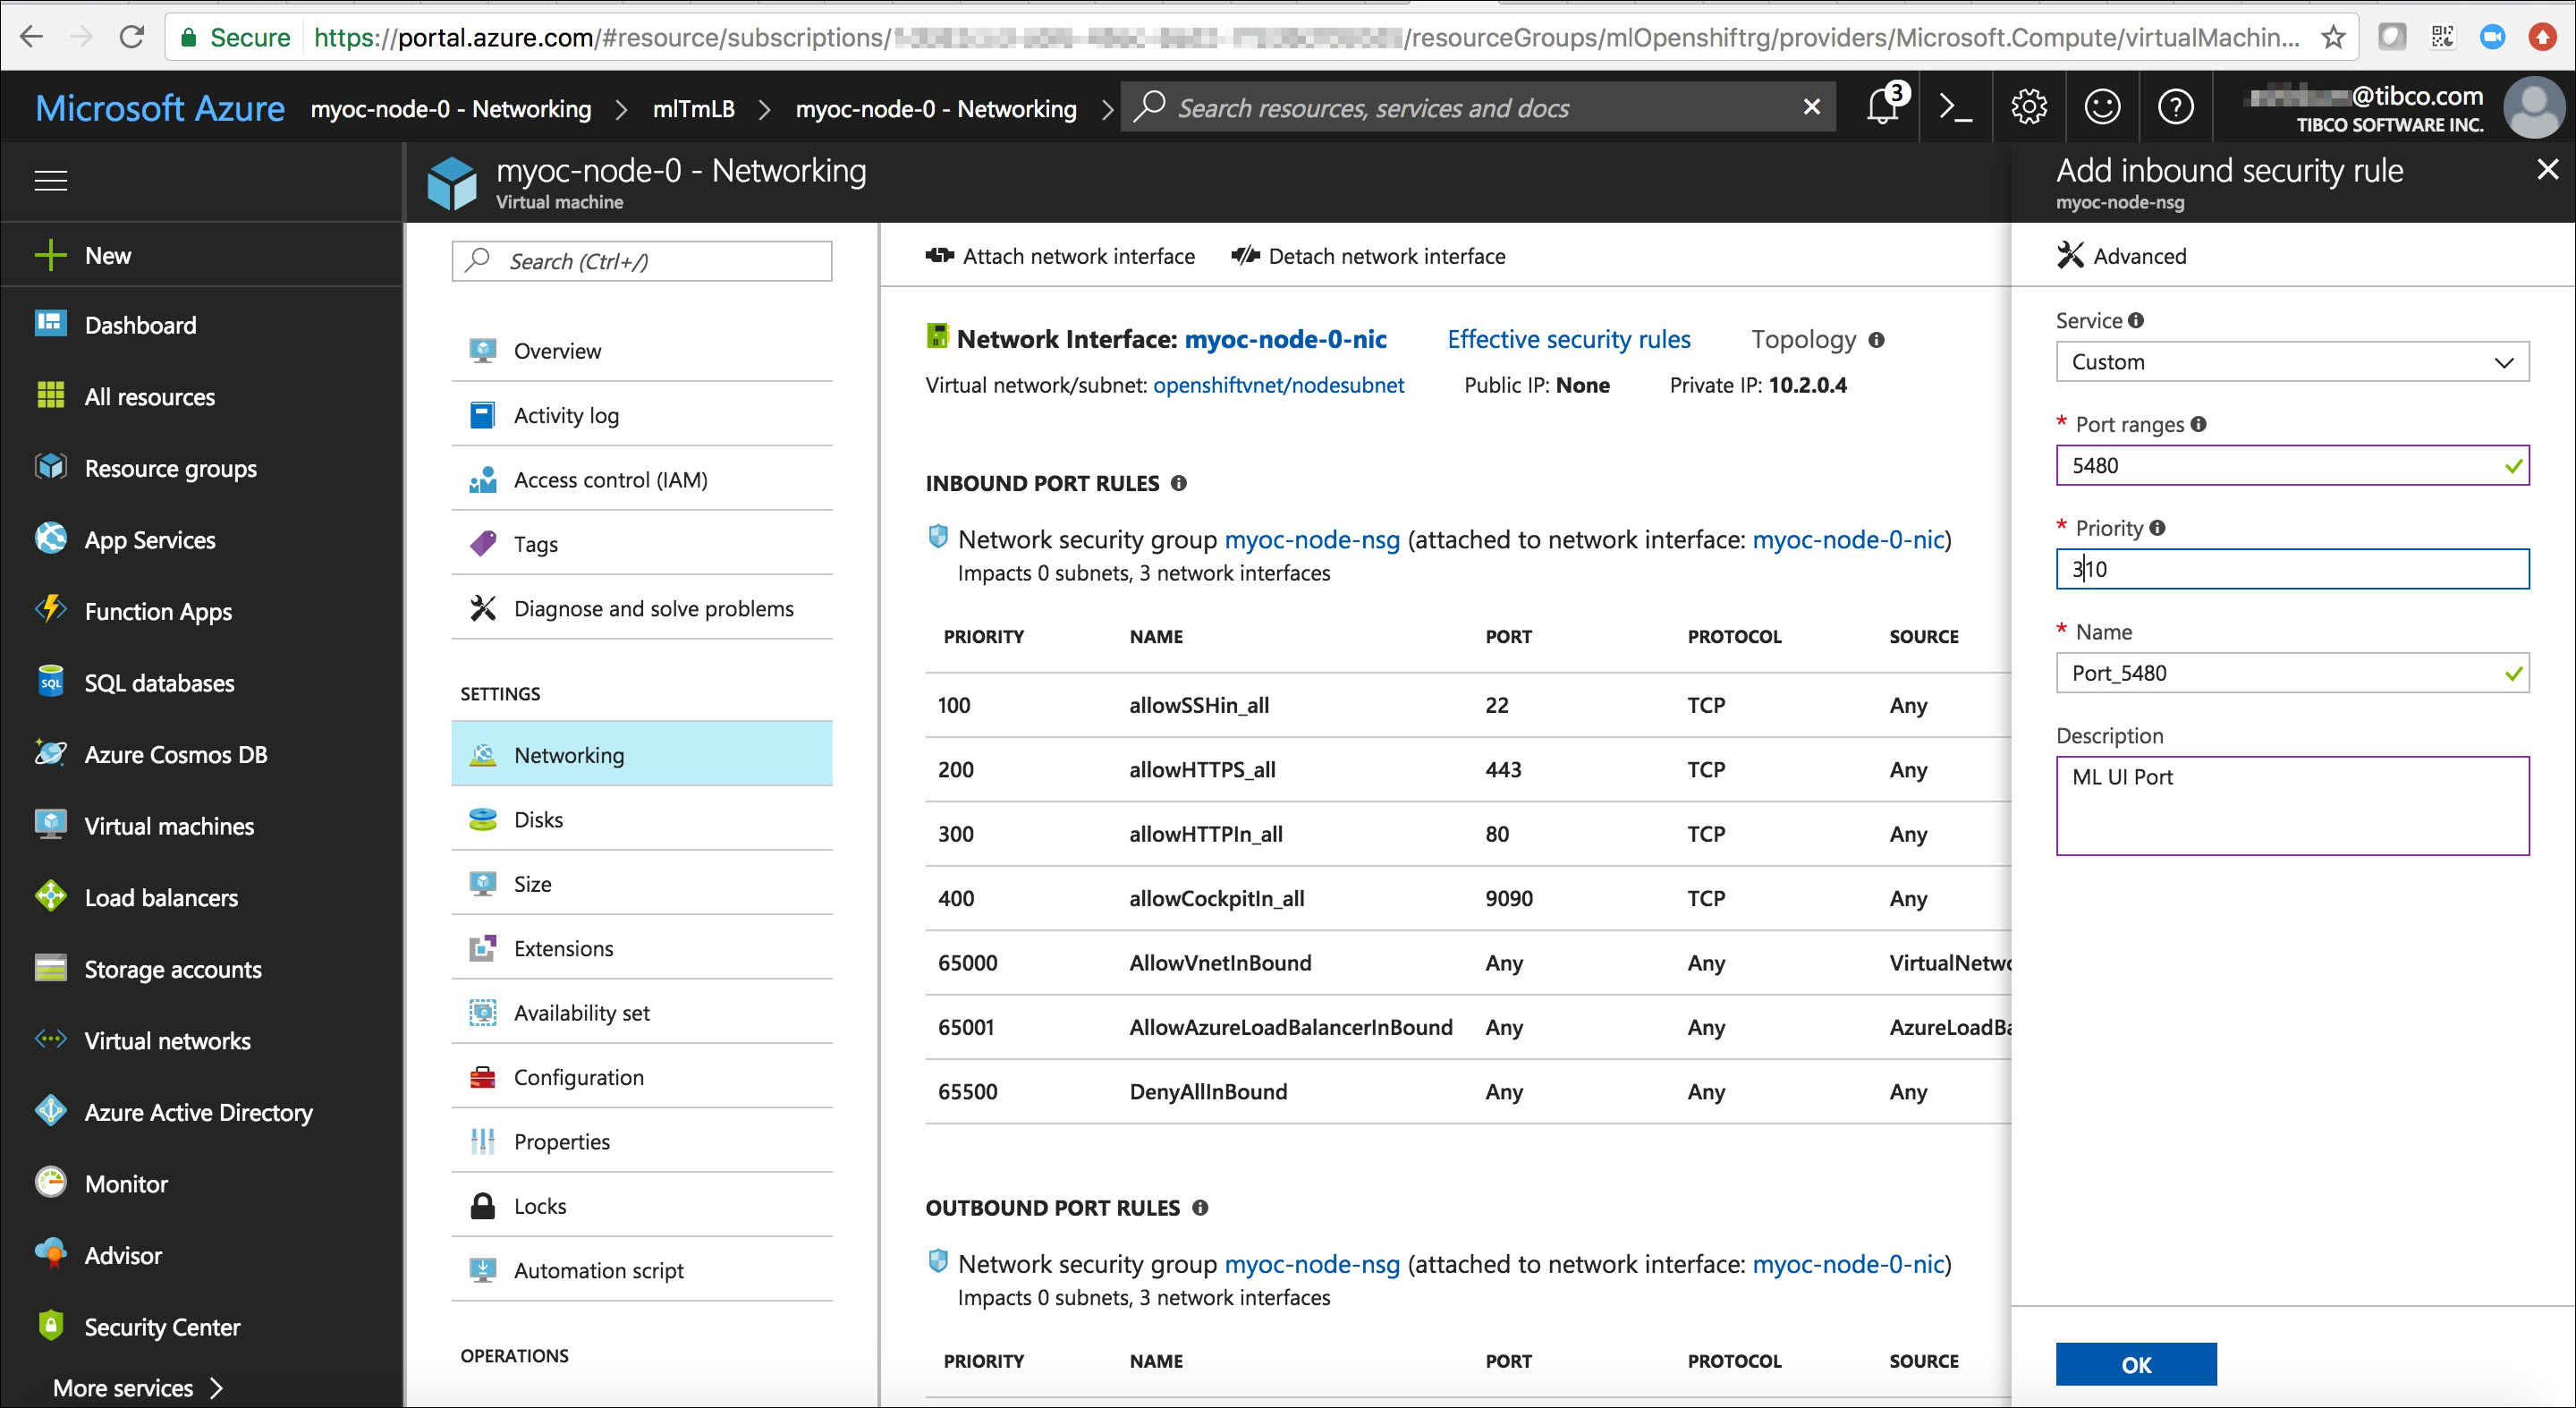
- To access the UI, enter the URL https://<public IP of the node>:5480.
- Execute the following command to get deployment details of pods along with the node:
- To clean up the environment, run the following scripts:
./deploy-master.sh delete
And./deploy-slave.sh delete
Copyright © Cloud Software Group, Inc. All rights reserved.