Installing and Running Mashery Local for Docker using OpenShift in Azure Cloud
1. Create OpenShift Cluster in Azure
2. Deployment
- Get the OpenShift Console URl. If you have used any Microsoft template to create the cluster in Azure, you can get the URL by running the following command. Replace the value of template name and resource group as needed:
az group deployment show --name Microsoft.Template --resource-group mlOpenshiftrg | grep ".azure.com:8443/console"
- Download and extract Mashery Local Docker edition. Load the images in local docker host if it is not loaded.
docker load -i ml-core.tar.gz

docker load -i ml-db.tar.gz

docker load -i ml-mem.tar.gz
- Navigate to the folder <Absolute path>/TIB_mash-local_<ML-version>_docker/examples/openshift/.
- Login into OpenShift using the following command, replacing the URL, user and enter password as appropriate:
oc login https://masterdnsx3ht335436wyq.westus.cloudapp.azure.com:8443 -u clusteradmin --insecure-skip-tls-verify
- Create a new project, such as
mloc41, as shown below. You can also create the project from the console.
oc new-project mloc41
- Make sure you are working under the required project by executing the below command. It assumes project name is mloc41. Change this name as needed.
oc project mloc41
- Provide user privileged access under the current project. Execute the following command:
oc adm policy add-scc-to-user privileged -n mloc41 -z default
- Get the Docker registry host name. This will be used for pushing the images which are used during deployment. If you are using default registry that is deployed with the OpenShift cluster, it could be like docker-registry-default.13.91.49.46.nip.io. Use this registry host name and project name to tag Mashery Local Docker images. In the file openshift-env.sh, ML_REGISTRY_NAME should be the working project's name and ML_REGISTRY_HOST will be Docker registry host's name.
- Source environment variables for deployment in the current working session. Modify the variables (such as ML_REGISTRY_NAME, ML_REGISTRY_HOST, ML_IMAGE_TAG, ML_DB_STORAGE_SIZE etc.) in the file
openshift-env.sh as desired and execute the following command:
source openshift-env.sh
Make sure your present working directory is the location specified in step 3.The following is a sample file for openshift-env.sh:# Openshift environment variables # #export GCP_DEFAULT_REGION=us-west1-a export AZURE_DEFAULT_REGION=uswest # #export PATH=/usr/local/Cellar/kubernetes-cli/bin:.:$PATH # # Kubernetes environment variables # export KUBERNETES_PROVIDER=azure # # Mashery Local custom environment variables # export HTTP_ENABLED=true export HTTP_PORT=80 export HTTPS_ENABLED=false export HTTPS_PORT=443 export OAUTH_ENABLED=false # # If NTP_SERVER_ADDRESS is specifed, the NTP is enabled; Otherwise disabled. export NTP_SERVER_ADDRESS="" # # ML docker image tag (Note: The revision number is incremented after each build) export ML_IMAGE_TAG="v4.1.1.0" # # Number of ML slave instances export ML_SLAVE_COUNT=1 # export ML_STORAGE_TYPE=pd-standard export ML_STORAGE_PROVISIONER="kubernetes.io/azure-disk" # # Storage size for config data and logs export ML_DATA_STORAGE_SIZE=2Gi # # Storage size for databse data export ML_DB_STORAGE_SIZE=2Gi # # # Docker registry name for ML images # export ML_REGISTRY_NAME="mloc41" export ML_REGISTRY_HOST=docker-registry-default.13.91.49.46.nip.io # #
- Next, login into the registry to push the images. This step must be completed successfully before proceeding further.
docker login -u clusteradmin -p $(oc whoami -t) <REGISTRY_HOST>
Sample command:docker login -u clusteradmin -p $(oc whoami -t) docker-registry-default.13.91.49.46.nip.io
- Upload the images into the registry by executing the following script:
./upload-images.sh
Make sure images are pushed successfully with the desired version. You can verify images on the OpenShift console or by executing the following command:oc get is
A sample output is shown below:
- Create a registry secret named "mlregistrykey" using below command. This name is fixed.
oc secrets new-dockercfg mlregistrykey --docker-server=<DOCKER_REGISTRY> --docker-username=<CLUSTER_USER_NAME> --docker-password=$(oc whoami -t) --docker-email=<ANY_VALID_EMAIL>
Sample command below:oc secrets new-dockercfg mlregistrykey --docker-server=docker-registry-default.13.91.49.46.nip.io --docker-username=clusteradmin --docker-password=$(oc whoami -t) --docker-email=abc@tibco.com
- Execute the following script to store MOM host and key as Kubernetes "Secret". MOM HOST is not required for Production deployment.
./set-mom-secret.sh create <MOM key> <MOM secret>
If you have enabled HTTPS or OAuth, please run the following scripts respectively../set-https-secret.sh <create|replace|delete> <server certificate file name> <server certificate password>
For the first argument in the above command, use "create" for the first time, then use "replace" for subsequent changes../set-oauth-secret.sh <create|replace|delete> <OAuth authorization user> <OAuth authorization user password>
For the first argument in the above command, use "create" for the first time, then use "replace" for subsequent changes. - Create storage classes for Mashery Local for Docker persistent stores.
./set-storage-classes.sh
- Create Mashery Local Traffic Manager service and Mashery Local Master service.
./set-ml-services.sh
- Deploy Mashery Local master instance.
./deploy-master.sh
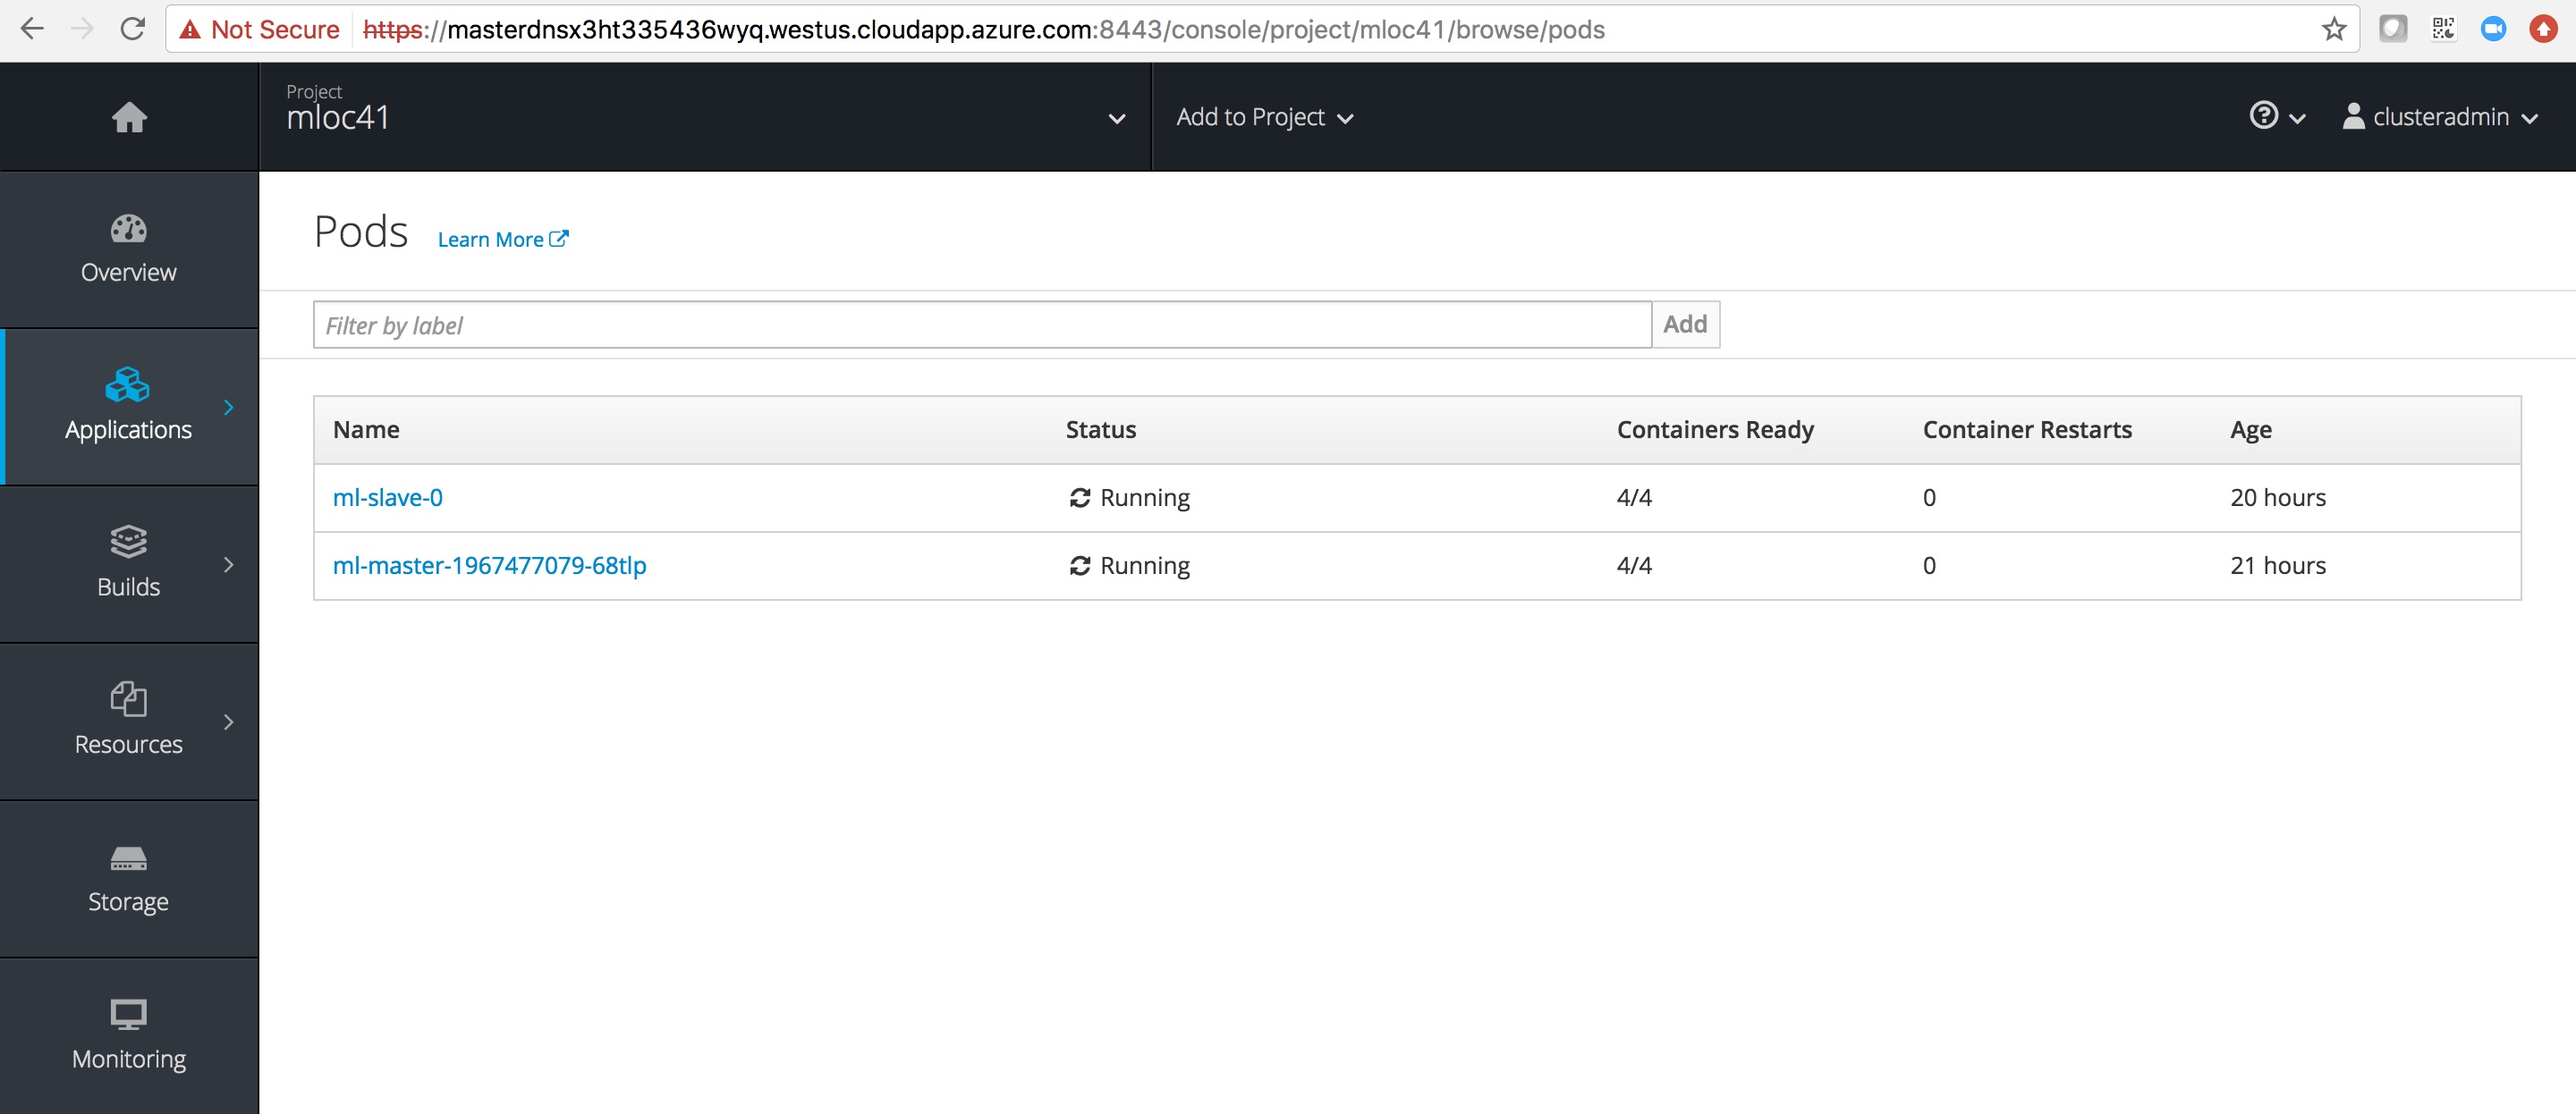
If everything goes well, it might take up to 10 minutes for all the containers to be ready. You can check the Mashery Local instance pods with the command:oc get pods
The Mashery Local master pod has a name similar to ml-master-<name>. When it is fully up, you should see 4/4 under the READY column with STATUS "Running" for the master instance pod.You can check the startup init instance log with the following command:You can get into any ML master instance container with the following command:oc exec -ti `kubectl get pods |grep ml-master |cut -d " " -f 1` -c ml-cm -- cat /var/log/mashery/init-instance.log
oc exec -ti `oc get pods |grep ml-master |cut -d " " -f 1` -c <container name> -- /bin/bash
- Deploy Mashery Local slave instances.
./deploy-slaves.sh
You can check the Mashery Local instance pods with the command:oc get pods
The Mashery Local slaves instance pods are named with ml-slave-0, ml-slave-1, ml-slave-2. When it is fully up, you should see
4/4 under the
READY column with STATUS "Running" for the slave instance pod.

You can also verify the status on the OpenShift console.
3. Post-Deployment
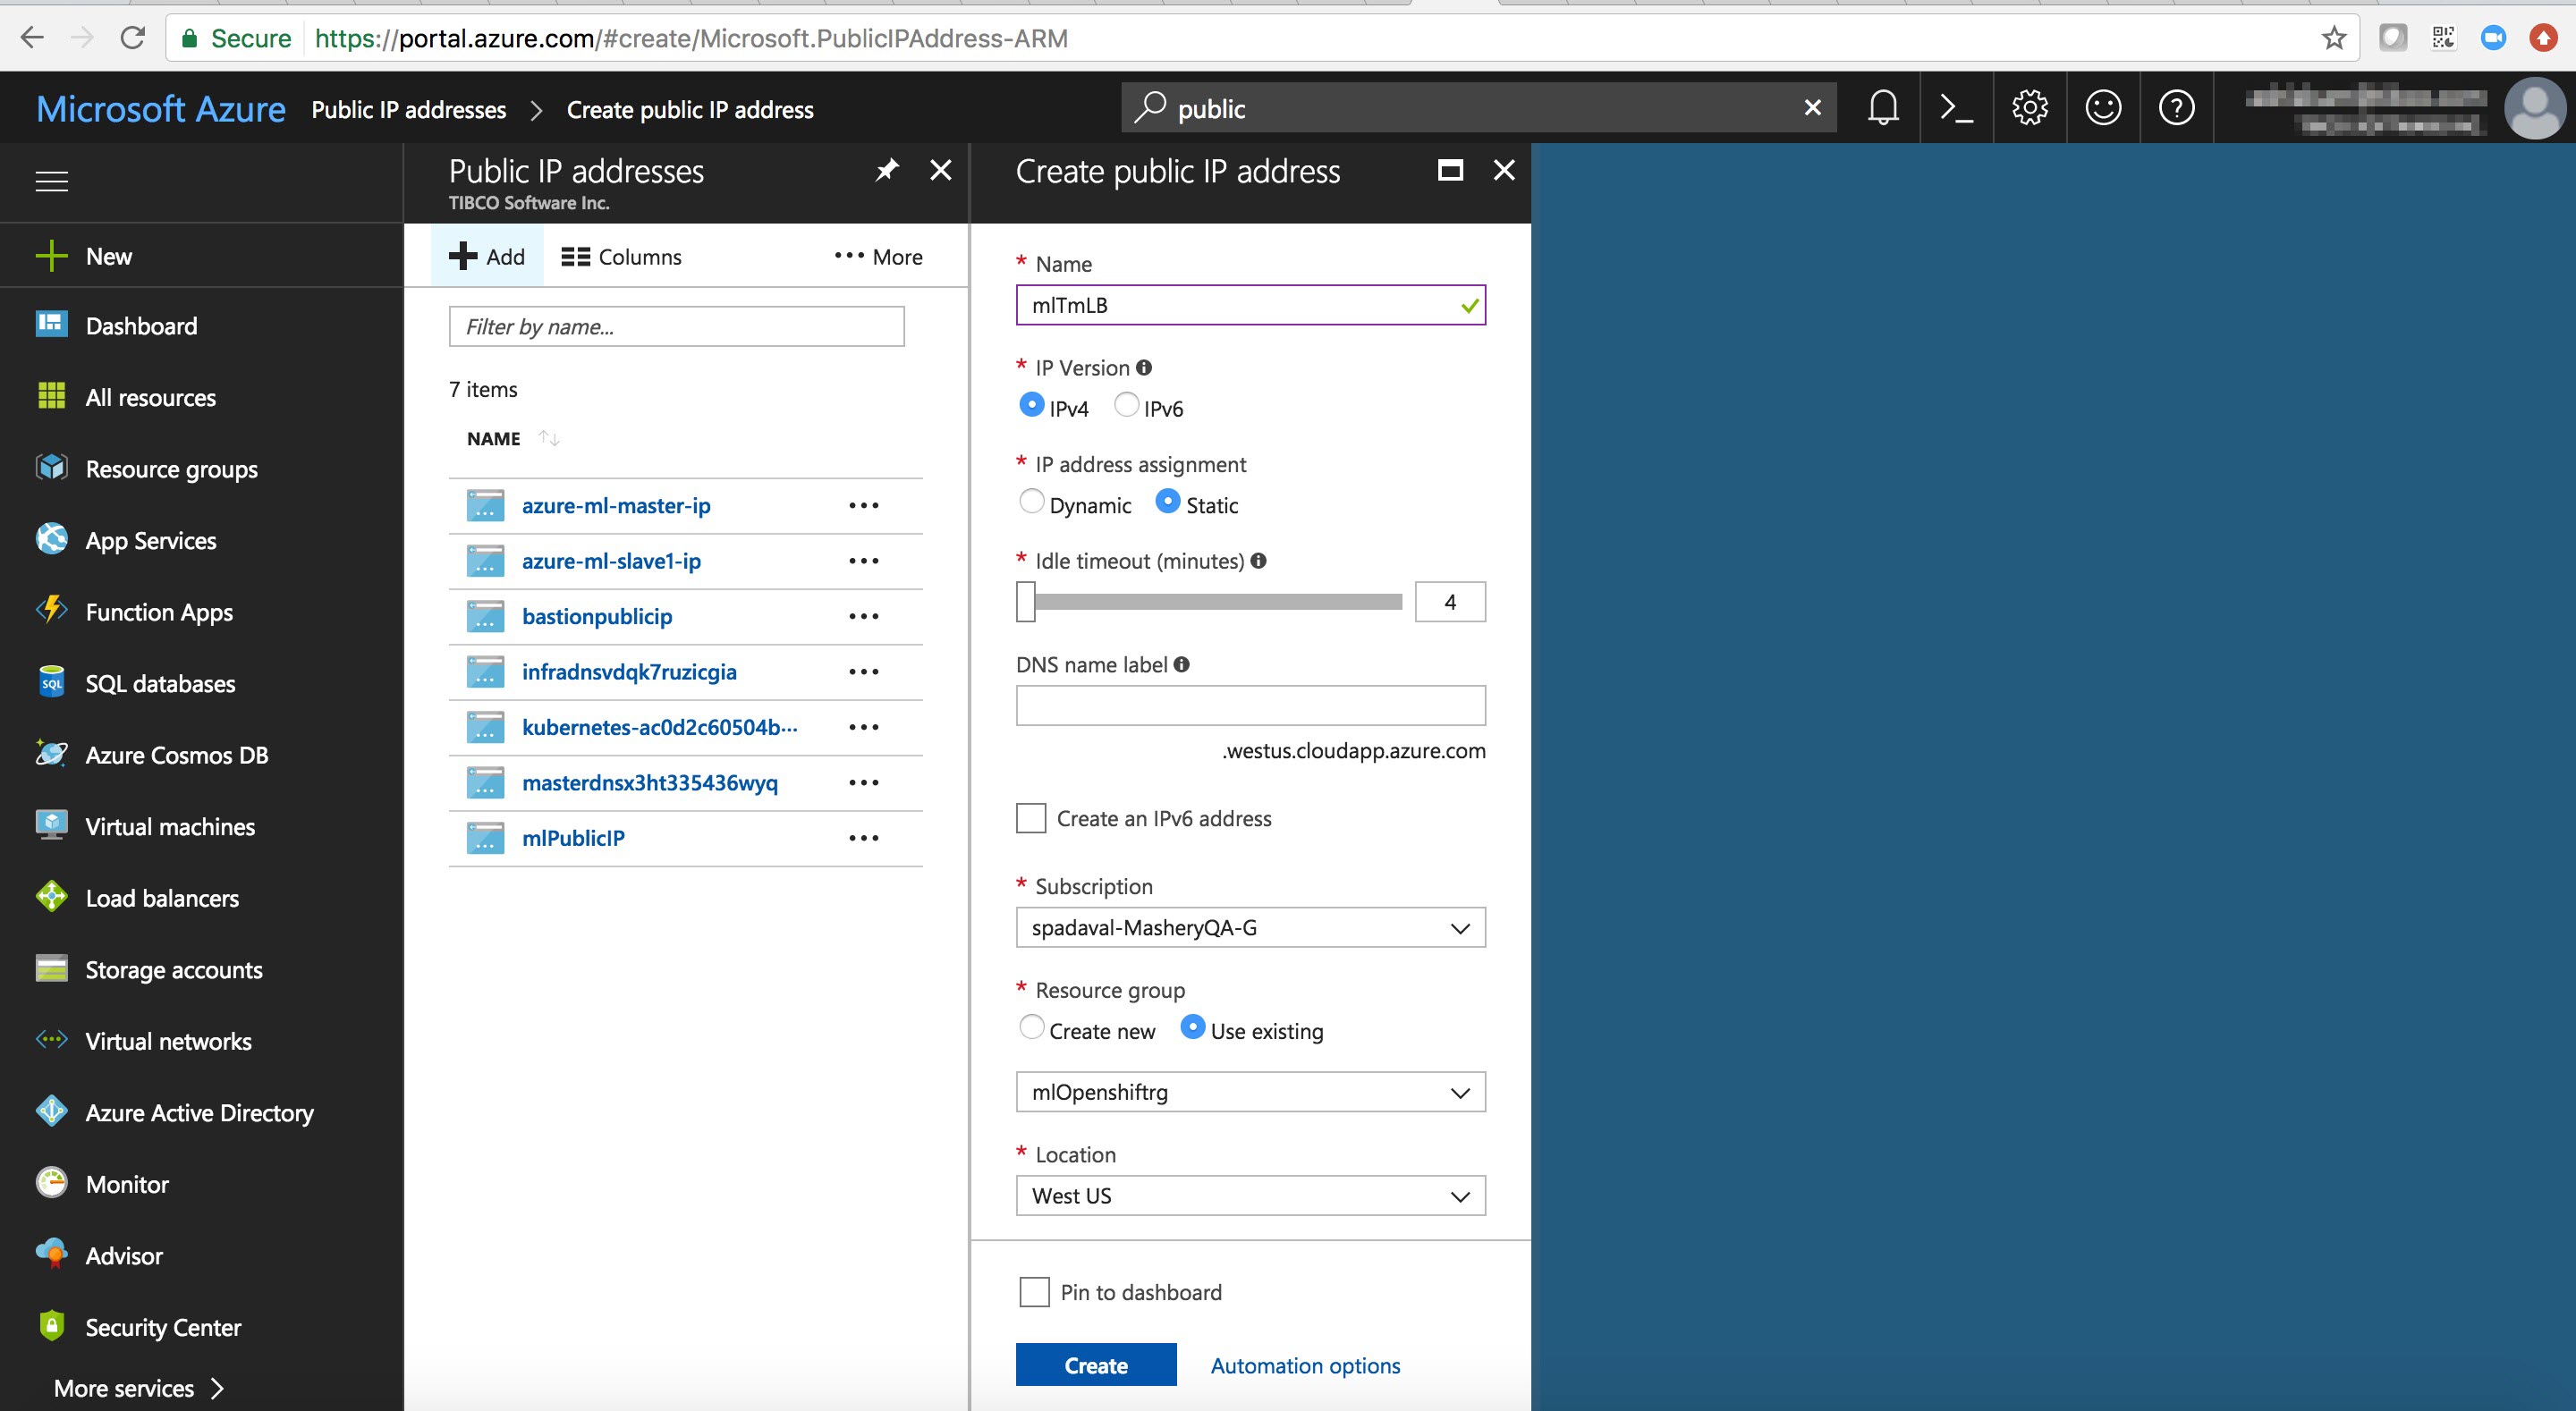
In an OpenShift environment, there are many ways to expose services to the outside world. (Refer to https://docs.openshift.com/container-platform/3.3/dev_guide/getting_traffic_into_cluster.html for more information.) For Mashery, assigning external IP worked for best in Azure. So you need to manually create a public IP and assign it to the one of the application nodes. In Azure, after creating the public IP, you need to associate the IP to the network interface of one of the application nodes in the cluster, which eventually binds to one of the nodes. Follow the steps below to achieve this.
- Create a static public IP address. On the Azure portal, click on
All Services, then choose
Public IP addresses under the
Networking section. Click
Add in the
Public IP Addresses panel and fill in the data below the screen, then click
Create.
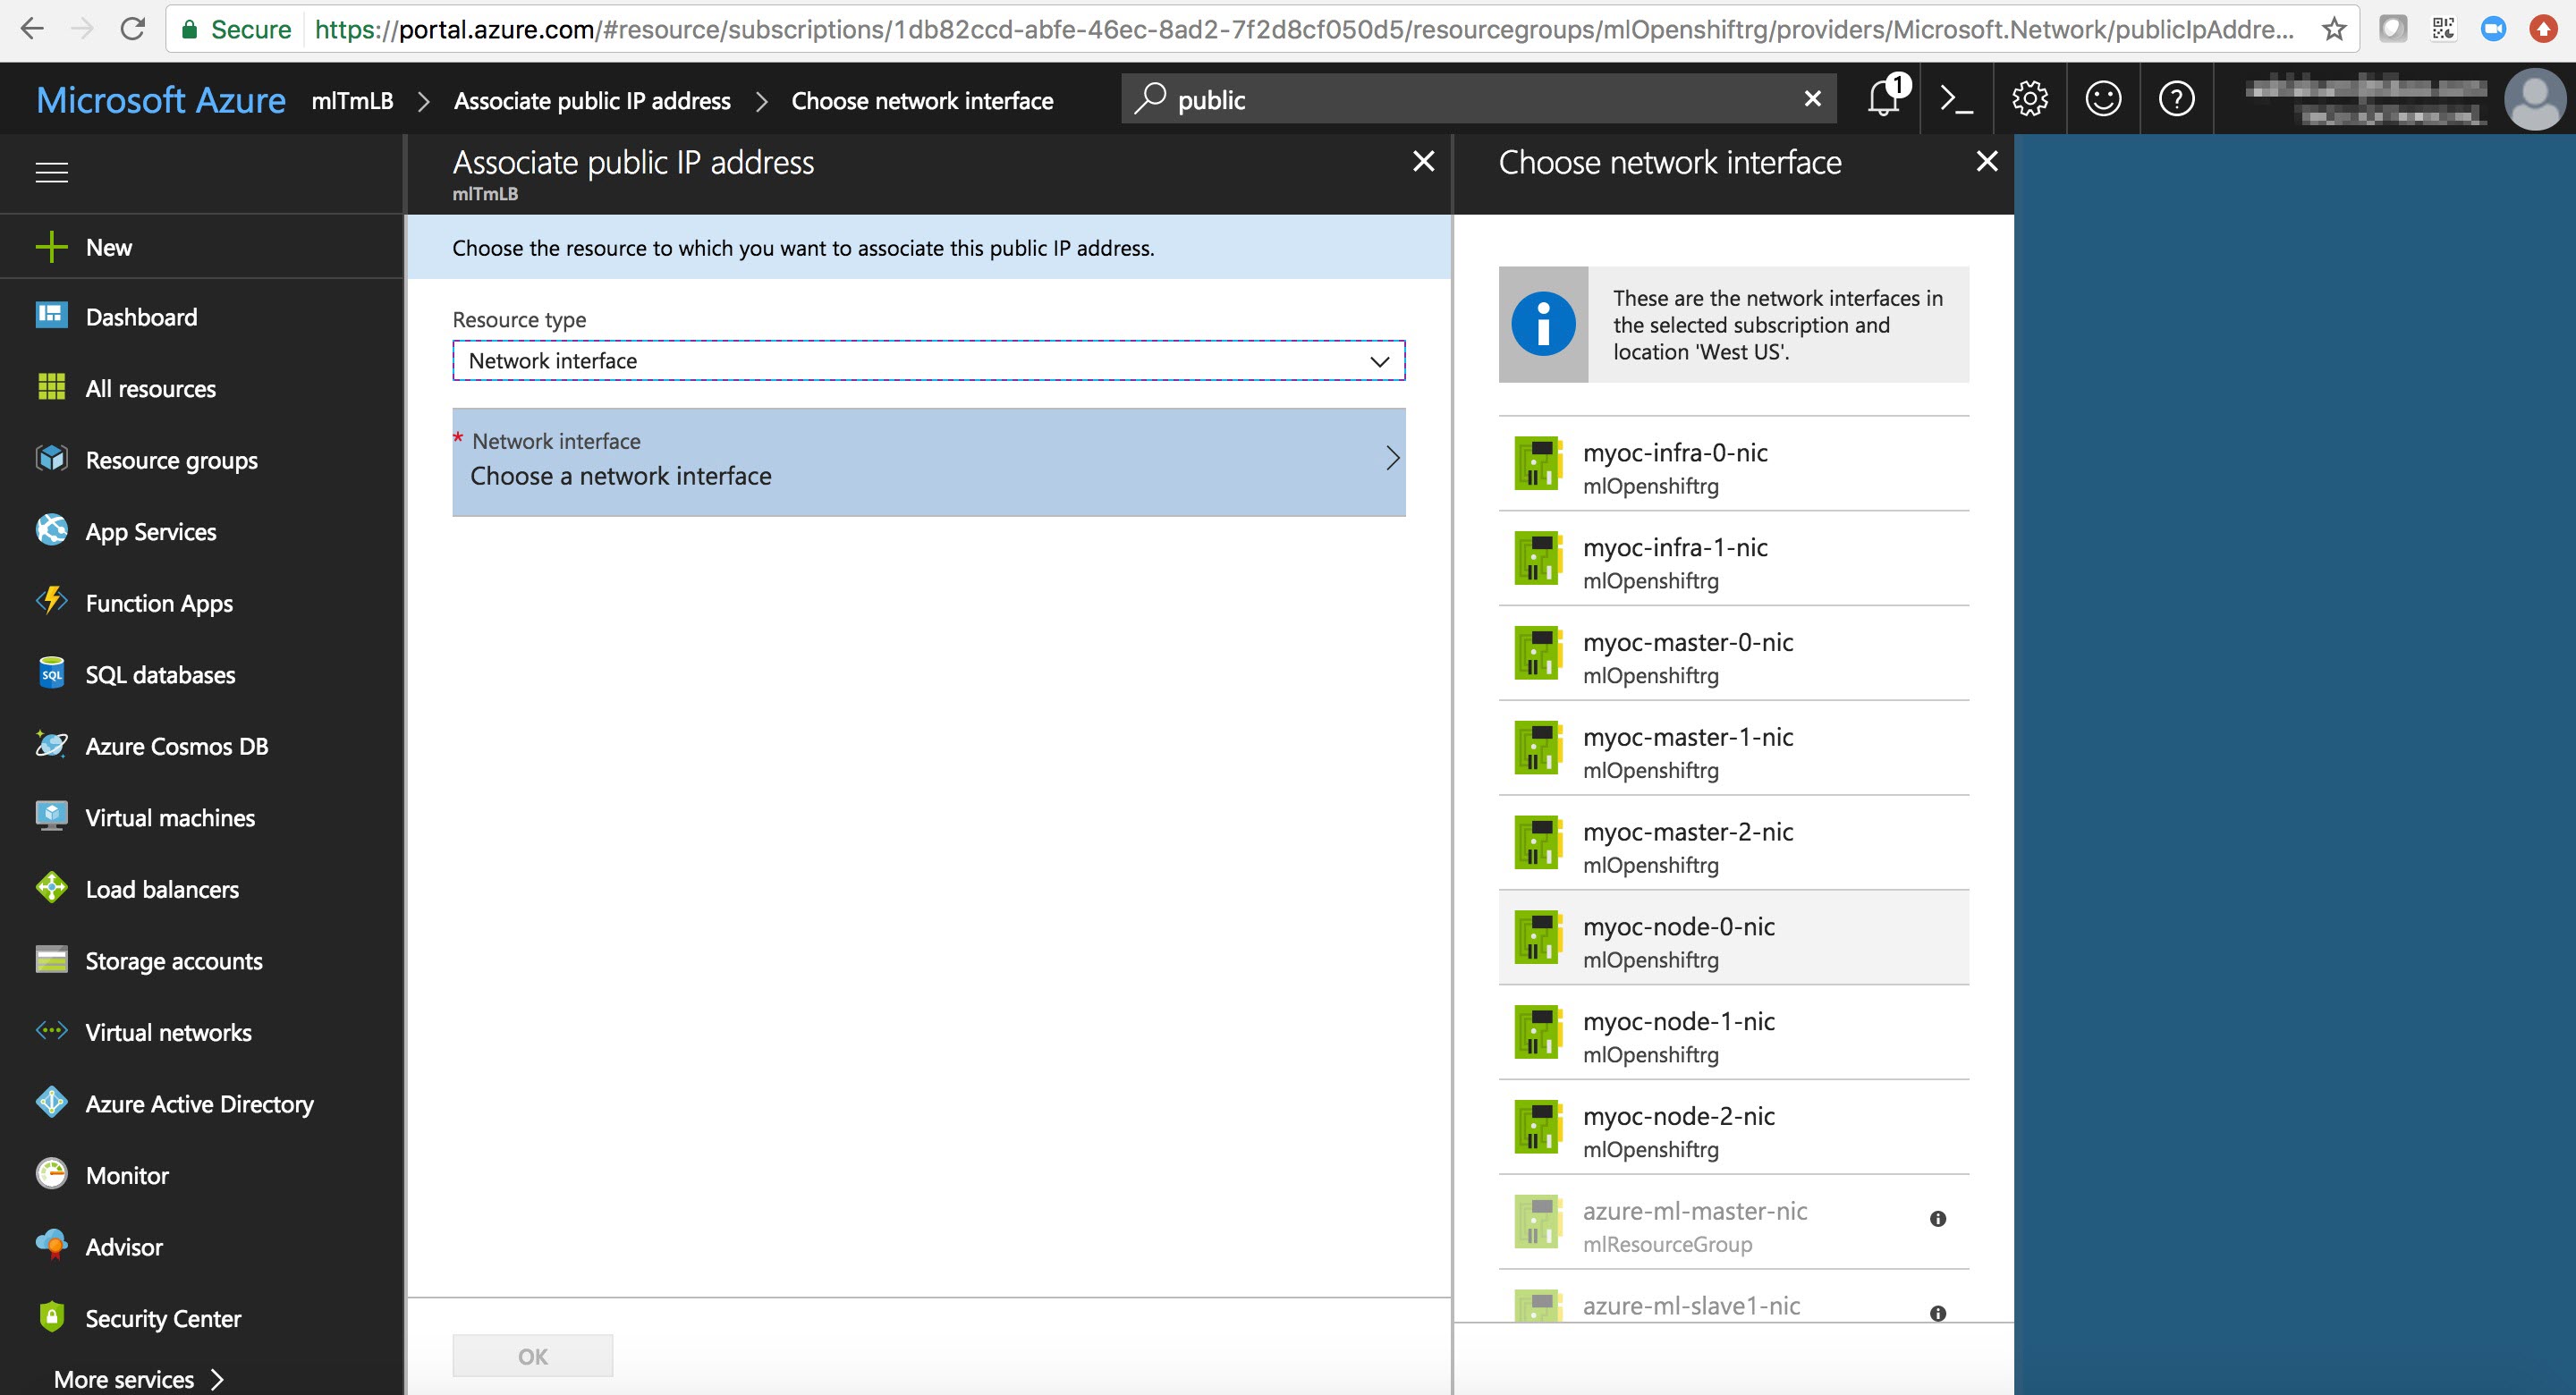
- Associate this IP with one of application nodes. Choose the public IP address created in previous step in the
Public IP Address panel and then click on the
Associate tab to get the following screen. You can get the name of the desired node by accessing the pod on the OpenShift console. Click
OK in the
Associate public IP Address panel after you choose the desired node.
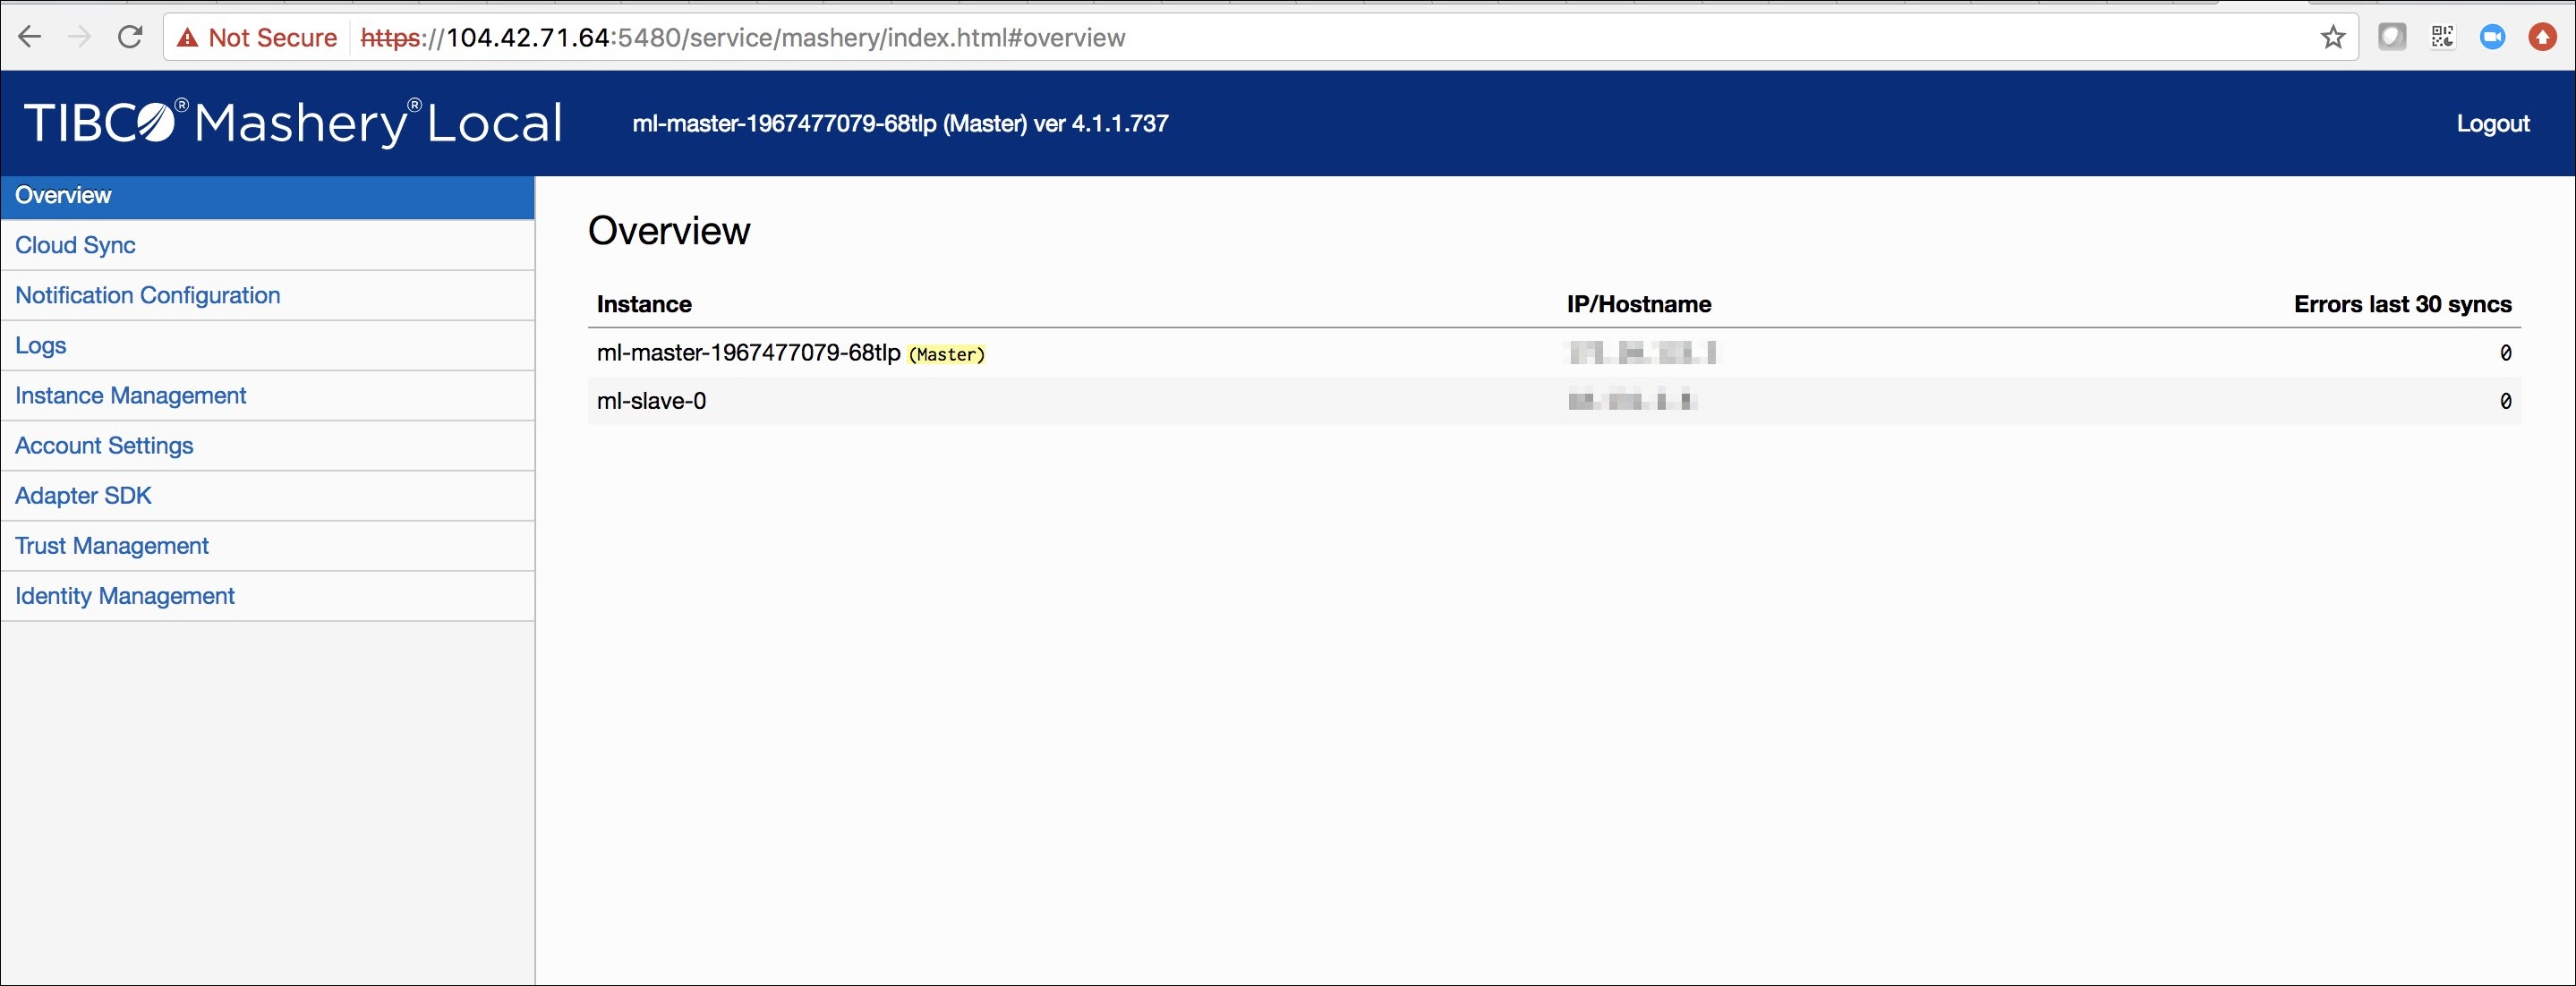
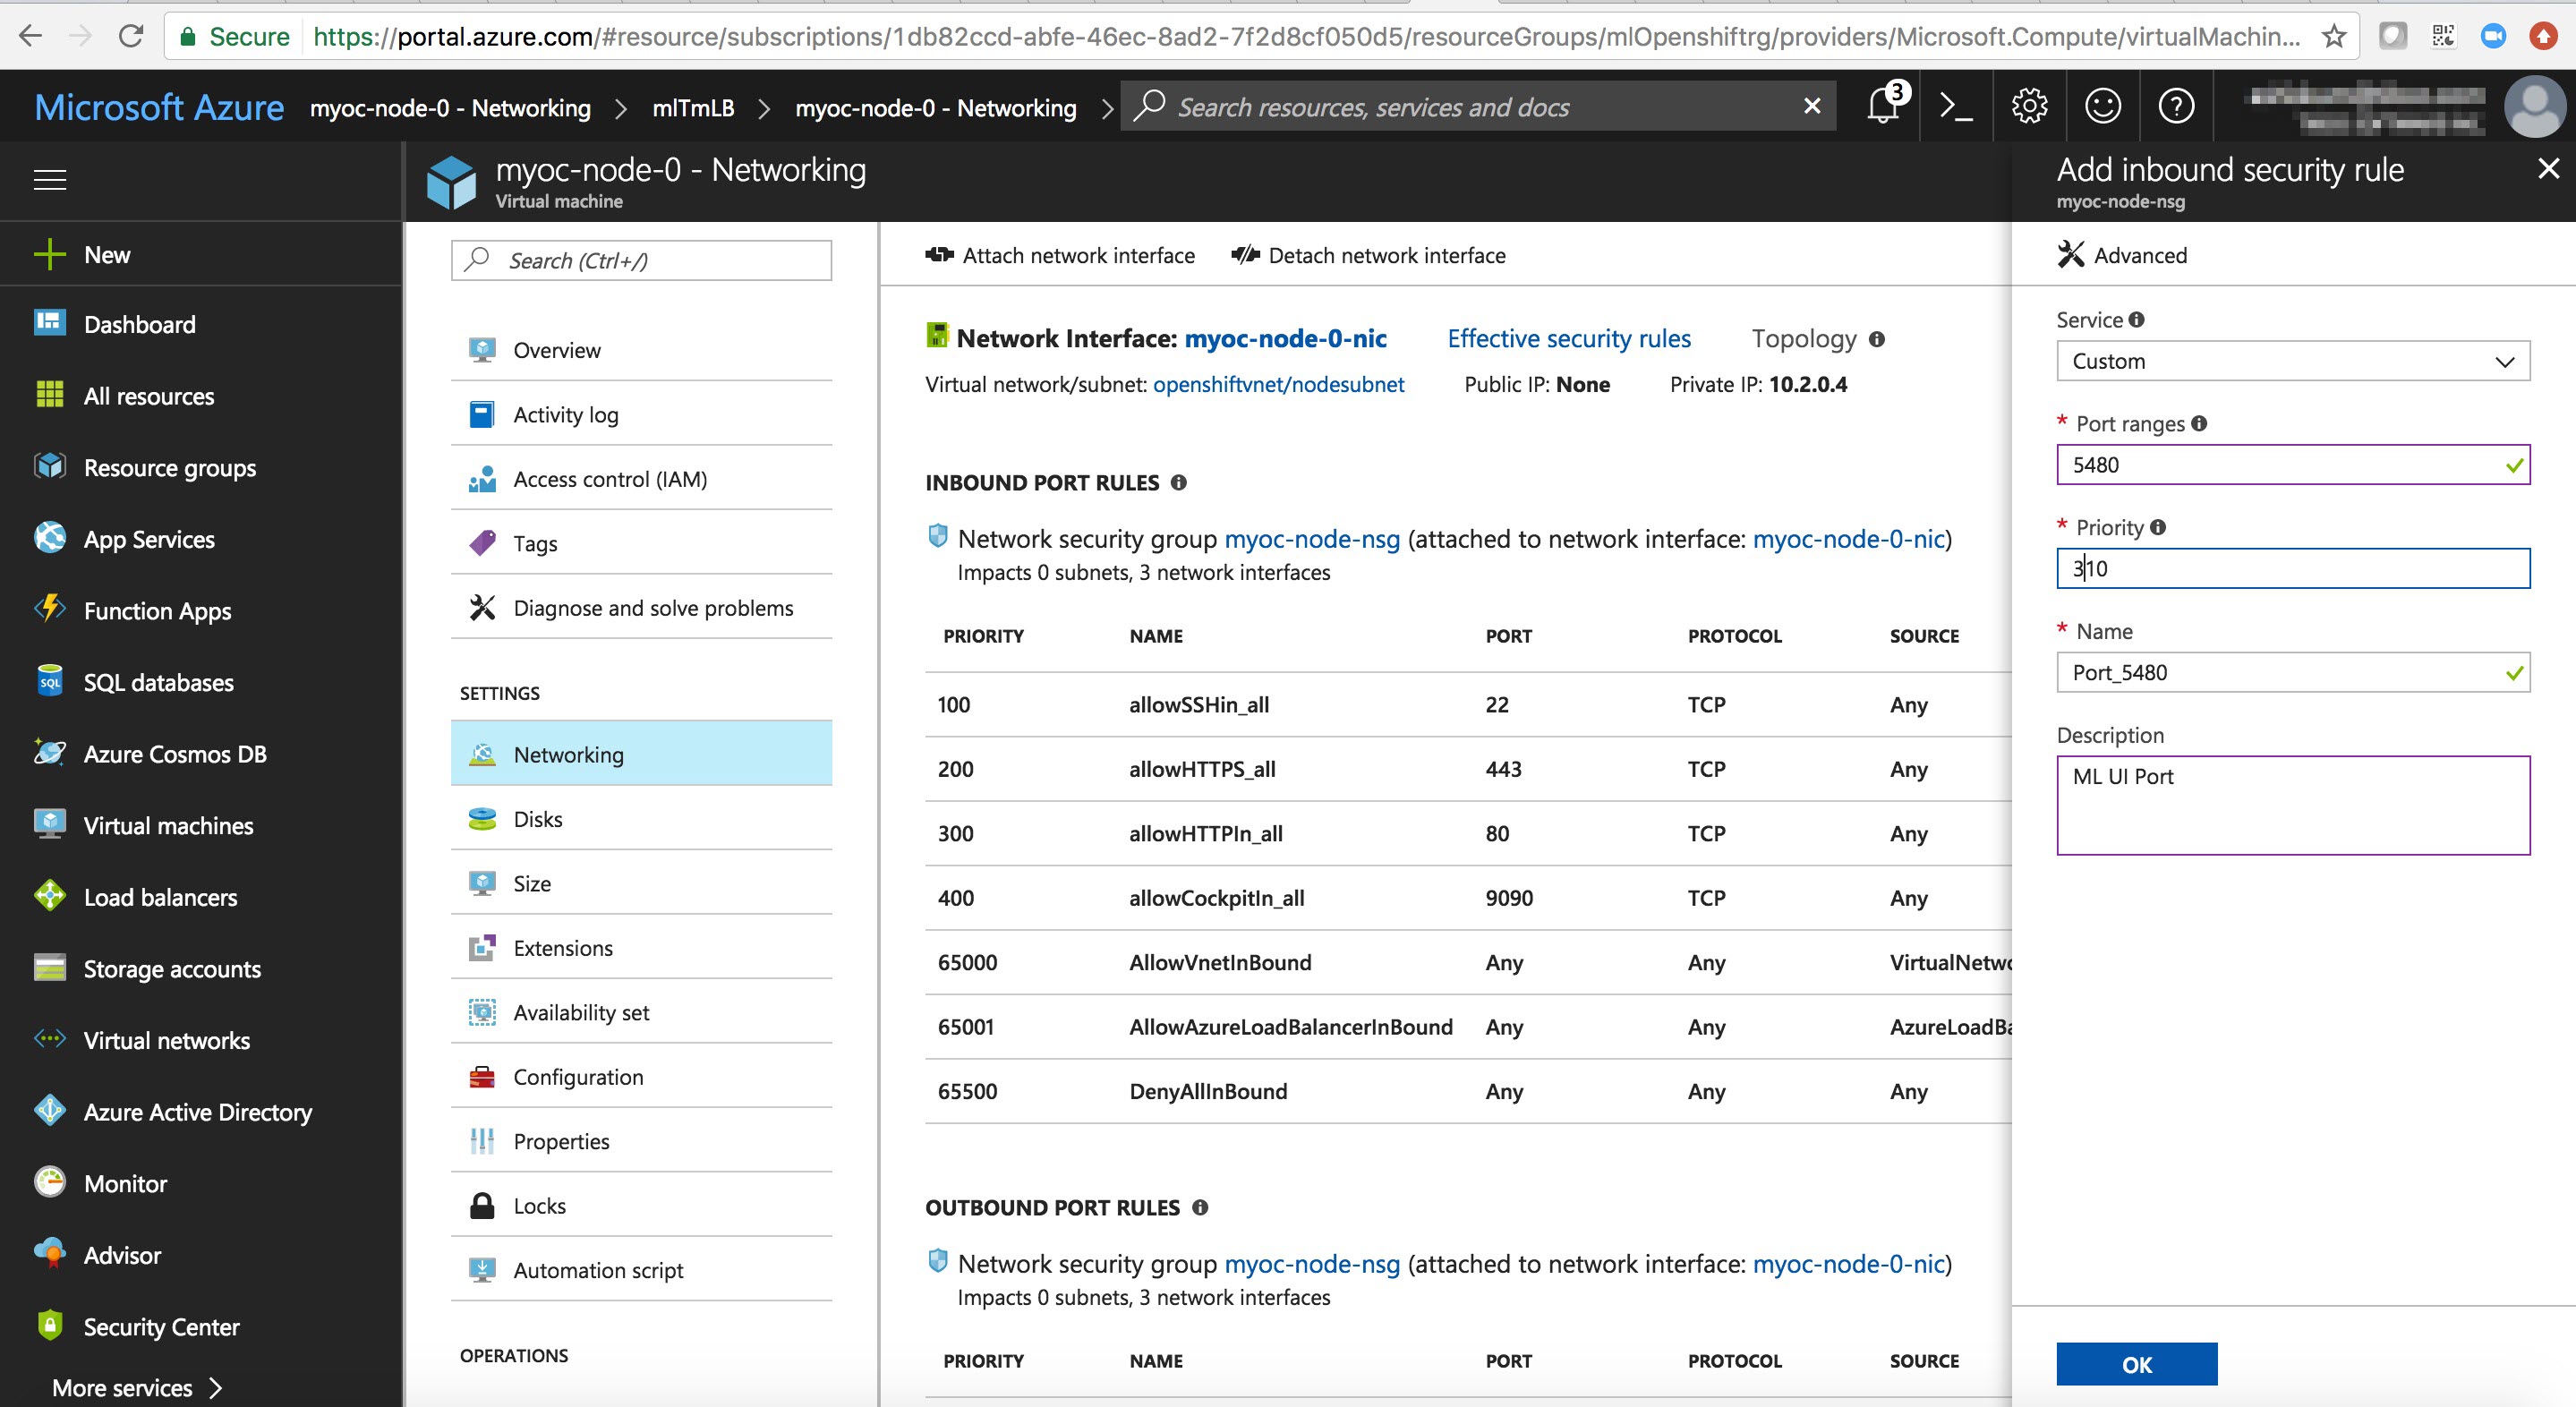
- Open port 5480 on the desired node to access the cluster manage UI. Navigate to
Public IP Address→
<your public IP address>. Click on the link under
Virtual machine; click on
Networking and then
Add inbund port rule. Fill in the data in the following screen, then click
OK.
- Once you have the public IP, patch the ml-traffic-manager service with this external IP. Execute the following example command.
oc patch svc ml-traffic-manager -p '{"spec":{"externalIPs":["104.42.71.64"]}}'If you have multiple public IPs for load balancing, you can pass those IPs in the array. - Once done, you can test the traffic as shown in the following example command.
curl -v -H 'Host: calypsoqa.api.secmom.mashspud.com' 'http://104.42.71.64/ml43?api_key=ml43key'
You should get the expected response from the API configuration.