Creating a Swarm Cluster in AWS
To create a Swarm cluster in AWS:
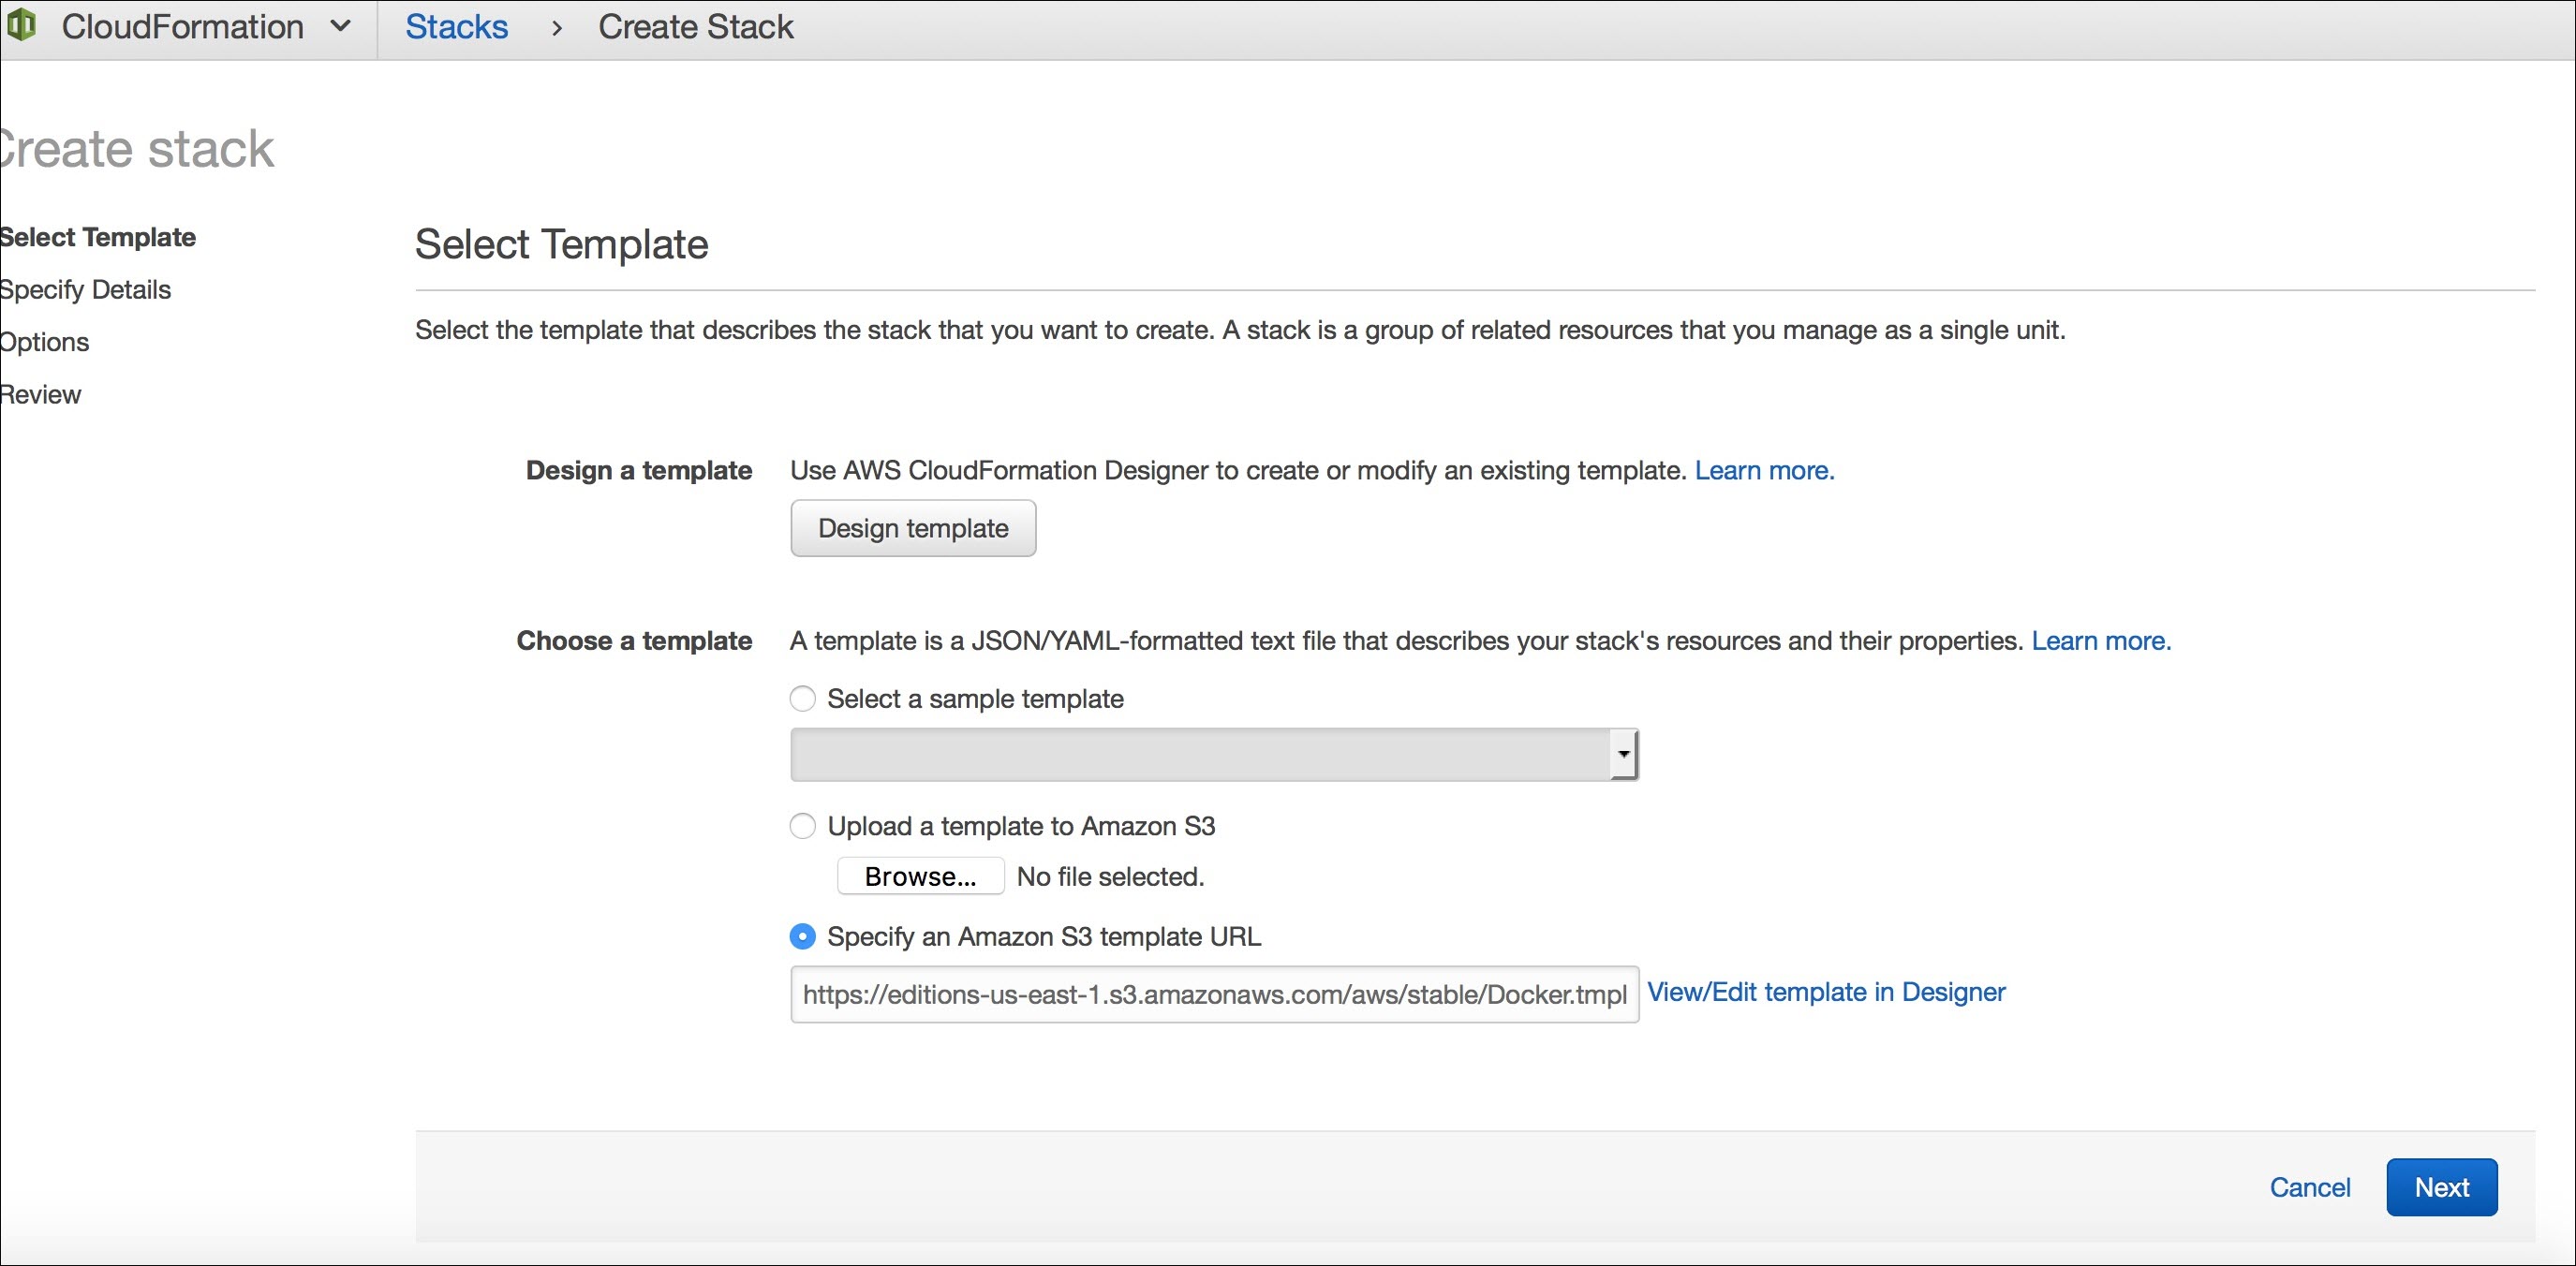
- Click Deploy Docker Community Edition (CE) for AWS.
- Click
Next to create stack.
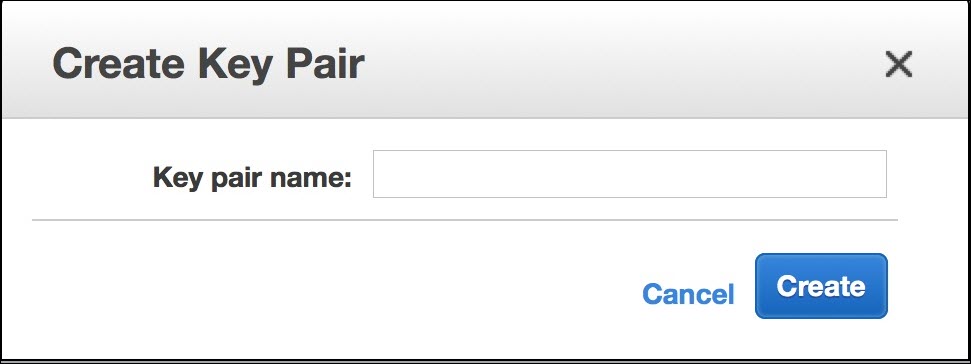
- Create the ssh key pair in AWS portal and save *.pem locally.
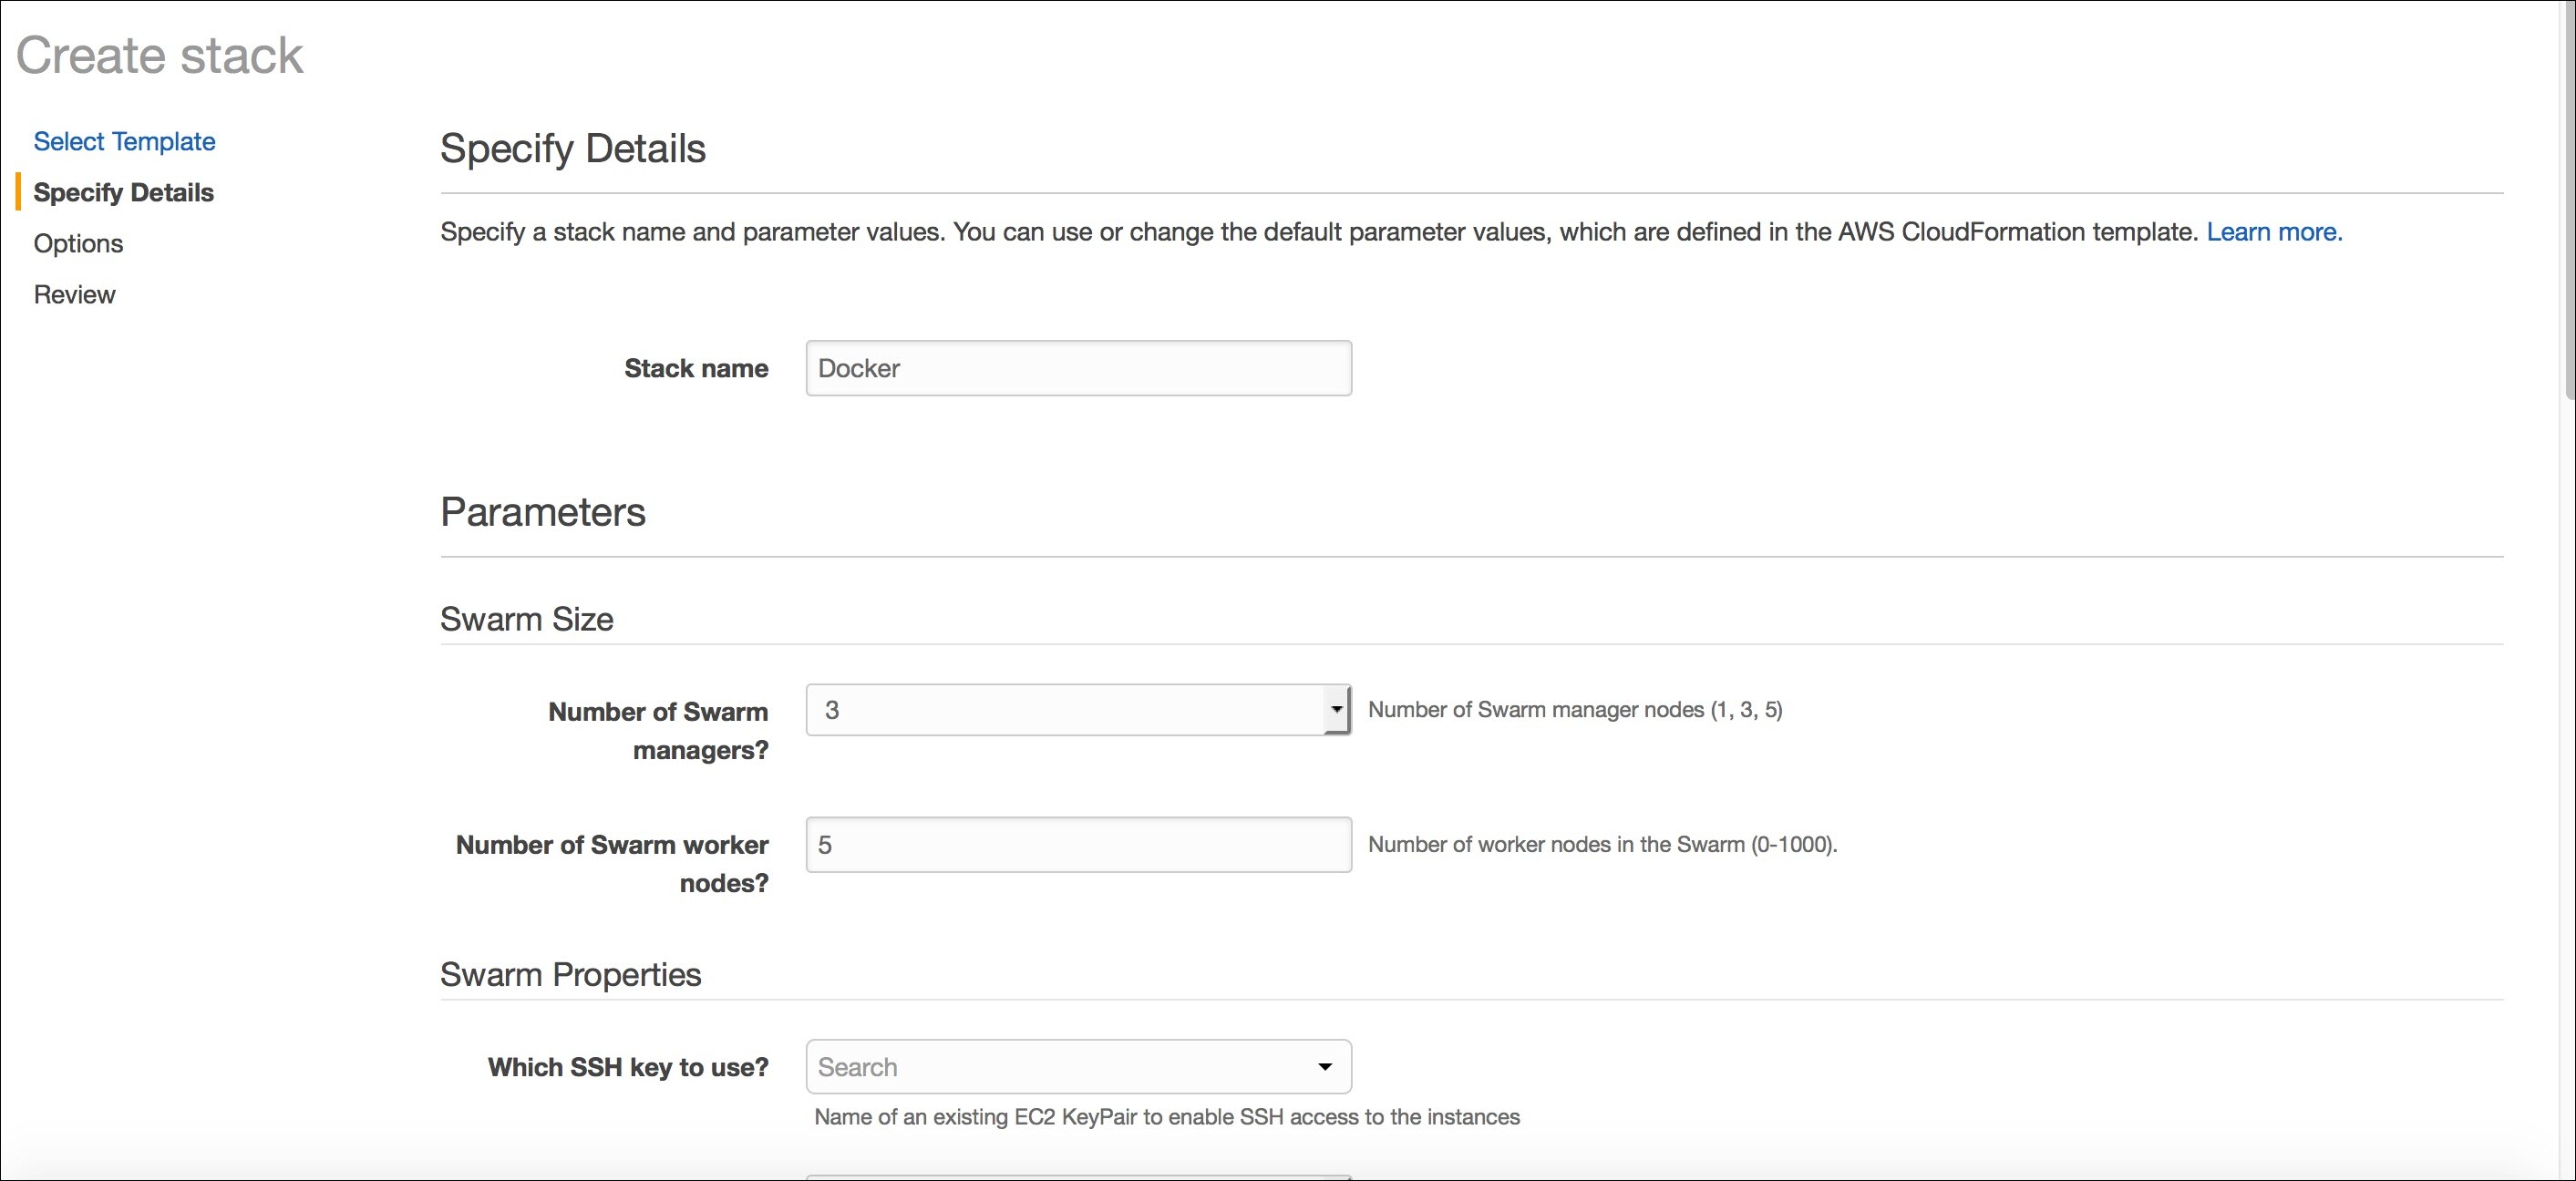
- Specify the stack name, Number of swarm managers, worker nodes, instance type, etc. Use the key pair name that was created above here for 'Which ssh key to use".
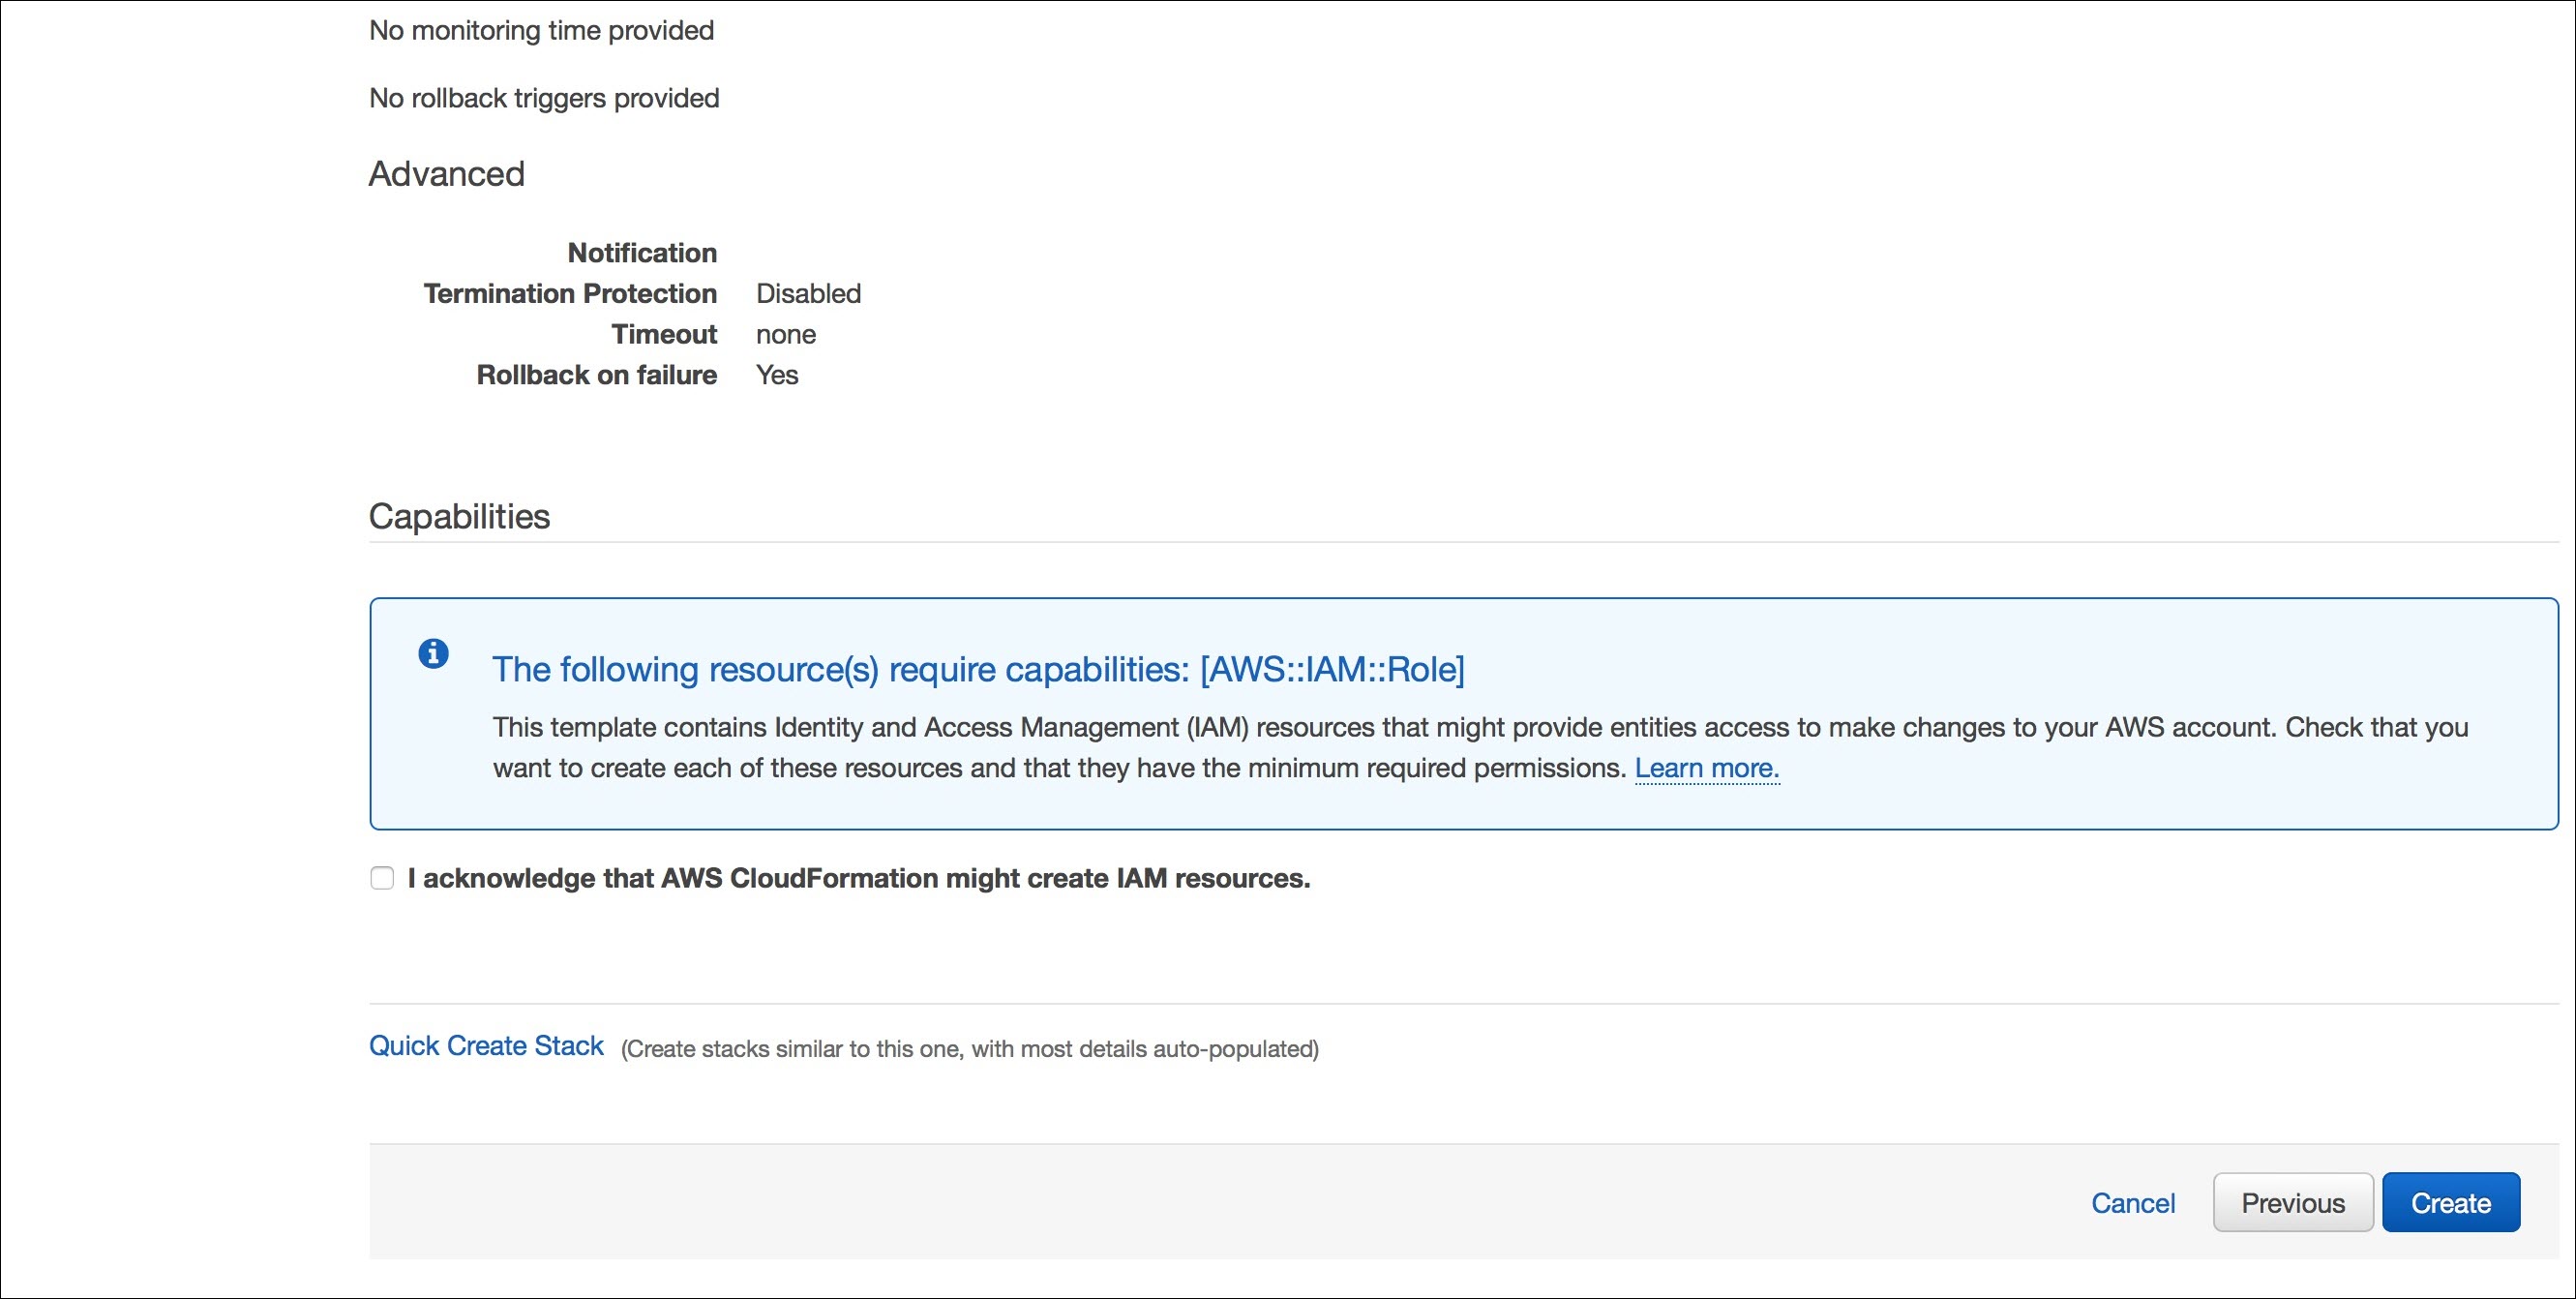
- Accept the acknowledgment to create the cluster.
Once the cluster is created, you will see a screen similar to this: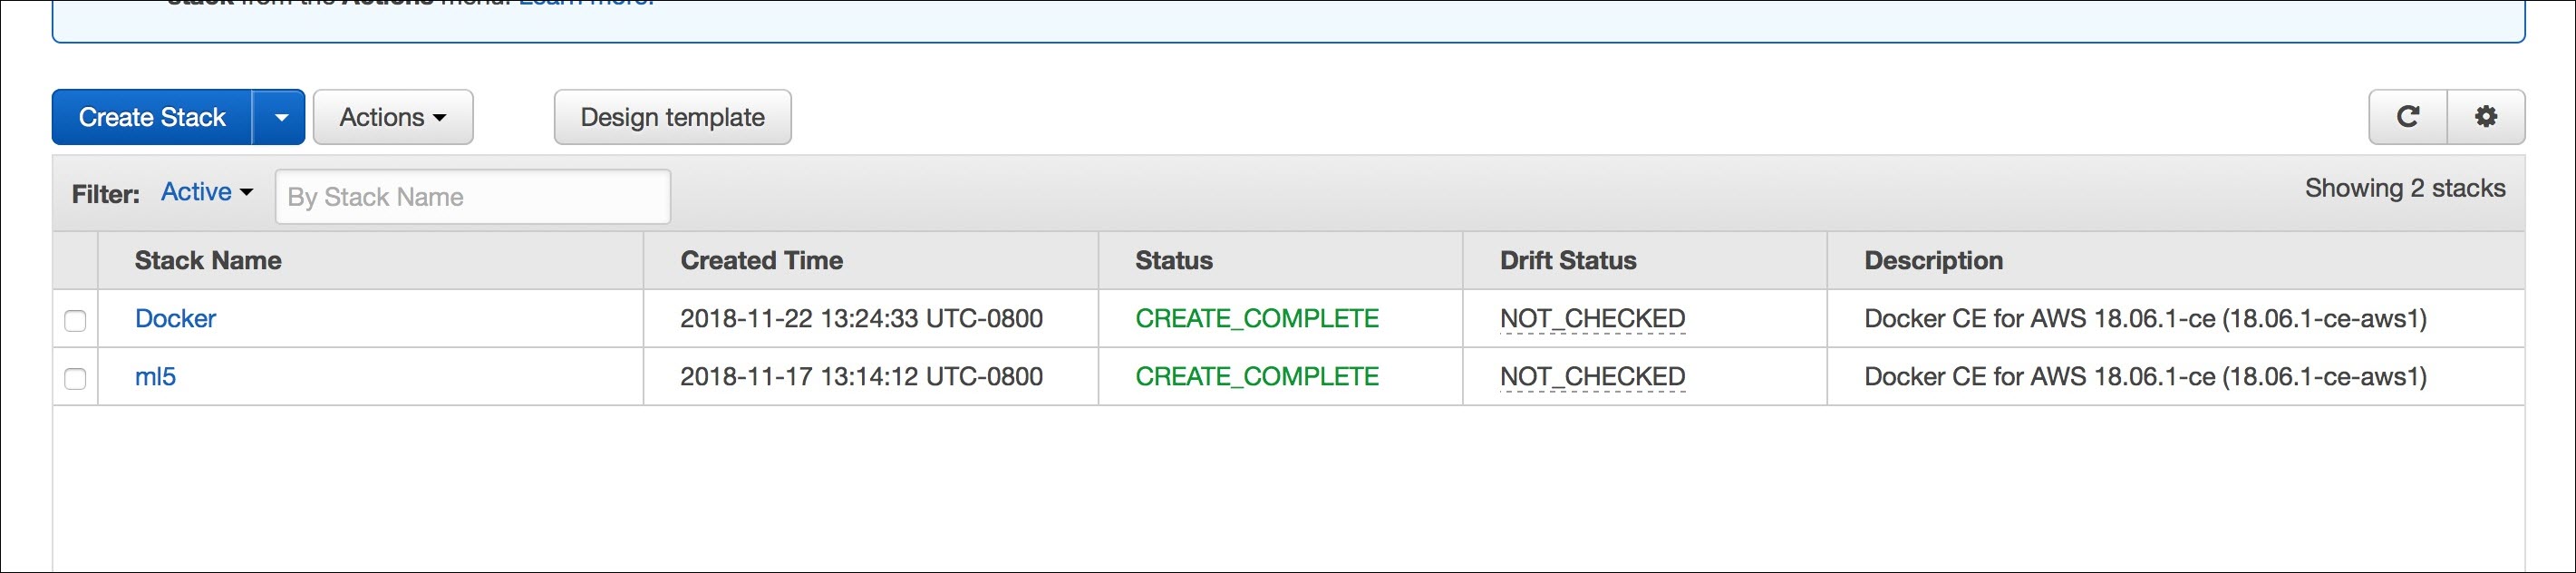
- Run the following command:
chmod 400 <*.pem>
Add the ssh key:ssh-add *.pem
- To login to the manager node, find the IO of the manager node in AWS cluster:
ssh -A docker@54.213.81.235
Make sure you are logged in to the manager node. - Copy the images files into the manager node using:
scp -i *.pem /tml*.* docker@54.213.81.235:/home/docker

- Login into the manager node and load all the images:
ssh -A docker@54.213.81.235
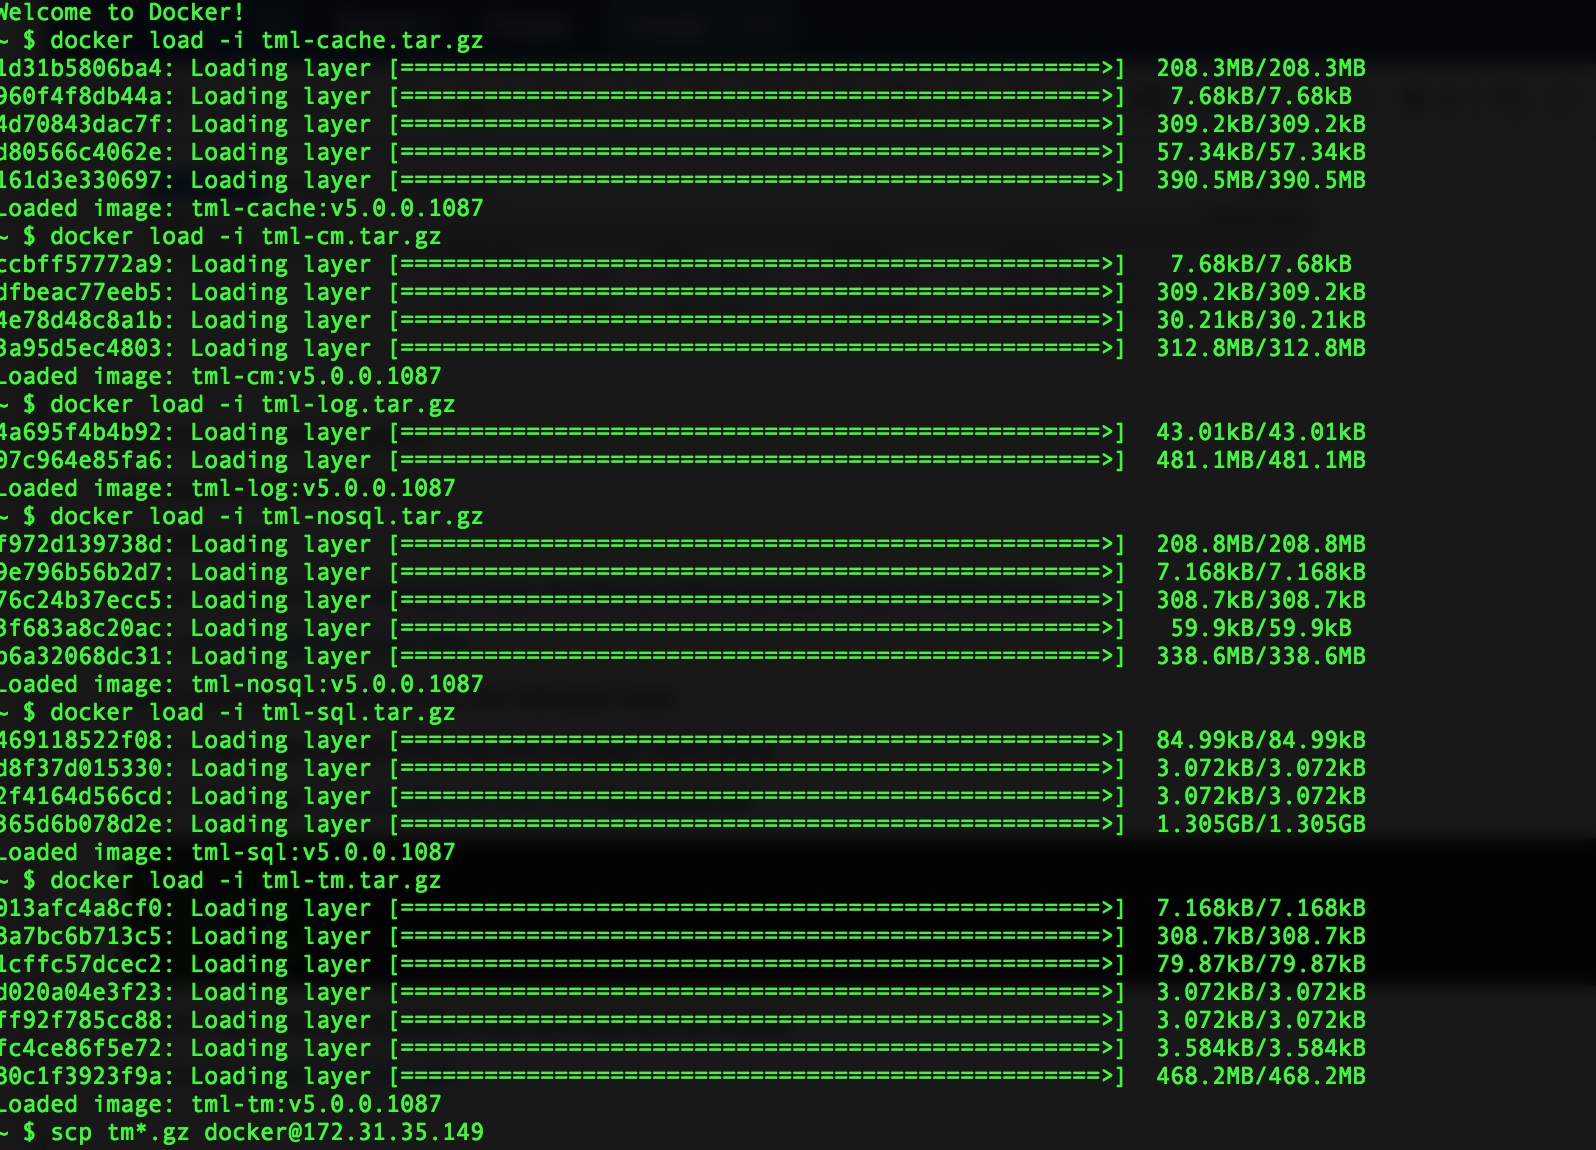
- Once the images are being loaded in the master node, ssh into the each of the worker nodes and scp the images, and load all the images in the worker node as well:

- Untar the tar -xvf tml-deploy.tgz:
./compose.sh manifest-aws-swarm.json

TML_CLUSTER_NAME: Tibco Mashery Local Reference Cluster
TML_CLUSTER_TAG: 169520f85a36e474ea1b06d4c87e111d
TML_ZONE_NAME 0: local
TML_ZONE_COUNT: 1
TML_RELEASE_VERSION: 5.0.0
- List the nodes:
docker node ls

ID                            HOSTNAME                                      STATUS              AVAILABILITY        MANAGER STATUS      ENGINE VERSION

hee56t3jntdm6tfv10y02vpyo *   ip-172-31-0-125.us-west-2.compute.internal    Ready               Active              Leader              18.06.1-ce
46uy8lpt1iwyg29j5irft2vc5     ip-172-31-35-149.us-west-2.compute.internal   Ready               Active                                  18.06.1-ce
- Create the cluster:
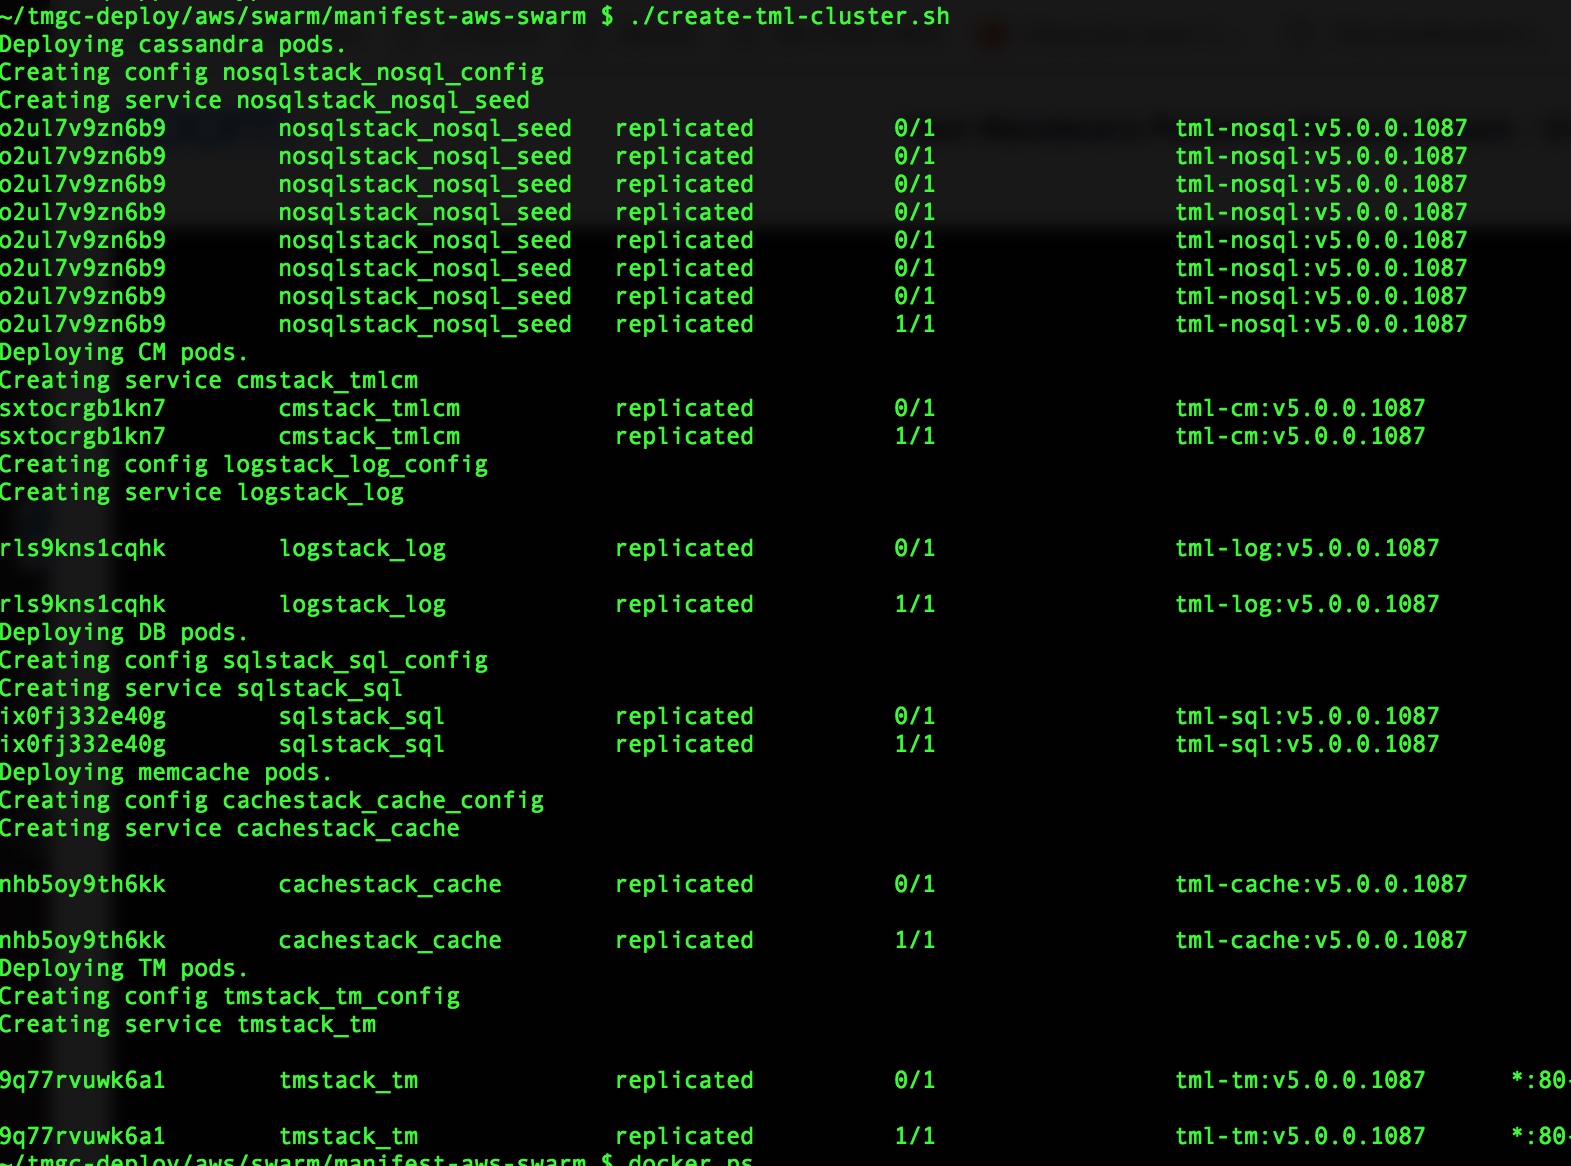
- Once it is complete, to check which nodes got deployed on Master/slave use:
docker ps
- To login to any pod inside node:
ssh docker@master-ip
docker ps, use docker exec to get into the pod.

Ensure that all the pods are ACTIVE.
When the cluster is created, it creates a load balancer.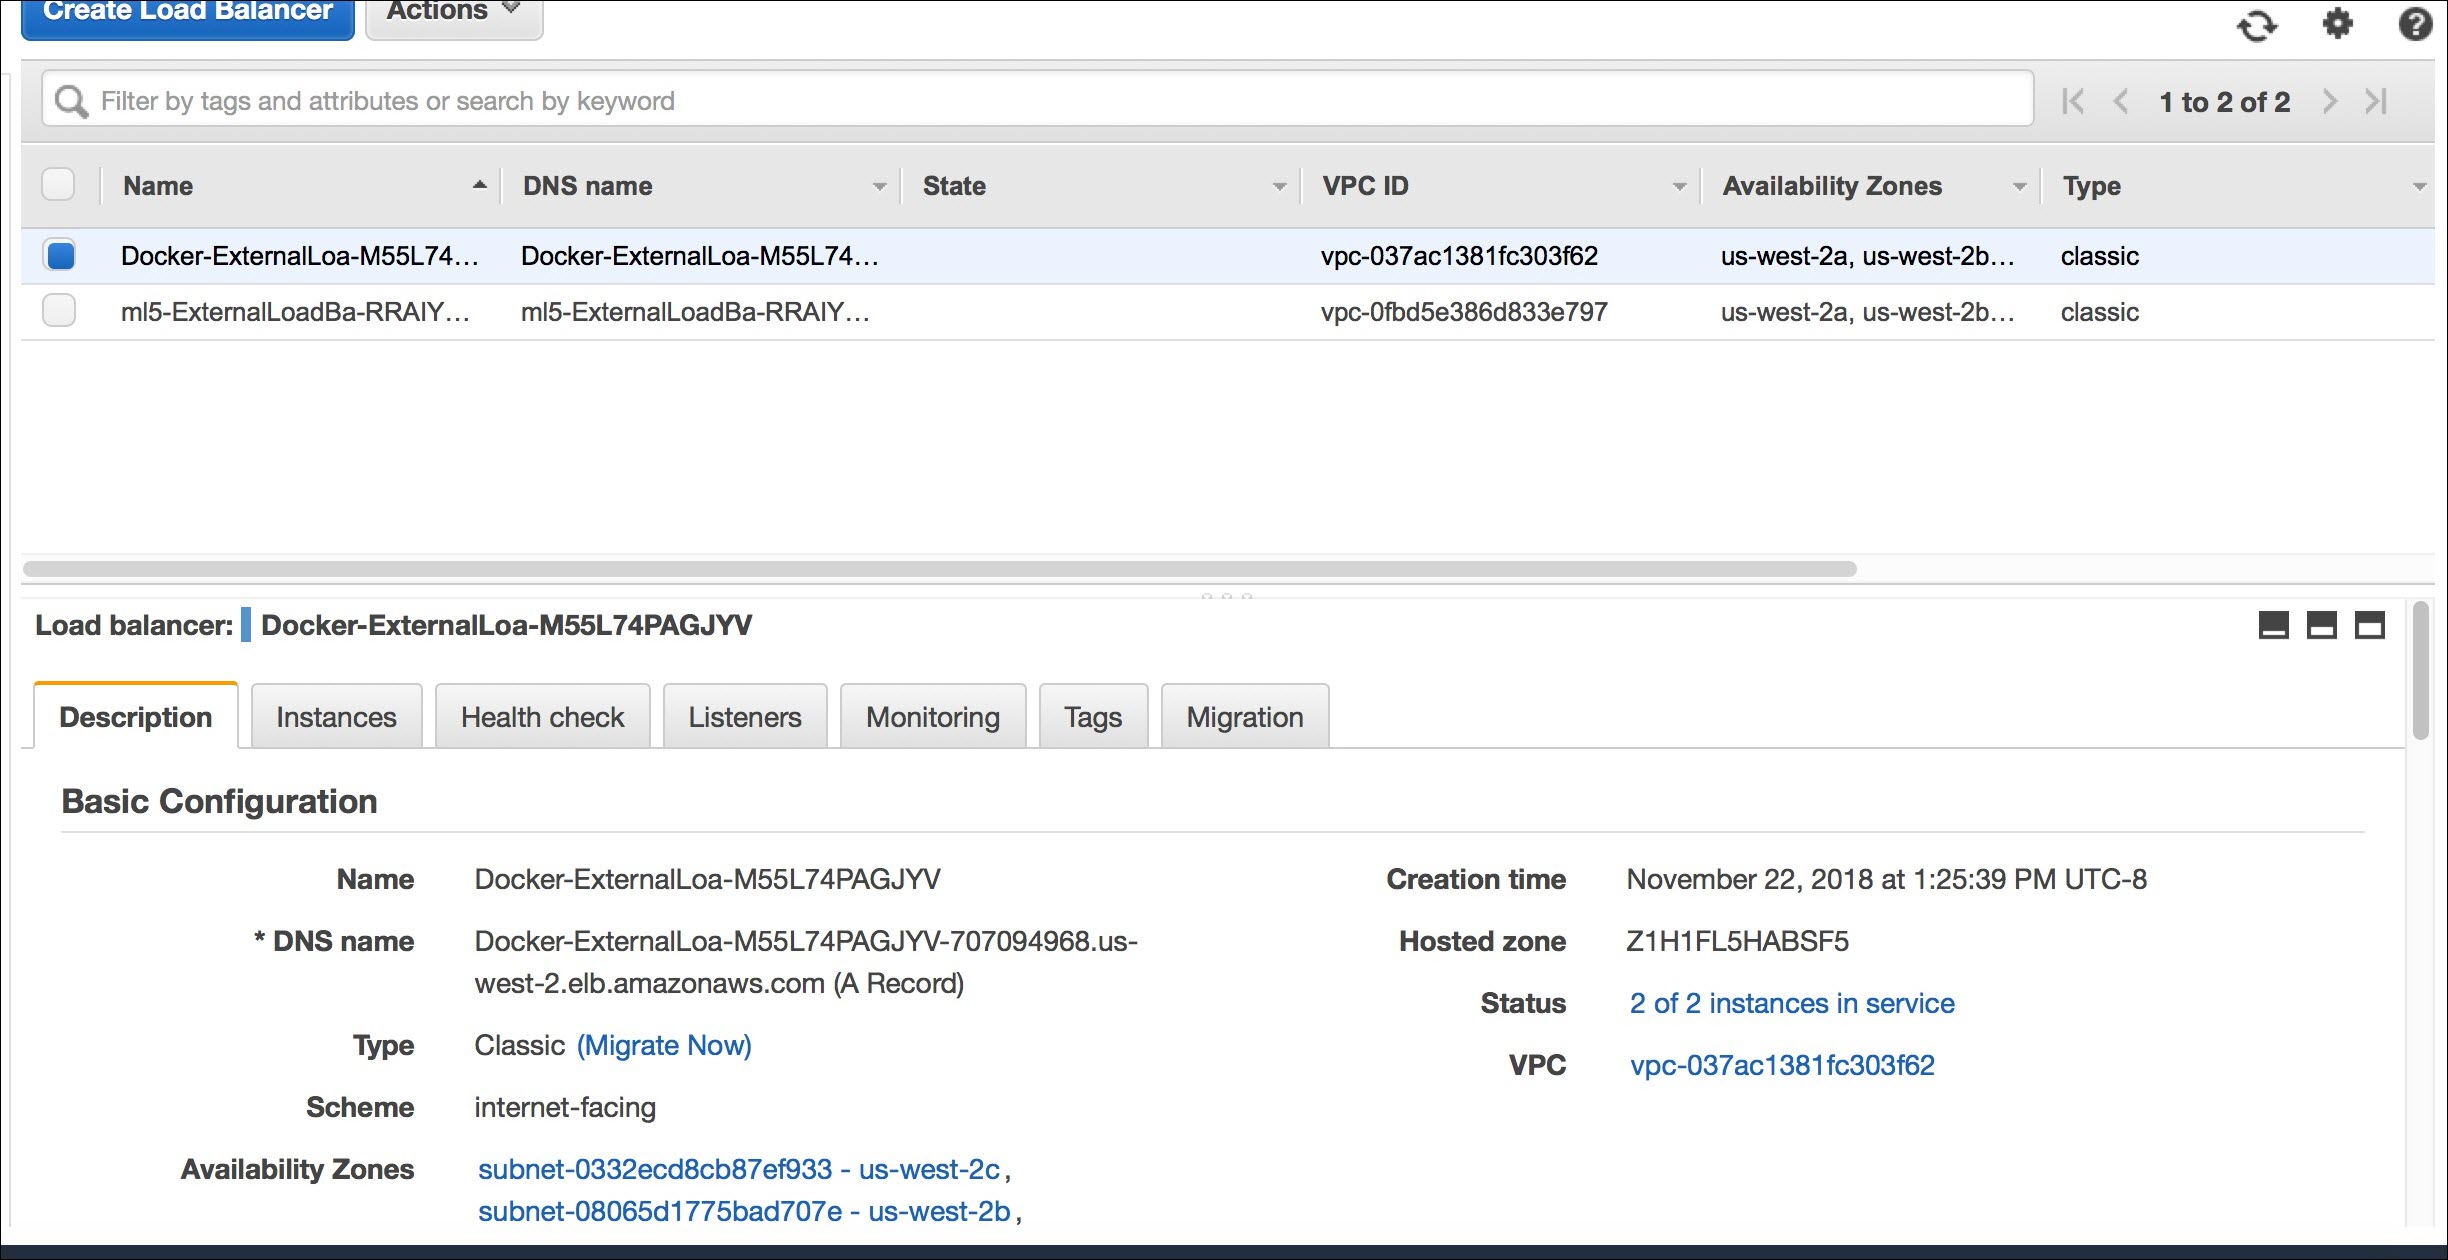
- Use the load balancer and make a TIBCO Mashery call.
curl -v -H 'Host:api.example.com' 'http://LB/v1/api/patient/1234/qatest/testRequestInfo.php?api_key=3bvu8u3p8k5vjxmhrs6tnd6e' * About to connect() to 10.0.0.15 port 80 (#0) * Trying 10.0.0.15... * Connected to 10.0.0.15 (10.0.0.15) port 80 (#0) > GET /v1/api/patient/1234/qatest/testRequestInfo.php?api_key=3bvu8u3p8k5vjxmhrs6tnd6e HTTP/1.1 > User-Agent: curl/7.29.0 > Accept: */* > Host:api.example.com > < HTTP/1.1 200 OK < X-Mashery-Responder: 666b4bc15de2 < Content-Type: text/plain; charset=UTF-8 < Date: Thu, 22 Nov 2018 22:07:15 GMT < X-Powered-By: PHP/5.3.3 < Content-Length: 640 < TIME NOW: 2018-11-22 14:07:15 ================================ Server Script: /internal/patients/1234/info/qatest/testRequestInfo.php Query params: api_key=3bvu8u3p8k5vjxmhrs6tnd6e Request Method: GET Request Protocol: HTTP/1.1 Requested URI: /internal/patients/1234/info/qatest/testRequestInfo.php?api_key=3bvu8u3p8k5vjxmhrs6tnd6e REQUEST HEADERS: Array ( [host] => content.mock.mashery.com [Accept] => */* [User-Agent] => Mashery Proxy [X-Original-User-Agent] => curl/7.29.0 [X-Forwarded-For] => 10.0.0.7, 34.221.248.122 [X-Forwarded-Port] => 80 [X-Forwarded-Proto] => http [Connection] => keep-alive ) -
Delete the cluster using:
./delete-tml-cluster.sh
- Delete k8 cluster using:
./delete-k8-cluster.sh
Copyright © Cloud Software Group, Inc. All rights reserved.