Debugging SDK Processor Remotely
Preparing Traffic manager container
- Set up the cluster and connect to the
tml-tm container.
docker ps | grep -i tml-tm
docker exec -it {tml-tm-container_id} bash - Enable
Javaproxy with debugger agent by executing the following command:
Edit the file /opt/javaproxy/proxy/proxy.ini and add below line at the end
-agentlib:jdwp=transport=dt_socket,address=8001,server=y,suspend=n
Save the changes. - Restart the proxy as shown below.
/etc/init.d/javaproxy restart
Preparing the IDE
Eclipse
- Open IDE and configure the debugger to connect to a remote port.
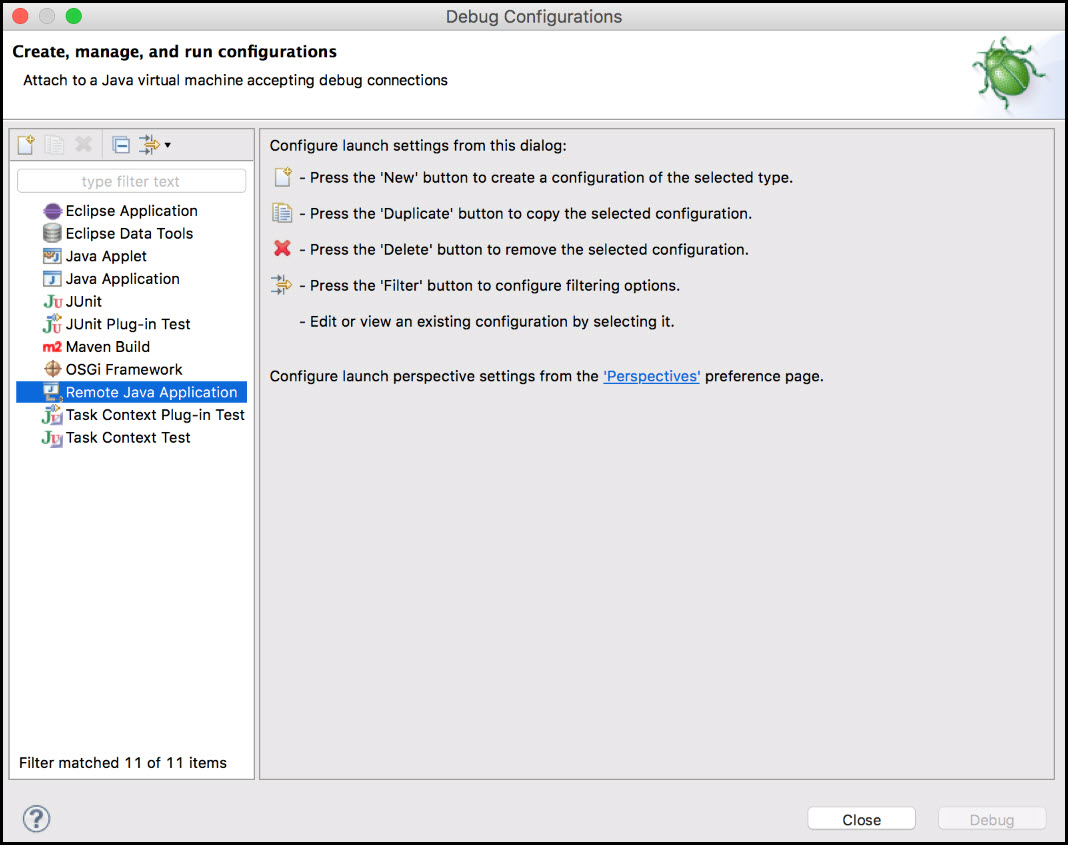
- Click Debug Configurations.
- The Debug Configurations window opens, here click Remote Java Application.
- Click New button, , to create a new configuration. The right side of the screen displays options to create new configuration.
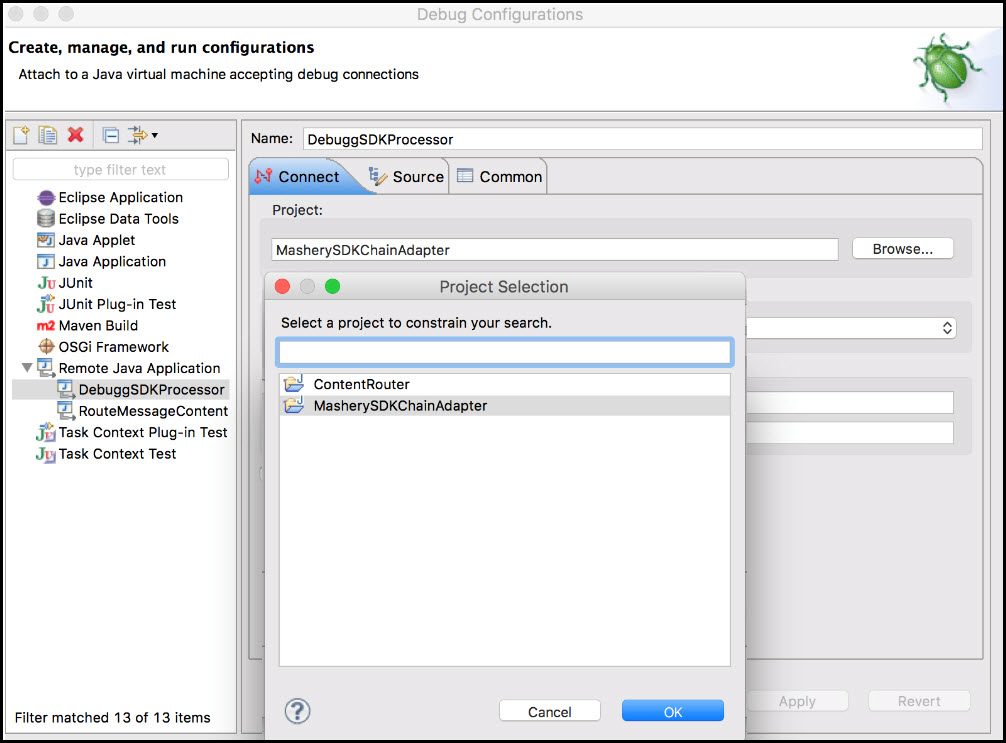
- In the Connect tab, select the Project by clicking Browse. In the Project selection window, select the SDK Processor's project.
- In the Connection Properties field, for the Host field, input the node's IP and for Port, input 8001. Click Apply and then click Debug.


IntelliJ Idea
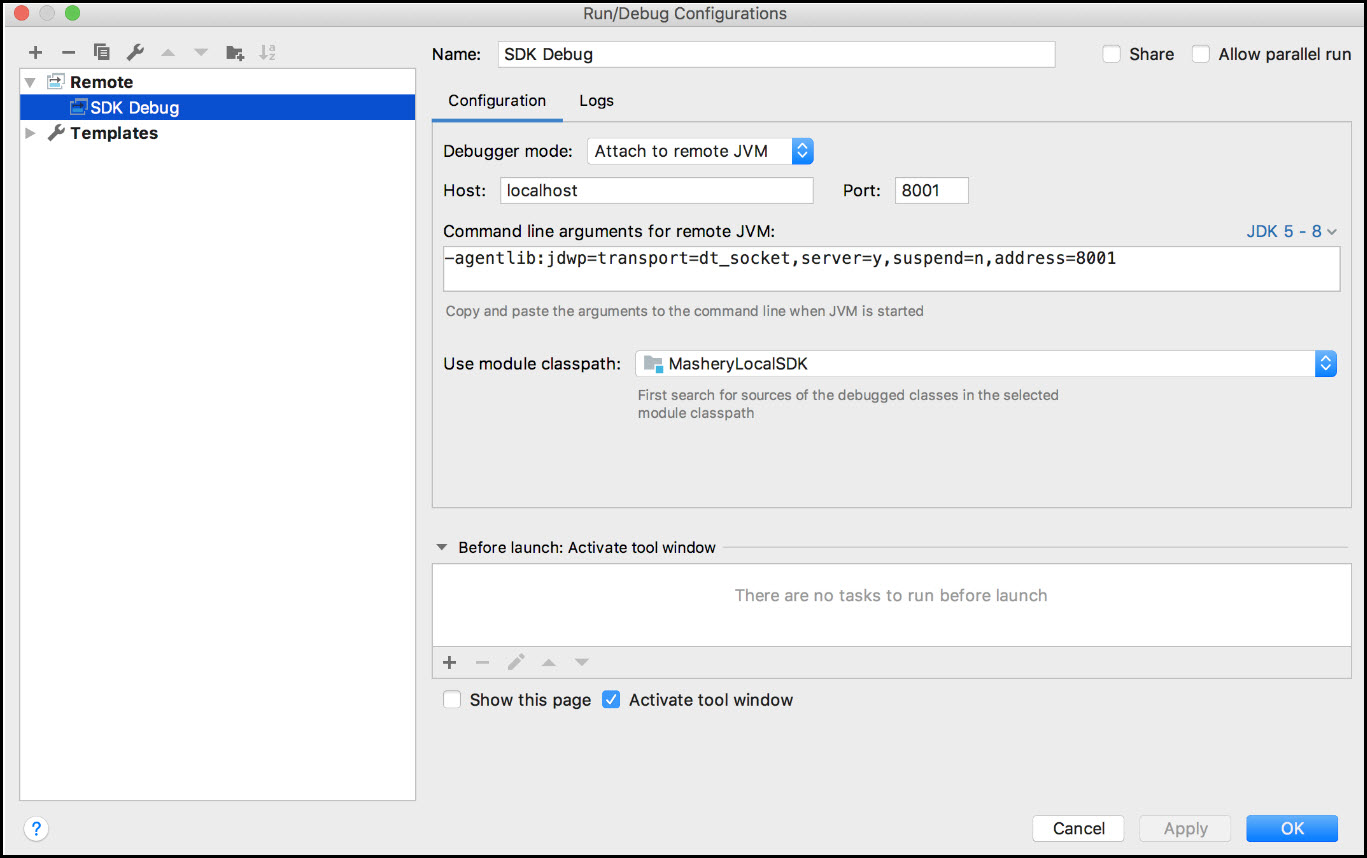
- From the main menu, click Run option and select Edit Configuration.
- Click
 button and select
Remote from the configuration list.
button and select
Remote from the configuration list.
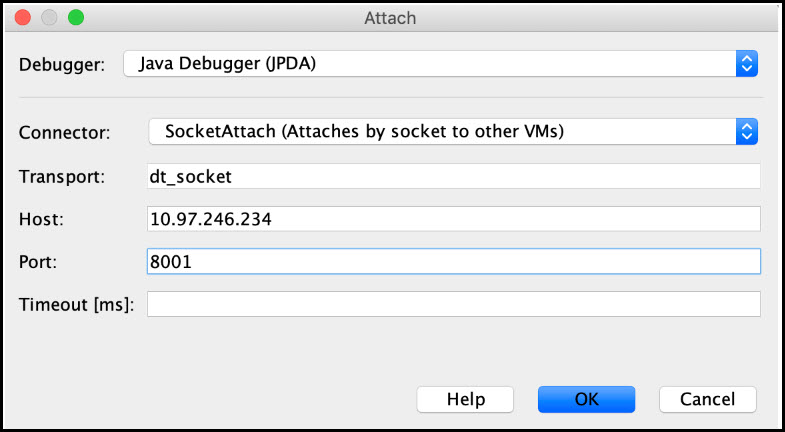
- In the tree structure, click SDK Debug. In the Debugger mode field, select Attach to remote JVM. For the Host field, input the node's IP and for Port, input 8001.


Fix, Build and Deploy
Fix
Fix the issues found on debugging by fixing the code.
Deploy
- Find the container ID of the
tml-tm container using the following command:
docker ps | grep -i "tml-installer"
- Copy the
upload-deploy-sdk-processor.sh script from the installer to the local path.
docker{tml-installer-contianer-id}:/var/jenkins_home/docker-deploy/onprem/quick_start/system/upload-deploy-sdk-processor.sh {path_to_save} - Use the
upload-deploy-sdk-processor.sh script to upload and deploy the already built SDK processors in the
tml-tm container.
./upload-deploy-sdk-processor.sh --help Usage: ./upload_deploy_sdk_processor.sh [--adapter-zip <ADAPTER_FULL_PATH>] [--tml-tm-container <TM_CONTAINER>] ( --adapter-zip | -a ) - path/filename of the adapter zip to be uploaded to container ( --tml-tm-container| -c ) - TML-TM Container ID where adapter to be uploaded Example: ./upload-deploy-sdk-processor.sh --adapter-zip /home/user/MasheryLocalSDK/dist/tml-mashery-customer-extension.zip --tml-tm-container 9c9e09ea1f95 - Log in the
tml-tm container,
docker exec -it {tml-tm-container-id} bashand restart thejavaproxy service using the following command:/etc/init.d/javaproxy restart
Copyright © Cloud Software Group, Inc. All rights reserved.