Downloading Data Model from Salesforce
In a company, you may have your own data model for your business needs. Many companies use Salesforce for managing customer data, and need to extend the TIBCO MDM service to include additional salesforce metadata. You can download you own data models from Salesforce. These data models can then be mapped to the sample data model template or you can create custom model for your TIBCO MDM service.
Procedure
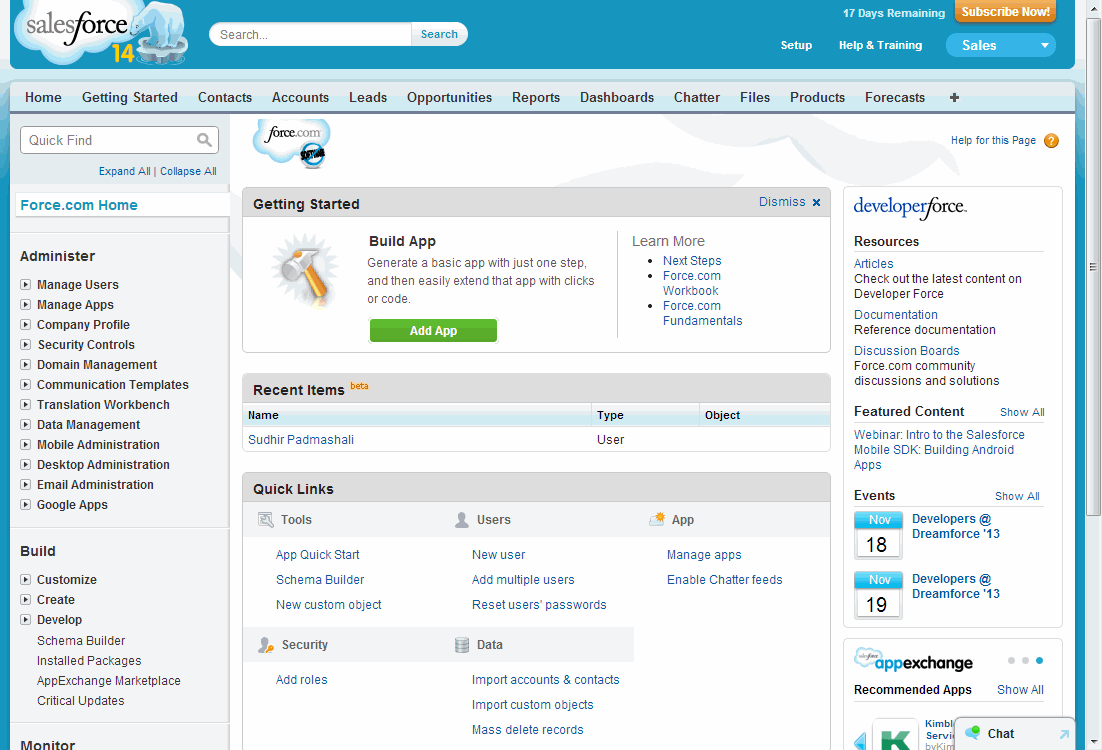
- Click Setup. The Administer page is displayed.
-
Click
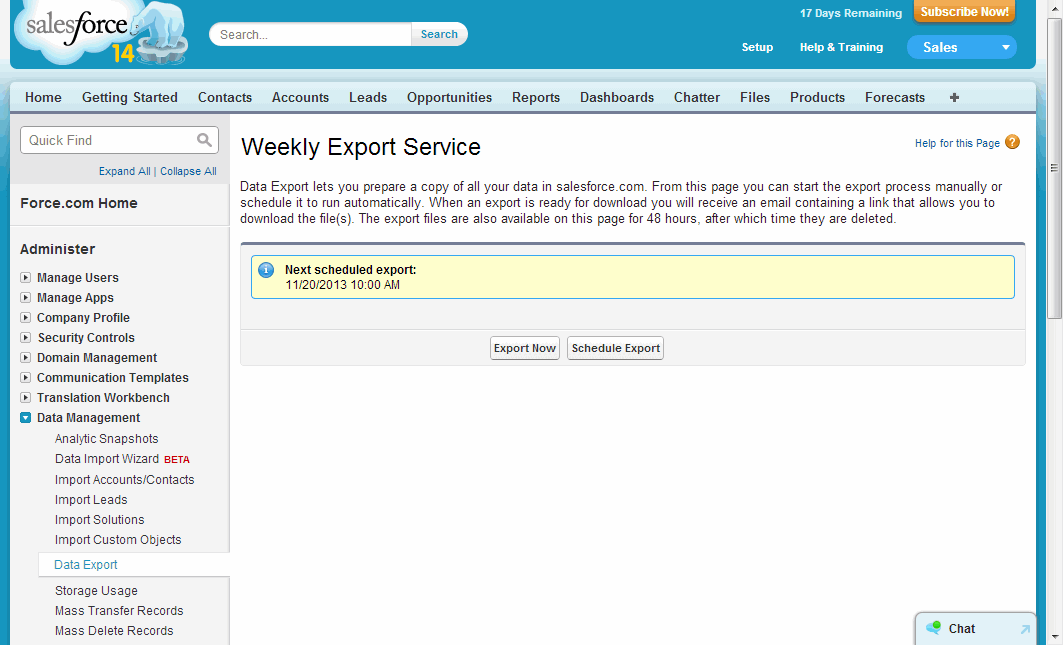
 .The Data Management options are displayed.
- The Weekly Export Service page is displayed.
-
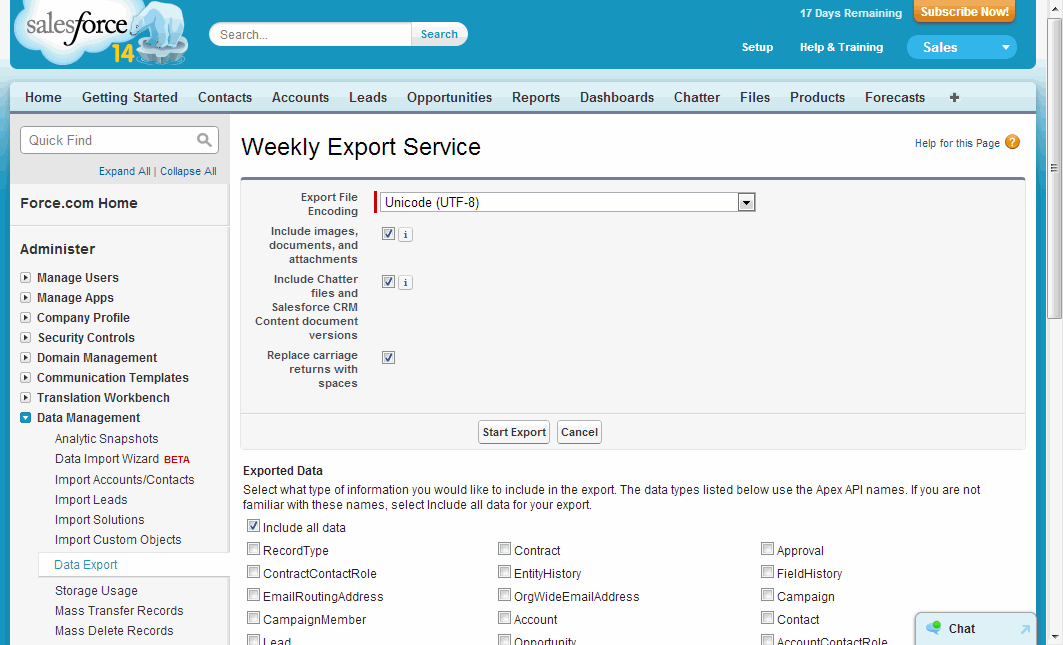
On clicking
Export Now, the Weekly Export Service page with the download parameter is displayed.
- Select Unicode (UTF-8) from the Export file Encoding drop-down.
- Select the Include images, documents, and attachments check box.
- Select the Include Chatter files and Salesforce CRM Content document versions check box.
- Select the Replace carriage returns with spaces check box.
- Select the Include all data check box from the Exported Data section.
- Click Start Export. The export is initiated with the message Your export has been queued. You will receive an email notification when it is completed.
-
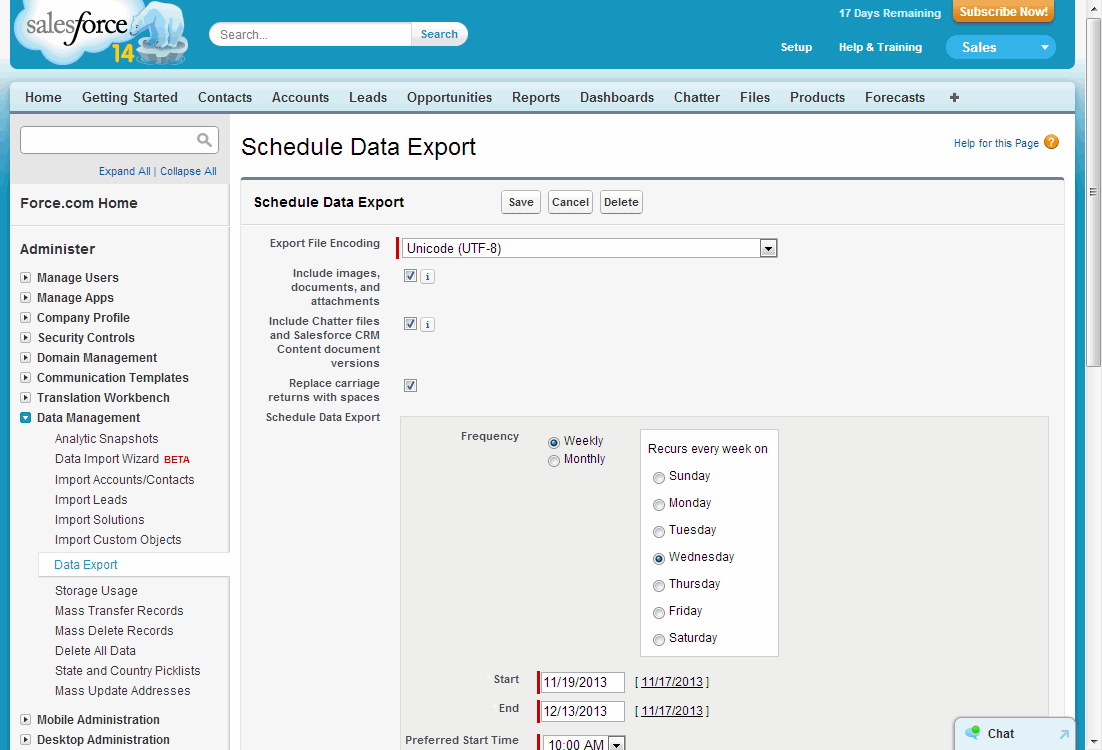
On clicking
Schedule Export, the Weekly Export Service page with the schedule data export parameter is displayed.
- Select Unicode (UTF-8) from the Export file Encoding drop-down.
- Select the Include images, documents, and attachments check box.
- Select the Include Chatter files and Salesforce CRM Content document versions check box.
- Select the Replace carriage returns with spaces check box.
- Select the frequency from the Schedule Data Export section.
- Select the Include all data check box from the Exported Data section.
- Click Save.
- Click Schedule Export. The export is initiated with the message Your export has been queued. You will receive an email notification when it is completed.
Copyright © Cloud Software Group, Inc. All rights reserved.