Mass Updating Records in Advanced Mode
- Procedure
- Click
.
The Basic mode is displayed by default. - Click
Advanced Mode on the upper right corner.
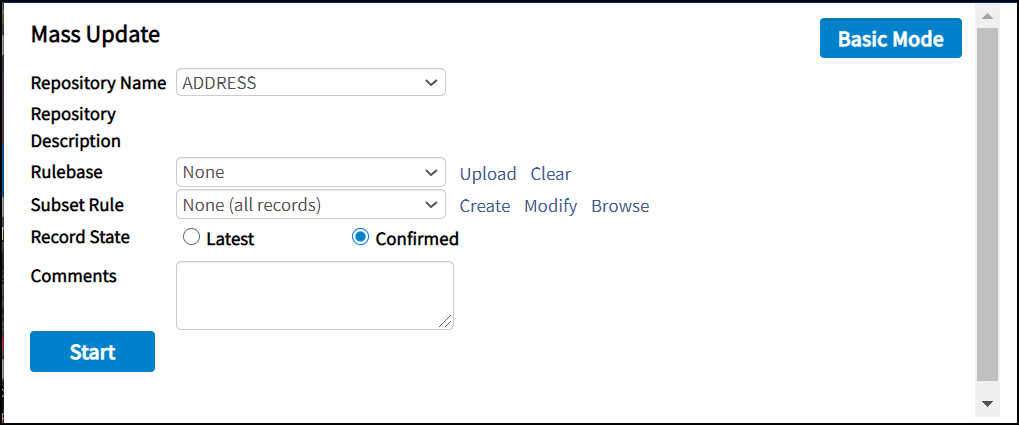
The Mass Update page is displayed. - Select a rulebase from the Rulebase drop-down list. The drop-down list shows a list of rulebases only those uploaded from the Mass Update page. You can select a rulebase from the drop-down list or upload a new rulebase.
- To upload a new rulebase, click
Upload. If the selected rulebase has input variables declarations, you can enter values for the rulebase input parameters on the Advanced Mass Update page.
Note:
- While declaring variables in a rulebase, make sure the variable declared as input has a name that differs from the repository attribute name.
- This rulebase file must specify which record attribute values of a specific repository need to be replaced with new values. Files that are not available in this directory, but have an entry in the ConfigurationDefinition table, are not shown in the drop-down list.
- Files without an XML extension are not shown in the rulebase drop-down list.
When a rulebase is selected, the Rulebase Parameters pane is populated. The variable names are derived from the selected rulebase name. In the rulebase file, if no variable is defined as
usage = input, no parameters are displayed on the user interface. - Optionally, you can specify a subset of records in the Subset Rule drop-down list. If a subset is specified, the specific record versions belonging to that snapshot get the required data. If no subset is specified, all records of the repository are updated.
You can:
Click Create to create a new subset. Any subset created this way is a private subset, and is only visible to the user who created it.Click Browse to browse an existing subset.Click Modify to modify an existing subset. - By default, the last confirmed record version is selected. However, you can also select unconfirmed versions by selecting the Latest Version option.
- You can add any process-related comments in the Comments field.
- Click
Start.
A confirmation message is displayed to process the mass update. Click OK. The mass update process starts and a mass update workflow is fired. A success message is displayed with an Event Progress link.Note: If no repository exists in a company, or if you have insufficient permissions for mass update on all repositories, the drop-down lists for repository, subset, and rulebase are disabled. - Click the Event Progress link to view the corresponding event details.
Note: When you switch between the two mass update modes, no information is saved and the following warning is displayed:
All changes made until now are lost, is it ok to switch the mode?