Configuring TIBCO MDM for WebLogic Application Server

Using the Configuration wizard, create a WebLogic domain.

Prerequisites

Configure the following properties in the Configurator:

Configurator Properties for WebLogic Application Server
Property Name Location Value Description
Application Server Name Node ID > Application Server WebLogic The name of the application server. If the value is WebLogic, it refers to the WebLogic application server.
JNDI Naming Service URL Node ID > Application Server > WebLogic t3://localhost:7001 The Uniform Resource Locator (URL) used by the WebLogic application server to expose the J2EE Naming service. This value is has already been defined in the application server configuration.
Encryption Provider InitialConfig > Security Provider > IBM The default value is com.ibm.crypto.provider.IBMJCE. This value typically does not need to be changed. Refers to the name of the Java class, which is the default security encryption on the IBM Java Virtual Machine. This value is sufficient.
JNDI Context Factory Node ID > Application Server > WebLogic The default value is weblogic.jndi.WLInitialContextFactory.This value typically does not need to be changed. The Java class that initiates a connection to the naming service of the application server.

Procedure

  1. Configure the Server
    1. Start the WebLogic application server.
    2. Verify that an instance of WebLogic is running by logging into the admin console (use the user name and password you provided during domain creation)
  2. Set up Timeout Seconds
    1. Go to Domain > Configuration > JTA tab.
    2. Set the Timeout Seconds to 36000.
    3. Click Save.
  3. Enable the Archived Real Path to dynamically deploy the resource files of a customized page that is built using UI Builder and to improve the page loading performance.
    1. Go to Domain > Configuration > Web Application.
    2. Select the Archived Real Path Enabled check box.
    3. Click Save.
  4. Set up JDBC Drivers for Oracle - WebLogic
    1. In the left pane, expand Services > > Data Sources. The Summary of JDBC Data Sources screen is displayed.
    2. In the Data Sources section, click the New button to create a new data source. The following three options are displayed: Generic Data Source, GridLink Data Source, and Multi Data Source.
    3. Select the Generic Data Source option.
    4. In the Name field, specify a name for the JDBC Data Source.
      Note: The name and JNDI name should be eCMDataSource.
    5. Select Database Type as Oracle.
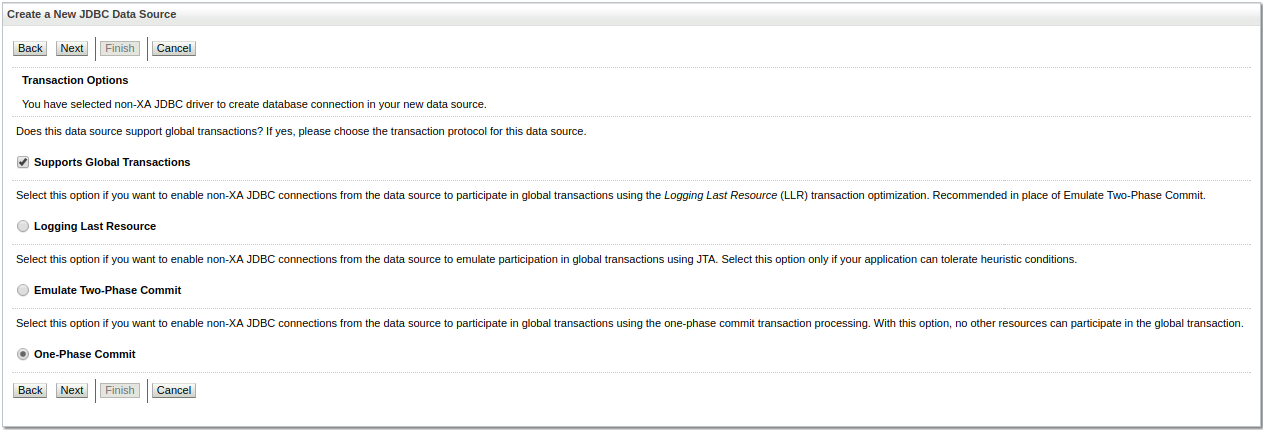
    6. Click Next. The Create a New JDBC Data Source screen is displayed.
    7. Select Oracle’s Driver (Thin) for Service Connections; Versions: Any from the Database Driver drop-down list.
    8. Click Next. Click Next on the following screen.
    9. Enter the details in the Database Name, Host Name, Port, Database User Name, Password and Confirm Password fields. Note that the Database Name = SID.
    10. Click Next.
    11. Click Test Configuration.
    12. Click Next. You are prompted to select targets to deploy your new JDBC data source.
    13. Select the Server and click Finish.
  5. Configure the Connection Pool
    1. In the left pane, click Services > > Data Sources > > eCMDataSource. The Settings for eCMDataSource screen is displayed.
    2. Click the Connection pool tab.
    3. Expand Advanced at the bottom of the screen.
    4. Select the Test Connections on Reserve check box.
    5. Specify 7200 in the Inactive Connection Timeout field.
    6. Specify 10 in the Maximum Waiting for Connection field.
      Note: Maximum Capacity for connection settings is 100.
    7. Select the Ignore In-Use Connections and Remove Infected Connections Enabled check boxes.
    8. Click Save. The connection pool configuration for the eCMDataSource is saved.
    9. Copy the following files from %TIBEMSDIR%\lib to %BEA_HOME%\user_projects\domains\domain name\lib and $MQ_HOME/lib/external
    • tibjms.jar
  6. Modify the startWebLogic.cmd or startWebLogic.sh file.
    1. Ensure that the WebLogic Application Server is running.
    2. Edit the startWebLogic.sh or startWebLogic.cmd file located under $BEA_HOME/user_projects/domains/domain_name/bin to add the following lines in the # START WEBLOGIC section:
      Note: If you are using Windows operating system, replace $ with %text% in the following example:
      java ${JAVA_VM} ${MEM_ARGS} ${JAVA_OPTIONS} 
      -Dweblogic.Name=${SERVER_NAME} 
      -Dweblogic.management.username=${WLS_USER} 
      -Dweblogic.management.password=${WLS_PW} 
      -Dweblogic.ProductionModeEnabled=${STARTMODE} 
      -DMQ_HOME=${MQ_HOME}
      -DMQ_CONFIG_FILE="${MQ_HOME}/config/ConfigValues.xml" 
      -DMQ_COMMON_DIR=${MQ_COMMON_DIR}  
      -DORACLE_HOME=${ORACLE_HOME}
      -DNODE_ID=Member1
      -DMQ_LOG=${MQ_LOG} 
      -DTNS_ADMIN=${ORACLE_HOME}/network/admin 
      -DPATH=${MQ_HOME}/bin:${WL_HOME}/server/bin:${WL_HOME}/common/bin:${ORACLE_HOME}/bin:/usr/bin 
      -Djava.security.policy="${WL_HOME}/server/lib/weblogic.policy" weblogic.Server
      Note:
      • To deploy the Configurator in WebLogic, set the following parameter: -Dcatalina.home=${MQ_LOG}
      • To deploy the TIBCO MDM custom pages to a common folder in the cluster environment, set the following parameter: set MQ_CUSTOMFORMS_HOME=/home/apps/MDM_Installations/MDMversionWLGORA_COMMON
      • Add the following environment variable in the WebLogic startup section: -DMQ_CUSTOMFORMS_HOME=/home/apps/MDM_Installations/MDMversionWLGORA_COMMON
    1. Optional: To improve the TIBCO MDM performance, add the following JVM parameter while starting the application server:
      -Dorg.apache.xml.dtm.DTMManager="org.apache.xml.dtm.ref.DTMManagerDefault"
    2. To monitor application server JVM, add the following JVM arguments:
      -Dcom.sun.management.jmxremote.authenticate=false 
      -Dcom.sun.management.jmxremote.ssl=false 
      -Dcom.sun.management.jmxremote.port=9999
    3. Set up TIBEMSDIR=path environment variable for EMS installation. For example: set TIBEMSDIR=C:\Tibco\ems5.1\ems\5.1
    4. The CLASSPATH set in the WebLogic startup script must include the location of the JAR files. Include the following JAR files in the CLASSPATH variable.
    • Windows:
      %TIBEMSDIR%\lib\tibjms.jar;
%TIBEMSDIR%\lib\tibjmsapps.jar;
%TIBEMSDIR%\lib\tibrvjms.jar;
%TIBEMSDIR%\lib\tibjmsadmin.jar;
%MQ_HOME%\lib\external\xbean.jar;
%MQ_HOME%\lib\external\log4j-1.2.17.jar;
%MQ_HOME%\lib\external\commons-logging-1.2.jar;
%MQ_HOME%\lib\external\gwt-user.jar
%MQ_HOME%\lib\external\dom4j-1.6.1.jar;
%MQ_HOME%\lib\external\hibernate\hibernate3.jar;
%MQ_HOME%\lib\external\javassist-3.12.0.GA.jar;
%MQ_HOME%\lib\external\slf4j-api-1.7.16.jar;
%MQ_HOME%\lib\external\stickyConfiguration.jar
    • UNIX:

      $TIBEMSDIR/lib/tibjms.jar:
$TIBEMSDIR/lib/tibjmsapps.jar:
$TIBEMSDIR/lib/tibrvjms.jar:
$TIBEMSDIR/lib/tibjmsadmin.jar:
$MQ_HOME/lib/external/xbean.jar:
      $MQ_HOME/lib/external/log4j-1.2.17.jar:
$MQ_HOME/lib/external/commons-logging-1.2.jar:
$MQ_HOME/lib/external/gwt-user.jar
$MQ_HOME/lib/external/dom4j-1.6.1.jar:
$MQ_HOME/lib/external/hibernate/hibernate3.jar:
$MQ_HOME/lib/external/javassist-3.12.0.GA.jar:
$MQ_HOME/lib/external/slf4j-api-1.7.16.jar:
$MQ_HOME/lib/external/stickyConfiguration.jar:$CLASSPATH