Installing and Configuring Promotion Utility (GUI mode)
You can install and configure MFT Promotion Utility in the GUI mode.
Before you begin
You must set the JAVAFX_HOME environment variable before you install and configure the Promotions Utility.
Note: If you are using Java 8, this prerequisite is not applicable and you do not have to set up the
JAVAFX_HOME environment variable.
- Go to URL: https://openjfx.io and download JavaFX.
Note: If you are using Java 11 or higher, download JavaFX because Oracle does not ship JavaFX with Java.
- Extract the contents of the downloaded JavaFX zip file to a new directory.
- Set an environment variable with the name
JAVAFX_HOME that points to the runtime directory.
- For Linux:
export JAVAFX_HOME=/path/to/javafx-sdk-12.0.2 - For Windows
set JAVAFX_HOME="\path\to\javafx-sdk-12.0.2"
- For Linux:
- Procedure
- Download MFT Promotion Utility from the following location and save it.
MFT-Install/distribution/MFTPromotionUtility/MFTPromotion.zip
- Unzip
MFTPromotion.zip to a new directory. For example:
c:\MFTPromote
- Choose one of the following ways to start the MFT Promotion Utility GUI and use the GUI mode:
Through Windows Explorer
Navigate to the following folder:
c:\MFTPromote\bin
Open the following file:
- promoteGUI.bat (or promoteGUI.sh on UNIX) if you are using JAVA 11 or higher
- promoteGUI-java8.bat (or promoteGUI-java8.sh on UNIX) if you are using JAVA 8
Through a DOS promptEnter the following command to change the directory:
cd \MFTPromote\bin
Enter the following command:
- promoteGUI.bat (or promoteGUI.sh on UNIX) if you are using JAVA 11 or higher
- promoteGUI-java8.bat (or promoteGUI-java8.sh on UNIX) if you are using JAVA 8
The MFT Promotion Utility main screen is displayed.
- On the main screen, click
New Server to create configuration entries for your source and target servers.
The Define MFT Servers screen is displayed.
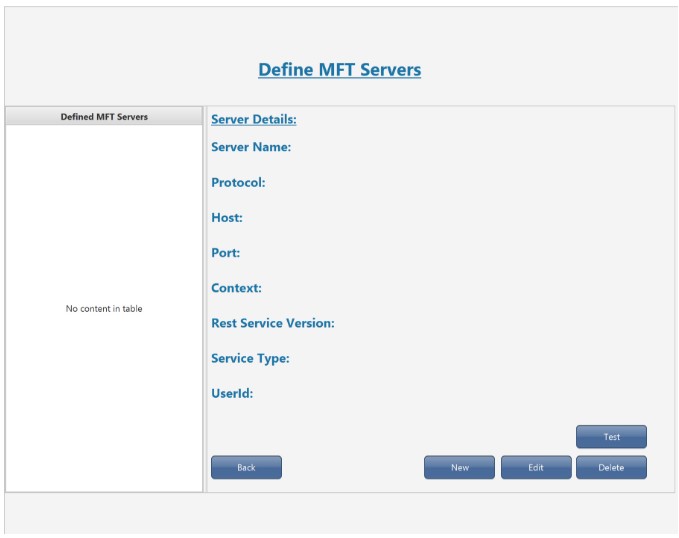
- On the Define MFT Servers screen, click
New.
The New Server screen is displayed.
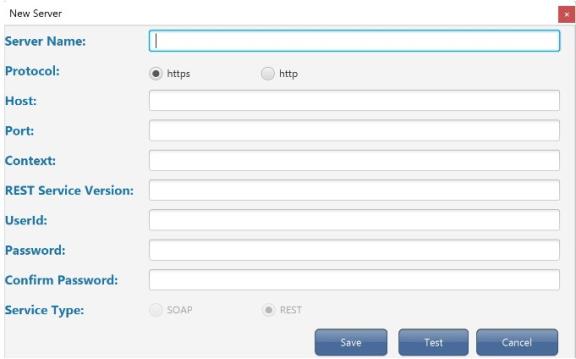
- Enter the details in the
New Server
screen and click
Test.
The details entered are then validated by connecting and authenticating to the required server.
- If the test is successful, click Save to save the server.
- Repeat steps 1-5 to save a second server.
The MFT Promotion Utility must have two servers, that is, a source server and a target server, defined and saved to promote components.