User Management Settings
Overview
This page explains how to use the Management tab to set: - User Settings - Permission Management - Property Management - Scoring Management - Deployment Management
When you select the Management tab, the ModelOps UI displays a series of management properties on the left side of the screen. Selecting an item displays its configuration options on the right. This example shows the configurable settings for User Settings > Personal Preferences.

Setting User Preferences
Personal Preferences You will see the following options under this section:
| Preference | Description |
|---|---|
| Only display edited artifacts in the Project Explorer. This setting does not affect artifacts displayed in Artifact Groups. | Artifacts you haven’t modified remain hidden |
| Always highlight differences in the Artifact Editor. | TBD |
| Automatically validate when changes to the artifact are added, saved, or loaded. Setting to On ensures validation is only performed when requested. | TBD |
| Show empty folders and projects in Project Explorer. | TBD |
| Display notifications when work list items have changed status. | TBD |
| Display all notifications (when not ticked, only info and error messages are displayed). | TBD |
| Open Project Explorer on large devices. | TBD |
| Turn On/Off Dark mode. | TBD |
Projects Configuration Selecting an available project displays: - A slider that shows or hides the selected project in the Project Explorer. - Permissions based on user’s role.

Account Settings Account settings displays any bindings between OpenID Connect identities and the currently logged-in user. You can also change the user password here. - Enter a new password as needed, then reenter it on the confirmation line. - Click Change Password. Changes take effect the next time you sign into the ModelOps Server.

Locked Artifacts Displays information about different locked artifacts.
Managing Permissions
Use the Permission Management panel to: - Add and delete users - Enable or disable users - Change user passwords - Assign roles to users
Changes you make from the web client persist across user sessions.
Deleting a role causes users with that role to immediately lose any permissions associated with that role, unless they have the same permissions assigned through another role. Conversely, any user who gains a new role or privilege can immediately take advantage of that change.
User Authentication and Authorization
Users are assigned roles based on the operations they are permitted to perform. For example, a business user might be tasked with modifying an artifact, a manager might be assigned the reviewer role to approve the change, and an IT department member might be assigned the administrator role to maintain ModelOps.
Due to this partitioning of responsibility, each user must authenticate to the ModelOps UI so ModelOps can determine the set of operations available to the user. The web client login method passes a user name and password to the ModelOps and, assuming the credentials are valid, returns a token that identifies the user in subsequent requests, which must include the token. ModelOps uses a security framework to authenticate and authorize users.
Users are assigned one or more roles, and roles are granted one or more permissions. Each permission specifies an object type, an action that can be performed on that object, and, optionally, a specific instance of the object.
Adding Users
- Under Permission Management, go to Users panel. Click the plus sign to add users who can access the TIBCO ModelOps Server.
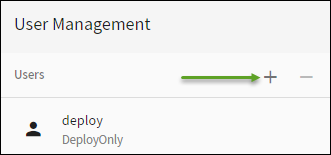
- Use the displayed dialog to:
- Add a user name
- Assign roles to the user
- Enter an email for the user to receive notifications
- Set the user password

- Click Save. The user is now added but not yet enabled. You can choose to enable the user now, or let the user remain disabled and return to Permission Management panel later to enable it. You might leave user accounts disabled for security reasons, such as when setting up accounts in advance.
Editing User Settings
- From Permission Management > Users panel, select a user and configure the following as required. Users currently logged into ModelOps are not affected until they log in again.
- Assign user roles.
- Change the selected user’s password. Use the dialog that appears to update the password and click Change password. Note: Changing your own user password logs you out of ModelOps.
- Enter an email for the user to receive notifications
- Enable or disable the account. Disabling a user also logs that user off ModelOps.
- Click Save.
Managing User Roles
Roles define the tasks that users can perform based on the privileges assigned to those roles.
As ModelOps administrator, you define the users who are permitted to log into the ModelOps UI, as well was what role or roles they play with the projects and artifacts contained therein. Role permissions are configurable.
The following shows the default ModelOps role-to-privilege mappings: - Reviewer, which can approve or reject committed artifact modifications. - Business User, which can import projects and perform all artifact-level operations. - Administrator, which has privileges to do everything that ModelOps supports. - Deploy Only, which can deploy an artifact from a project. To deploy an artifact, a user must have the Deploy privilege on the artifact being deployed. - User role, which is a role an admin defines.
Use the Permission Management panel > Roles panel to add, change or delete user roles and assign them to users. The following scenario describes how to add a new role and assign users and permissions to it.
- From the Permission Management panel, click Roles. In the example below, two roles are already defined, Reviewer and Business User. Each role contains an assigned user, Rob and Bill, respectively.
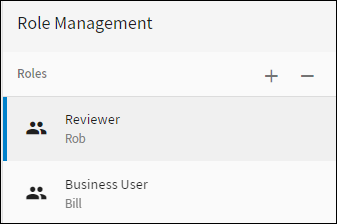
- In the Role Management panel, click the plus sign to create a new role. A list of assignable users appears below the Role name field.
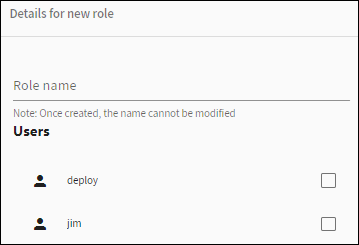
- Enter a role name and assign user(s) to the role as needed.
- Assign Privileges as follows:
- Privileges:
- Allow full access to all resources
- Administration Privileges:
- Allowed to manage users, roles, and permissions: Users with this permission can manage all users, roles, and permissions. Users without this permission are not permitted to do so.
- Manage servers: Allows users to manage the ModelOps Server, including creating and deleting deployment descriptors, viewing active login sessions, releasing locks held by other users, and shutting down the server
- Project Privileges:
- You can assign the following privileges to: all projects by leaving the Name field blank an individual project located in the drop-down list additional projects by clicking the plus sign next to the Approve privilege
- Supported Project-level Privileges:
- *: Allows all operations on the specified projects.
- Import: Allows importing projects and artifacts into the ModelOps, including adding new artifacts to existing projects.
- Read: Allows checking out the specified projects. A user must have read permission for a project to fetch or check out any of its artifacts.
- Write: Allows modifying the metadata of the specified projects.
- Delete: Allows deleting the specified projects.
- Approve: Allows approving/rejecting commits of the specified projects.
- Artifact Privileges:
- You can assign the following privileges to:
- all projects by leaving the Name field blank
- an individual project located in the drop-down list
- additional projects by clicking the plus sign next to the Approve privilege
- Supported Artifact-level Privileges:
- *: Allows all operations on the specified projects.
- Read: Allows fetching or checking out the specified artifacts
- Write: Allows modifying the specified artifacts
- Delete: Allows deleting the specified artifacts
- Deploy: Allows deploying the specified artifacts
- You can assign the following privileges to:
- Privileges:
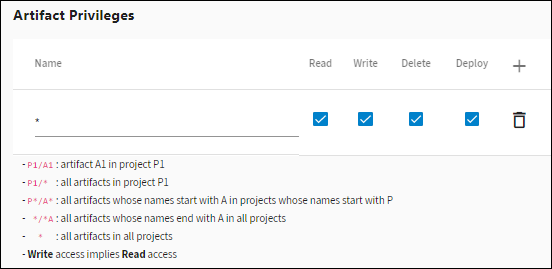
- Click Save.
Editing roles is similar — click the minus sign and click Save per operation.
Property Management
Use the Property Management section to define and edit properties of artifacts and models.
Managing Core Properties
This section allows you to add or delete core properties of for all artifacts.
- Click the plus sign and select which type of properties you wish to add.
- In the Create Artifact property section, click on Advanced option and add the property and description.
- You can also chose the following attributes:
- Is this property disabled?
- Is a property value required?
- Allow only one property value per artifact of project?
- Is this property definition auto-associated when creating a new artifact or project?
- Can this property definition be associated with projects?
- Can this property definition be associated with artifacts?
- Add prefix, suffix, and allowed artifact types. The new property will be saved automatically.
Managing Model Properties
This section allows you to add or delete model properties when scoring a model.
- Click the plus sign and select which type of model properties you wish to add.
- In the Create Artifact property section, click on Advanced option and add the property and description.
- You can also chose the following attributes:
- Is this property disabled?
- Is a property value required?
- Allow only one property value per artifact of project?
- Is this property definition auto-associated when creating a new artifact or project?
- Can this property definition be associated with projects?
- Can this property definition be associated with artifacts?
- Add prefix, suffix, and allowed artifact types. The new property will be saved automatically.
Scoring Management
Use the Scoring Management section to create Scoring Environments for your model artifacts.
A scoring environment is a client defined scoring environment configuration. Each scoring environment must have a unique name and zero to N predecessors. The predecessors define the scoring environments where the approved artifact revision must be promoted to. Further, an approved model artifact revision can be promoted to only one scoring environment per request.
The example below shows three such environments and their predecessor workflows: - Development: Scoring environment for developing scoring pipelines, scoring flows, and models. - Testing: Scoring environment for testing scoring pipelines, scoring flows, and models prior to placing them in production. - Production: Scoring environment for testing scoring pipelines, scoring flows, and models prior to placing them in production.
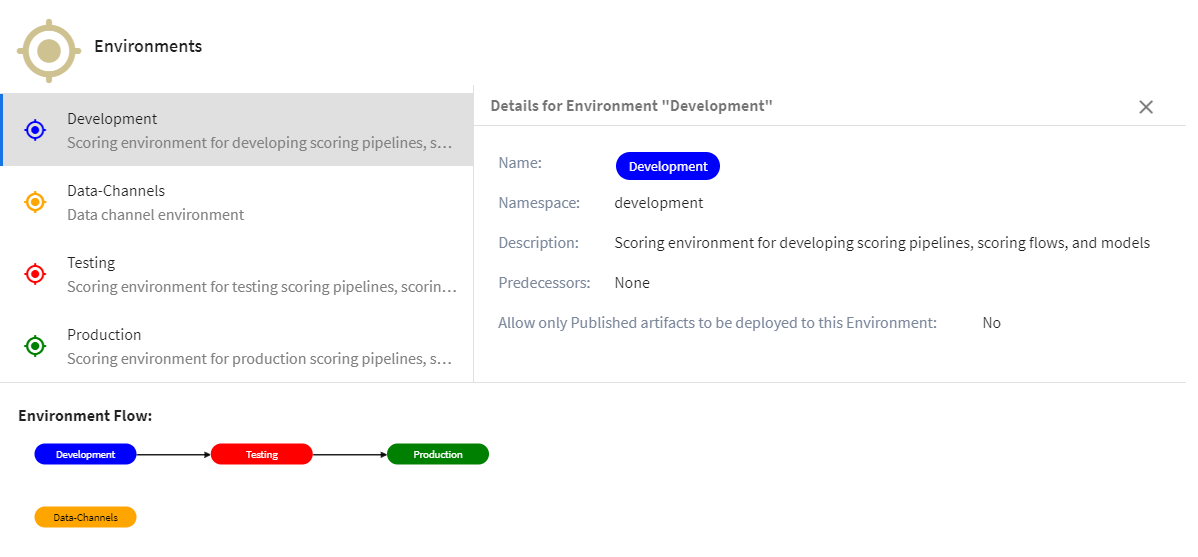
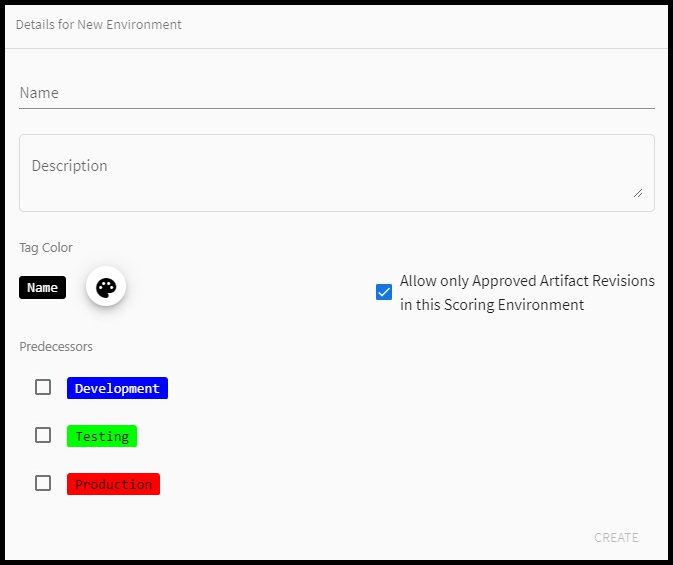
- To create an environment, click the plus sign.
- Create a unique name and add a description.
- Assign a color to represent the environment. 4 Select whether or not to allow only Approved Artifact Revisions in the environment.
- Assign a predecessor to the environment and click Create.
Deployment Management
Use the Deployment Management panel to manage: - deployment of artifacts - service addresses, which are building blocks for deployment descriptors
Managing Deployment Descriptors
You use deployment descriptors to configure how you want to deploy artifacts. Deployment descriptors are specific to an artifact and StreamBase operator and can be reused indefinitely.
Descriptors must be either be unique by Target Type, or within the same Target Type, and must contain unique URI(s), Service Name(s), or Service Address(es) per descriptor (for example, the same artifact can use the same service name if the Target StreamBase Operators are different).
- In the Deployment Descriptor Management panel, click the plus sign to create a new descriptor.
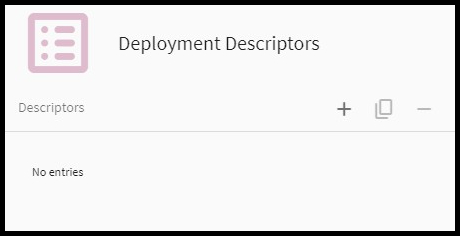
- Select an artifact from the drop-down list.
- Select a Target Type from the drop-down list:
- StreamBase URI (StreamBase 7 only)
- StreamBase Service Name
- StreamBase Service Address
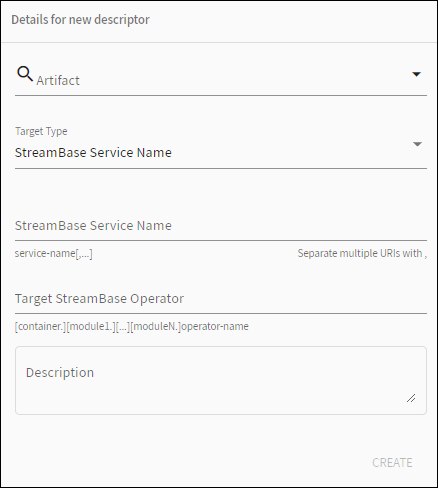
- Enter a StreamBase Service Name.
- Enter a Target StreamBase Operator.
- Enter a description and click Create.
Managing Service Addresses for Artifact Deployment
The Service Address panel is a convenience for creating “building blocks” when creating deployment descriptors; service addresses are not tied to a specific artifact.
- In the Service Address Management panel, click the plus sign to create a new service address. Refer to the following options that appear in the displayed dialog.
- Service Address Name
- Host Name
- Admin Port
- Userame
- Password

Note: Disabling the service address leaves the service address in the web client, but does not allow it to be selected for new deployment descriptors. Also, by disabling a service address, any existing deployment descriptor having the service address still works but not deployed to that service address.
- Enter a description and click Create.
