
RedHat OpenShift Installation
Table of Contents
Introduction
This guide’s intention is to help a user deploy TIBCO ModelOps on RedHat OpenShift Platform, regardless of which platform OpenShift is installed on.
Prerequisites
- Create a RedHat account
- Ensure OpenShift is installed
- Optional, In case of windows node is required, install opensift with hybrid network
- Download and install Tools Kubectl and OC (OpenShift CLI)
- Download and Install HELM Cli
- Download and Install Tekton CLI (Optional)
- Download and Install Lens (Optional)
Supported OpenShift Environments
ModelOps is supported on OpenShift running in these environments:
- vSphere (Datacenter)
ModelOps supports both installer-provisioned infrastructure (IPI) as well as user-provisioned infrastructure (UPI). Installer-provisioned infrastructure is recommended for a ModelOps installation.
To install an OpenShift cluster please use the official RedHat installation documents:
Installation
-
Log in into OpenShift cluster, using any of the two ways below:
-
Using the kubeconfig file:
export KUBECONFIG = $path/kubeconfig
-
Using OC for login:
oc login \
    https://api.${clustername}.${domain}:6443 \
    -u ${cluster_username} \
    -p ${cluster_password}
-
-
Create a namespace
kubectl create namespace ${namespace} -
Add the secrets
kubectl create secret generic elasticsearch-es-elastic-user \ --from-literal=${elastic_username}=${elastic_password} \ --namespace ${namespace} --dry-run=client --output=yaml 2>/dev/null > secret.yaml kubectl apply --filename secret.yaml kubectl create secret generic git-server \ --from-literal=${git_username}=${git_password} \ --namespace ${namespace} kubectl create secret generic nexus-server \ --from-literal=${nexus_username}=${nexus_password} \ --namespace ${namespace} kubectl create secret generic modelops-server \ --from-literal=${modelops_username}=${modelops_password} \ --namespace ${namespace} kubectl create secret generic scoring-admin \ --from-literal=${scoring_username}=${scoring_password} \ --namespace ${namespace} -
Install Helm charts
helm upgrade \ --install installer ${home}/helm-charts/kubernetes-installer-1.0.2.tgz \ --set cloud=openshift \ --set openshift.ingressDomain=$(kubectl get ingresses.config/cluster -o jsonpath={.spec.domain}) \ --namespace ${namespace} -
Copy the shipped Maven artifacts to the Maven repository Pod
kubectl cp \
    ${path}/modelops-repo-1.2.0-mavenrepo.zip mavenrepo-0:/tmp \
    --namespace ${namespace}
This command takes some time to run, and gives no output.
-
To monitor installation logs, use:
tkn pipelinerun logs bootstrap --follow --namespace ${namespace} -
The installation is completed when all tasks display
Succeeded$ tkn taskrun list --namespace ${namespace} -
Capturing ModelOps UI url
-
Log into OpenShift console
To get the console URL run
$ oc whoami --show-console
Navigate to the URL and pass ${cluster_username} and ${cluster_password}
-
Select developer mode
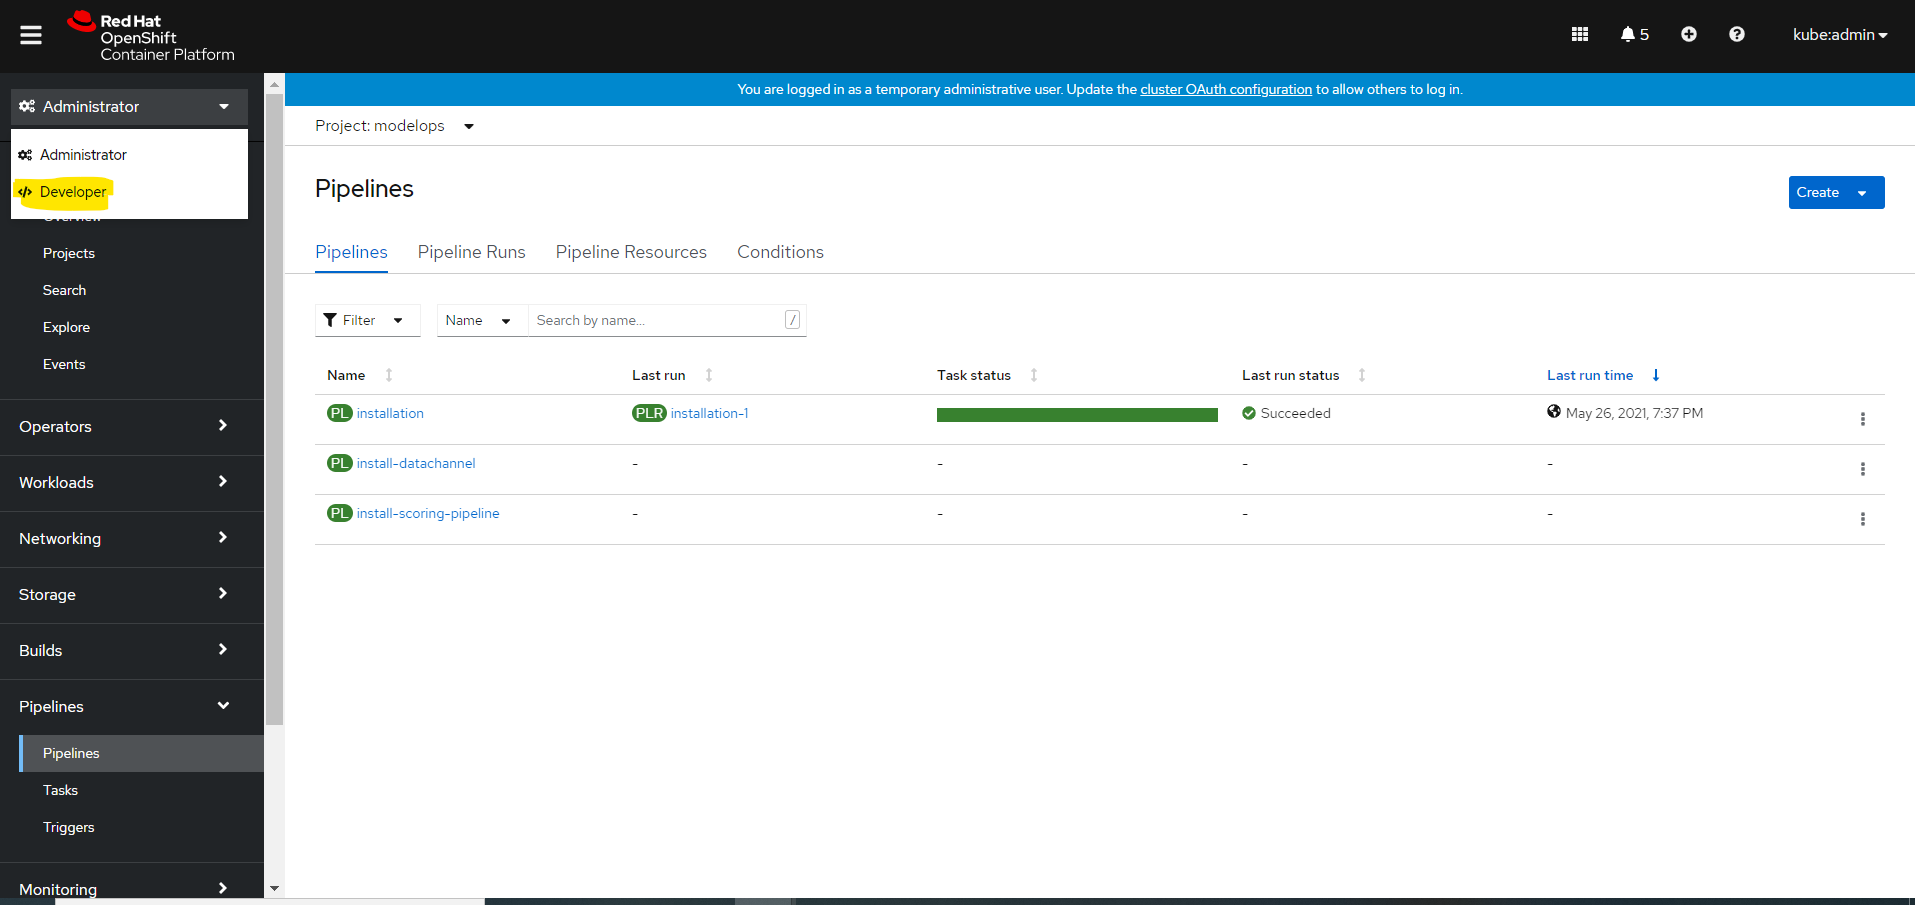
-
Navigate to Topology and Click on ModelOps server
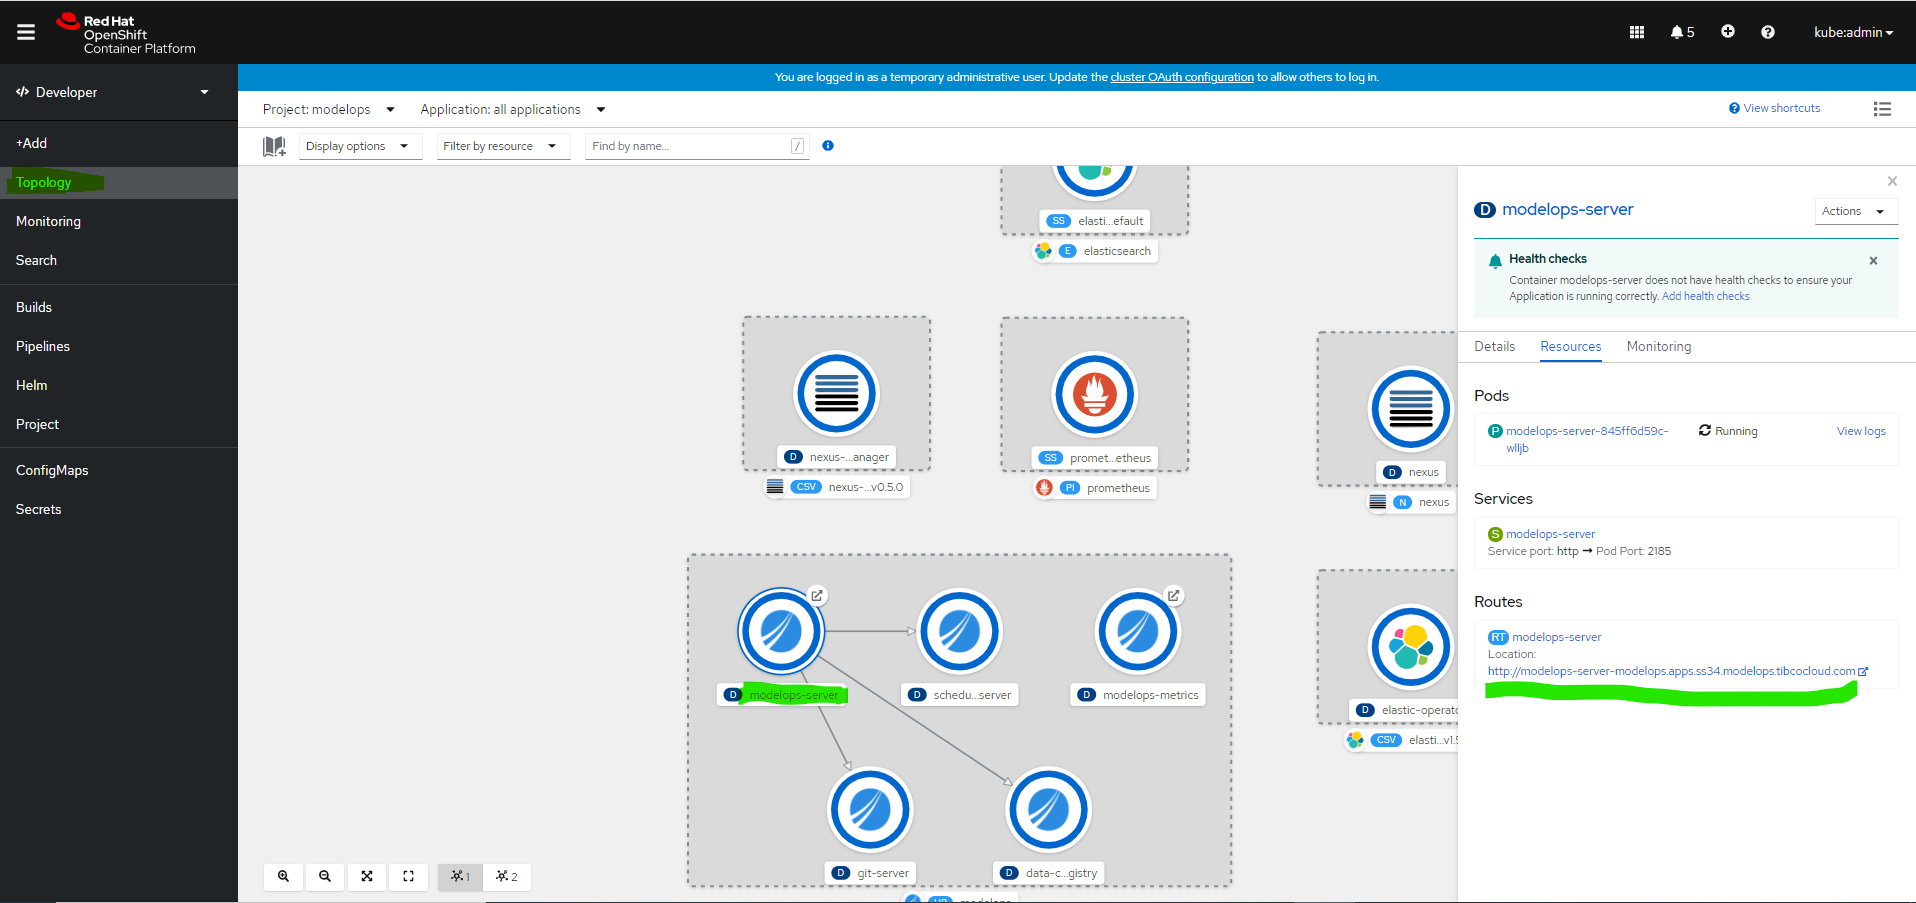
-

