Adding Inclusion Periods to a Schedule
You can define a period when the system applies the rulebases and rules whenever the conditions are met.
Procedure
|
1.
|
In the TIBCO OI Hawk RedTail - Container Edition UI, navigate to the Hawk Agent page for which you want to define the inclusion period.
For steps, see Viewing the Agent Details. |
|
2.
|
On the Agent page, select the Schedules tab. |
All the schedules for the Hawk agent are displayed in the left pane of the tab. For details, see Schedules Tab.
|
3.
|
On the Schedules tab, select the schedule for which you want to add the inclusion period. |
The lists of inclusion periods and exclusion periods is displayed in the right pane.
|
4.
|
On the Inclusion Periods pane, click the Add ( ) icon for adding inclusion period. ) icon for adding inclusion period. |
The Period Details window opens to define a new period.
|
5.
|
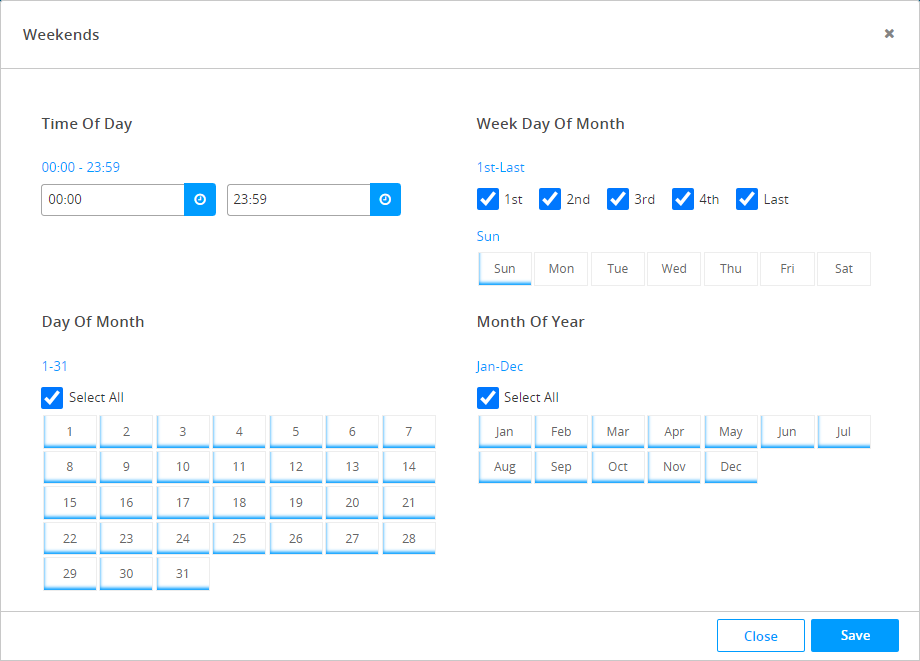
In the Period Details window, define the following parameters in the inclusion period of a schedule: |
|
—
|
Time of Day - Select the starting and ending time interval for the period. If you want to specify multiple time intervals for the schedule, you must add multiple Inclusion periods. |
|
—
|
Day of Month - Select the dates for the schedule to be active. Click Select All to select all days of the month. |
|
—
|
Week Day of Month - Select the days of the week and weeks in the month for the period. |
|
—
|
Month of Year - Select the month of the year for the period. Click Select All to select all months of the year. |
The Week Day of Month and Day of the Month selections must overlap in order for a day to be selected.
Result
The new inclusion period is displayed on the Inclusion Periods list for the schedule.
Example
For example, the following figure shows the selection for the inclusion period of a Weekend schedule, where the applied rules and rulebases are active on every Sunday for 24 hours.
Weekend Schedule Inclusion Period
What to do Next