Installing in GUI Mode
The following procedure explains how to install TIBCO Order Management - Low Latency in GUI mode:
- Open the physical media or download the TIBCO Order Management - Low Latency product package.
- Extract the TIBCO Order Management - Low Latency product archive file to a temporary directory.
- Navigate to the temporary directory that contains the universal installer.
- Run TIBCOUniversalInstaller-(platform).bin (the name of the executable depends on the platform, the ends with the .bin extension).
-
Review the information in the Welcome dialog, and click the Next button.
-
The License Agreement dialog is displayed.
Choose "I accept the terms of the license agreement" and click the Next button. The Installation Profile Selection dialog is displayed. If you do not agree to the terms of the license agreement, click the Cancel button to exit from the installation process.
-
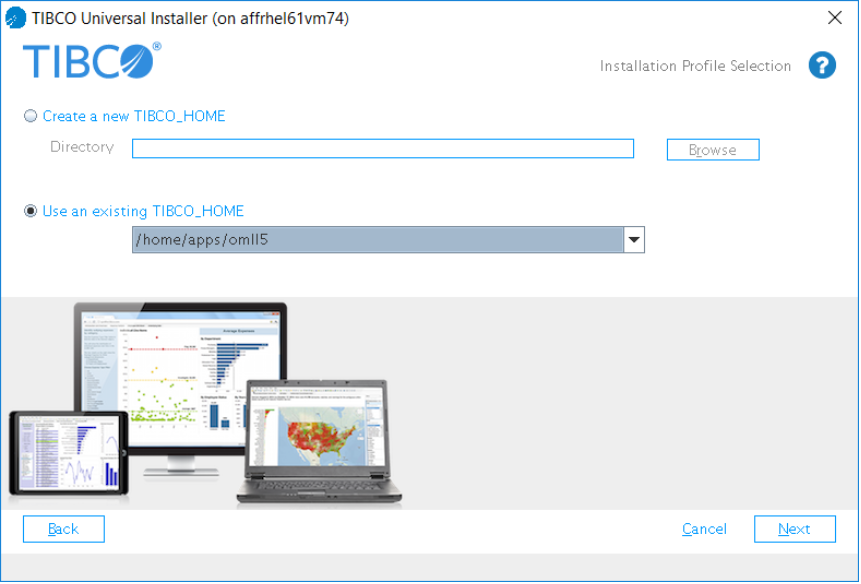
The TIBCO Installation Home dialog is displayed.
Specify an installation environment and click the Next button.
You can choose to either create a new TIBCO installation environment or select an existing environment. A TIBCO installation environment is used for software installations and consists of a Directory (the path where the product is installed) and Name fields. Products installed into different installation environments do not share components; therefore you can keep product installations completely isolated from each other.
Create a new TIBCO_HOME
If this is the first time that you are installing a TIBCO product by using the Universal Installer, you must create an installation environment by specifying the following:
- Directory: The root directory into which all TIBCO products are installed. Individual products use sub-directories. Type a path or click
Browse to specify the path or accept the default location.
The path cannot contain special characters such as "*", "#", "?", ">", "<", "%", "&", "$", "`" or "|". The path cannot be the same as the path of an existing environment.
- Name: Identifies the installation environment. The name cannot contain special characters such as "*", "?", ">", "<", ":", "|", "/", "\", or quotation marks (").
Use an existing TIBCO_HOME
If you have previously installed a TIBCO product by using the Universal Installer, you can install the product into a previously created installation environment (by selecting the environment from the list). If you do this, the Directory and Name fields are populated automatically and cannot be edited.
- Directory: The root directory into which all TIBCO products are installed. Individual products use sub-directories. Type a path or click
Browse to specify the path or accept the default location.
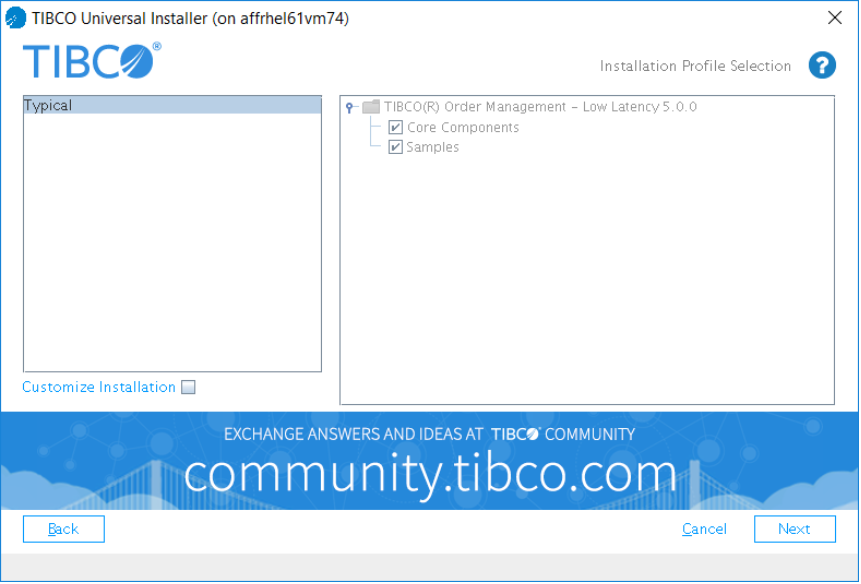
- You can choose an installation profile from the list on the left. Select Typical to install all the features or choose the features to install by selecting Customize Installation. After making your choice, click the Next button.
-
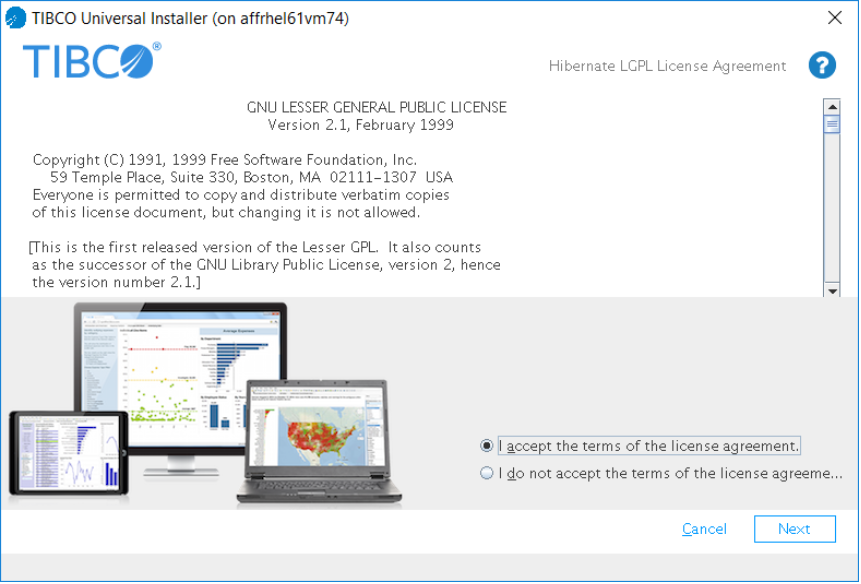
The Hibernate LGPL License Agreement dialog is displayed.
Choose "I accept the terms of the license agreement" and click the Next button. If you do not agree to the terms of the license agreement, click the Cancel button to exit from the installation process.
- Choose to download the Hibernate assembly from TIBCO or choose to provide the location for the assembly previously downloaded from TIBCO and provide the path, and click Next.
-
The Oracle Elliptic Curve Cryptography Library LGPL License Agreement dialog is displayed.
Choose "I accept the terms of the license agreement" and click the Next button. If you do not agree to the terms of the license agreement, click the Cancel button to exit from the installation process.
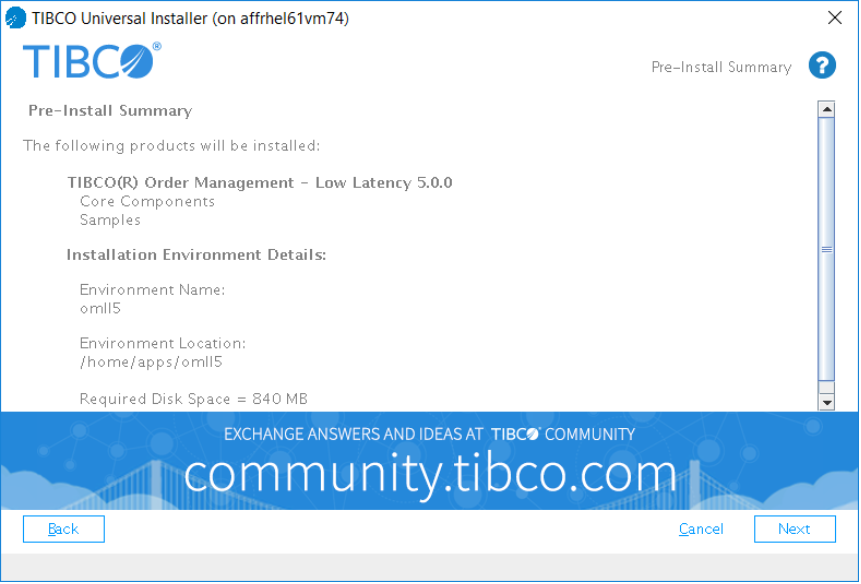
- After the installer configures your installation choices, the Pre Install Summary dialog is displayed. Review the information displayed in the dialog and ensure that it is correct.
If you want to change any of your choices, click the Back button to step back through the dialogs to the appropriate point. You can then continue the installation process from that point.
- When you are satisfied with your choices, click the Install button.
-
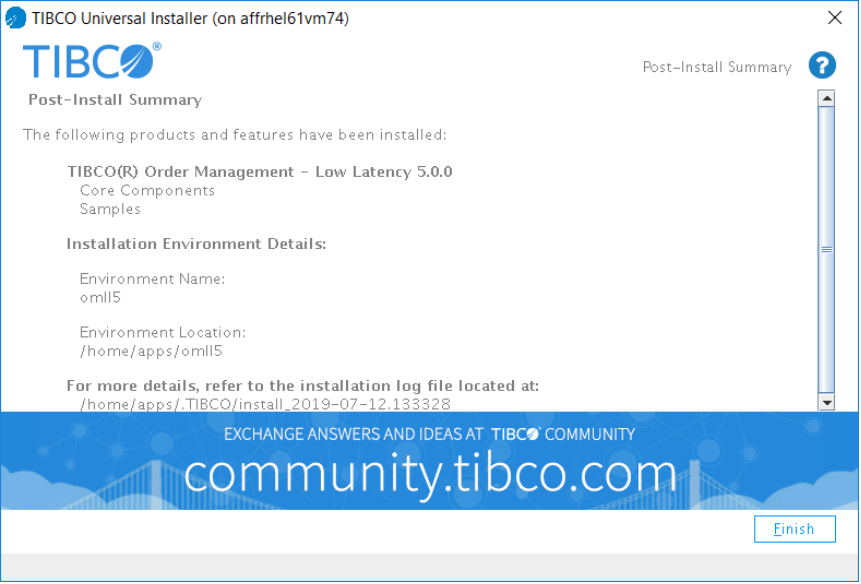
The Post Install Summary dialog is displayed, which summarizes the installation process. Click the Finish button to complete the installation process and close the installer window.
- Complete the post-installation tasks described in Post-Installation Tasks.