There are several ways to display well, seismic, and interpretation data that reside in OpenSpirit enabled data stores.
![]()
Any layers added in this manner will have OpenSpirit datakeys associated with every feature so you may then send OpenSpirit data selections events for features selected from the map. If you add scanned layers that represent wellbores, 2d lines, or 3d surveys you may then select these features and see children of the selected features - e.g. if you select wellbores from the map you may then list associated picks,logs, and checkshots (see the See selected feature attributes section).
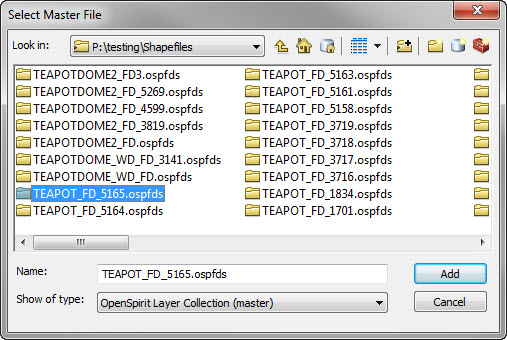
If you are selecting shape files output from the Scan Utility then you will navigate to the directory containing the feature dataset folders created by the Scan Utility. Select a feature dataset folder which will have a folder name suffix of .ospfds. This will then cause all the shape files in the feature dataset folder generated by the Scan Utility to be added to the map representing the geometry of the scanned well, seismic, and interpretation data.
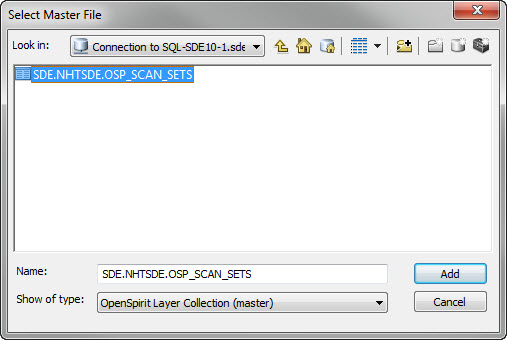
If you are selecting SDE output from the Scan Utility then you need to select the appropriate database connection for your SDE instance and then select the scan set catalog table. Scan sets created using the TIBCO OpenSpirit Scan Utility contain a scan set catalog table named OSP_SCAN_SETS.
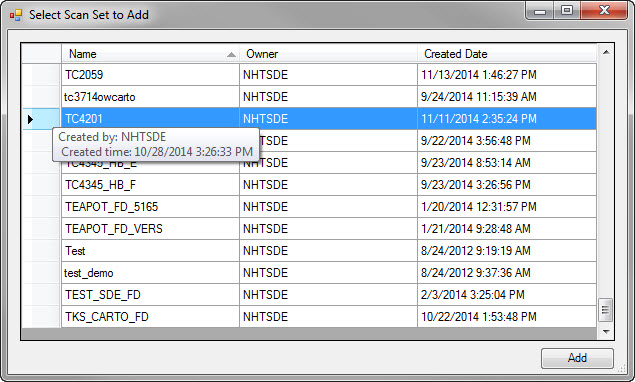
Then select the specific Scan Set (this contains the well, seismic, and interpretation feature classes made by the Scan Utility) you wish to add to the map:
This is the preferred option if you wish to see data coming from many projects or you have many objects in a single project.

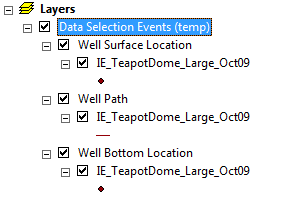
When the extension receives a data selection event it will create in-memory feature classes to contain all the received objects and add these to the map like this:
An options dialog controls which data types that are listened for, which layer files will be used to set their display characteristics, and how they will grouped. This options dialog is launched from the OpenSpirit toolbar by using this button:

This dialog is then displayed:
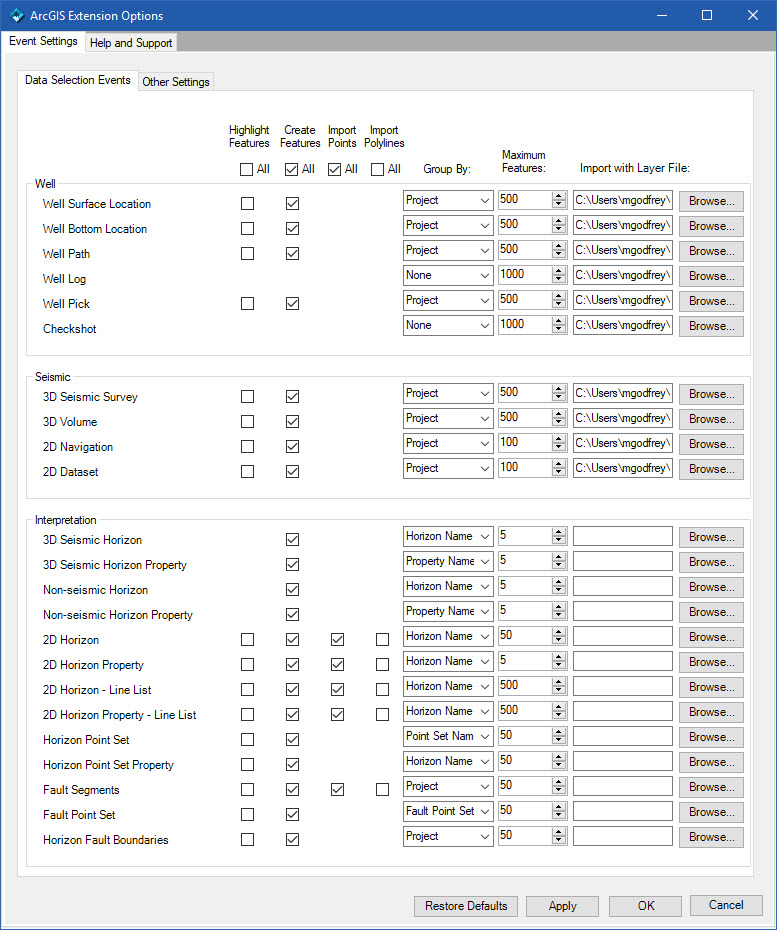
This dialog also allows one to set a maximum number of features that will be imported. You may wish to increase these limits based on the capabilities of the system you are running on.
This dialog also allows you to control how certain data types are imported. For example, fault segments may either be imported as polylines or as points - points are more useful for input to griding operations but you may wish to see the connectivity between points that the polyline option offers.
The "Import with Layer File" option will apply the associated layer file definition to the incoming feature. This will control the symbology of the imported layer. Several predefined layer definitions are provided in the OpenSpirit ArcGIS Extension's Layerfiles directory, or you can provide your own definition. The layer file definition must be appropriate for the layer type (i.e. if it is a polygon, then a polygon definition must be used).
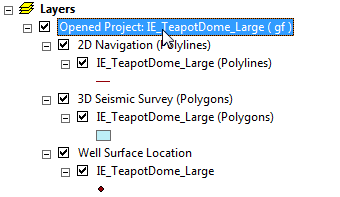
The "Group By" options control whether features representing the same data type are placed into the same feature class or are split into separate feature classes based on a chosen attribute. For example, if you choose to group Well Surface Location by Project then wells coming from different projects will be placed in different feature classes (named after the source projects) like this:
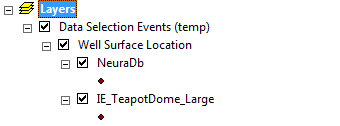
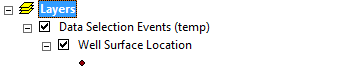
But if you choose "None" as the Group By option then you get this:
Open a project, via OpenSpirit, and add its well and seismic spatial data to the map.
![]()
Click on the indicated toolbar button and a project selection dialog will be displayed:
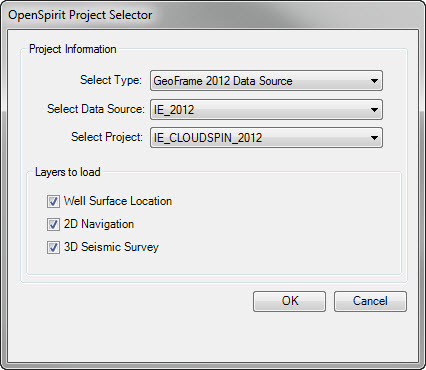
Select the desired data store type, data source, and if applicable, project. Then based on what data types are supported in the chosen project you will have a choice of reading well, 2d seismic, or 3d seismic data. The number of objects that will be imported is controlled by the same options dialog as described above. The extension will then read the desired project and create in-memory feature classes and add these to the map like this:
![]() If you have large projects with many wells and seismic lines it is more efficient to run the OpenSpirit Scan utility to save the spatial data in SDE or shape files and then add these layers to the map.
If you have large projects with many wells and seismic lines it is more efficient to run the OpenSpirit Scan utility to save the spatial data in SDE or shape files and then add these layers to the map.