Managing IdP Groups
IdP Groups are logical collections of user identities managed within an Identity Provider (either SAML or LDAP). You can assign permissions in TIBCO Platform to these groups rather than individual users. This allows you to manage users at the Identity Provider level rather than individually at Control Plane. Teams are an alternative collection of users. They are instead managed at Control Plane rather than at Identity Provider. For more information about teams, see Managing Teams.
Assigning permissions to IdP Groups is only possible if an external identity provider that supports IdP Groups has been configured. TIBCO Support team will configure the IdP connection based on communication with you. This is applicable to TIBCO Operated Control Plane environment. For self-hosted Control Plane, both SAML and LDAP can be configured without help from TIBCO support.
Assigning Permissions to IdP Groups
- The IdP manager must have configured Single Sign-on. IdP Groups are part of the configuration.
- IdP Groups from IdP are added in TIBCO Control Plane by TIBCO Support team.
- Procedure
-
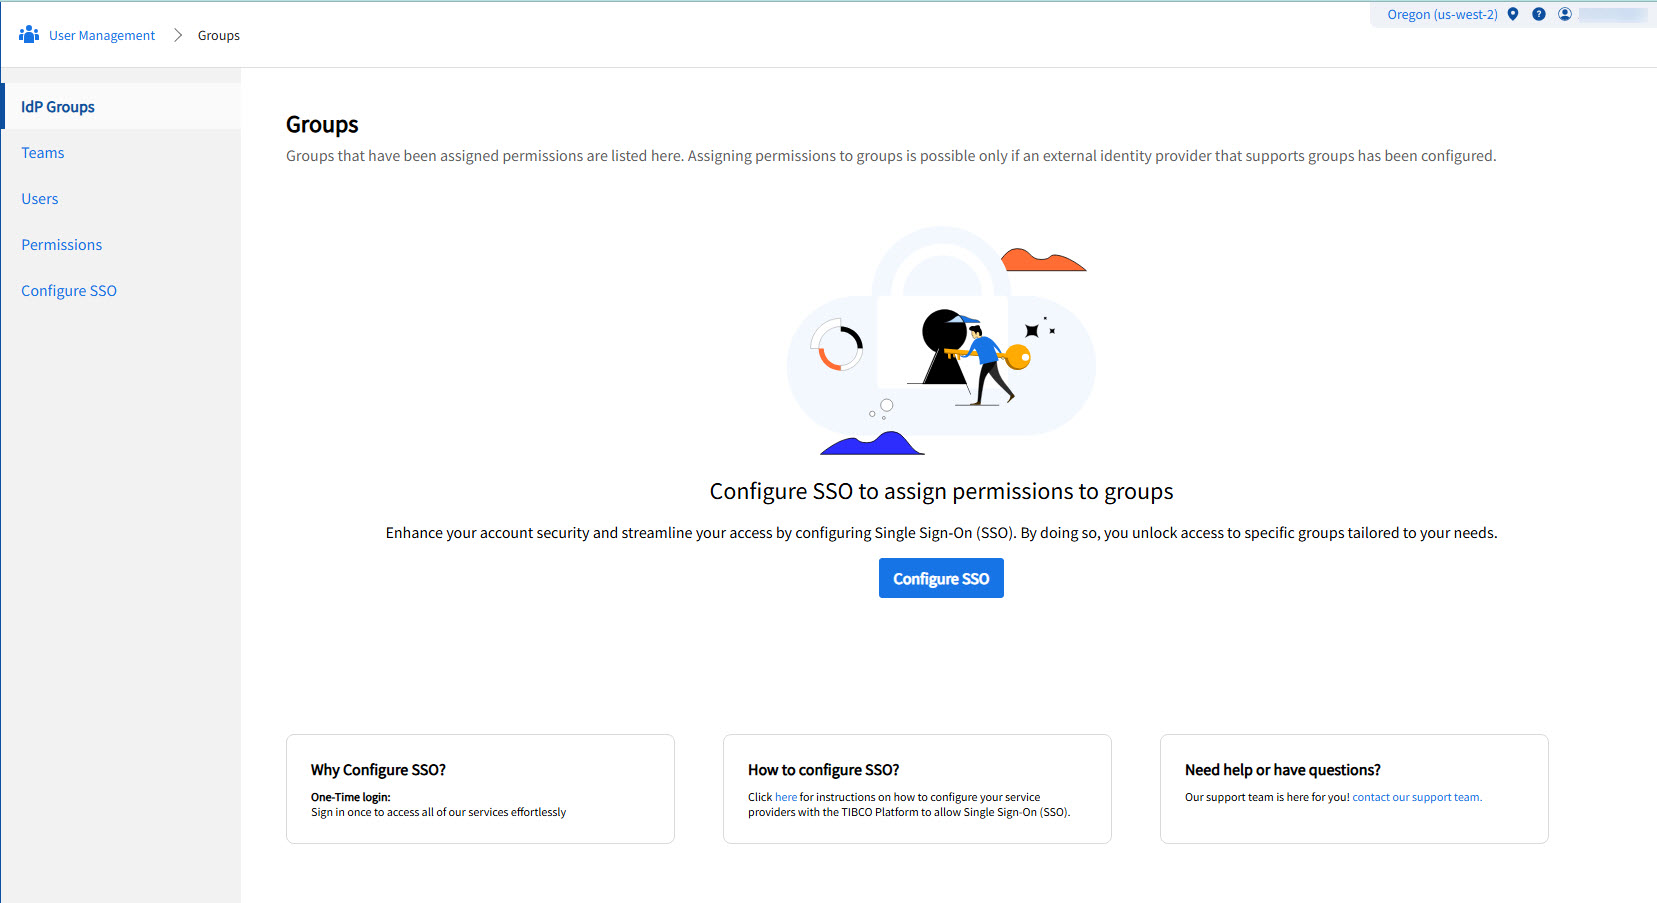
Go to User Management > IdP Groups. Click Assign Permissions.
-
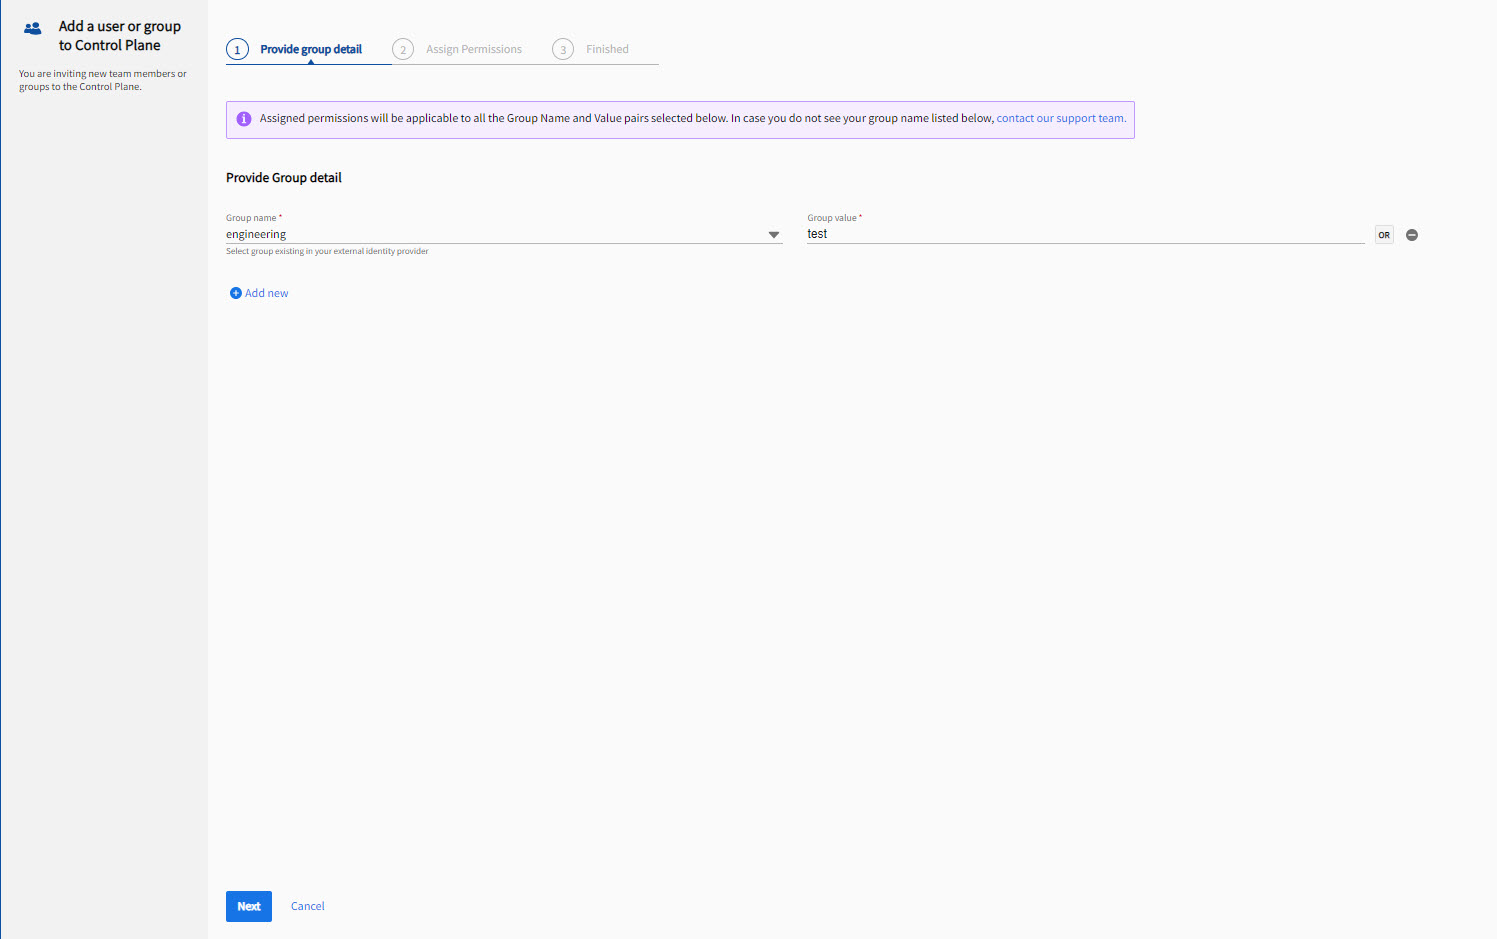
Select the group name and group value configured in your identity provider and click Next. Group value is text field and case sensitive. You can add multiple IdP Groups by using the Add new button. If multiple IdP Groups are added, the permission is assigned using the OR operation for users in multiple IdP Groups. For LDAP IdP, user must select from the imported values. The following example is applicable to SAML IdP.
The external IdP has a small set of group names. For example: Location, Manager Name, Cost Center, Business Group etc. Users have different values depending on their membership. Multi-valued attributes such as
memberOfare also supported.While assigning permission, you select group name from the drop down and the corresponding value. For example, you can select group name as Location and value as New York, so that employees from New York gets assigned the permission. If you add one more group as Manager and value as John. Then employees with location as New York or Manager as John gets assigned the permission.
-
For more information about assigning permissions, see Managing Users.
Viewing Group Details
On the IdP Groups page, click the group name to view group details and assigned permissions. To update permissions, click the vertical ellipsis icon next to the group and click Update permissions. If you have assigned any permission to group then only the group is listed in this IdP Groups list.

Configuring LDAP Group Permissions
- The IdP manager must have configured LDAP as IdP.
- You must have Admin permission.
- Procedure
- Navigate to the IdP Groups tab.
- Click Assign Permissions.
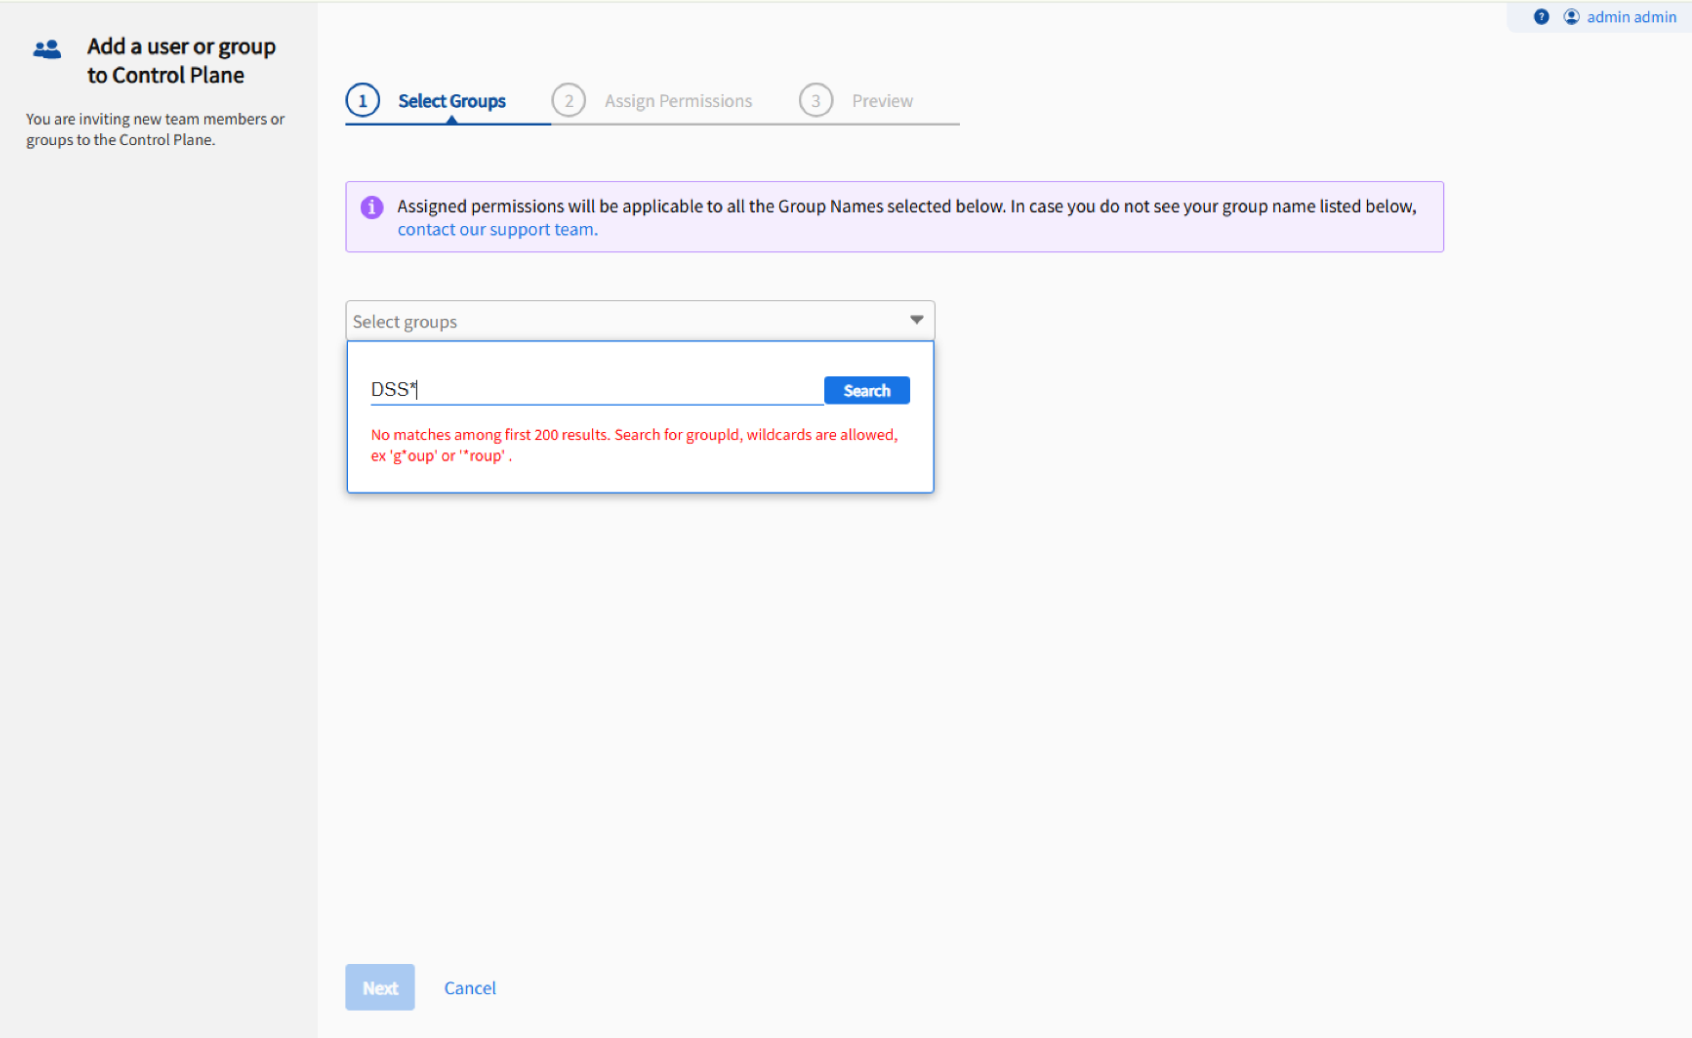
- Click Select Groups. The system imports LDAP groups. The Select Groups tab opens and displays a list of the first one hundred group names.
- Filter the results by typing in the text field.
- If the desired group is not visible, type search terms, including a wildcard sign (*), into the text field. Then click Search.
The search results from the LDAP directory appear. Select the groups to which you want to assign permissions.
- Click Next.
-
In the Assign Permissions tab, assign the desired permissions to the selected groups.
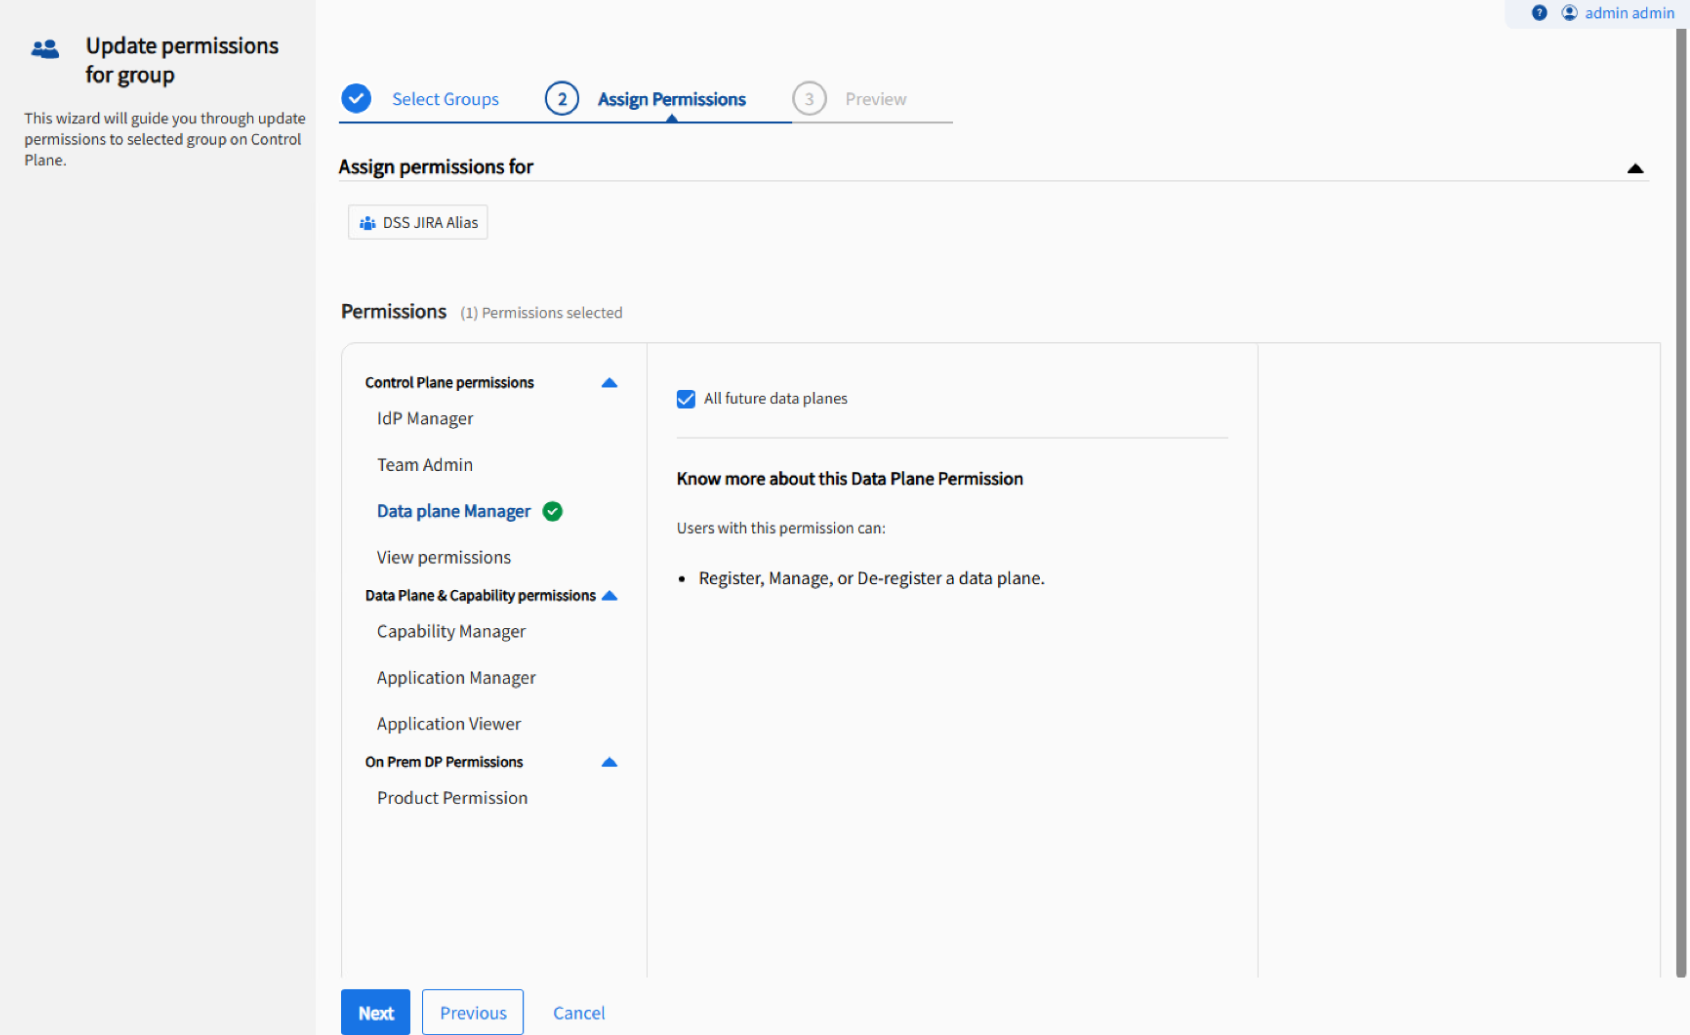
- Click Next.
- In the Preview tab, verify the selected groups and assigned permissions.
- Click Apply Permissions.
A success message appears after successful application of permissions.