Registering Non-Kubernetes Data Plane
You can monitor non-kubernetes applications by registering an non-kubernetes data plane in the Control Plane.
- Procedure
-
On the Home page, click Register a Data Plane or click Data Plane on the left tab on the screen and select Register a Data Plane.
-
On the non-kubernetes card, click Start.
-
Configuration of Data Plane
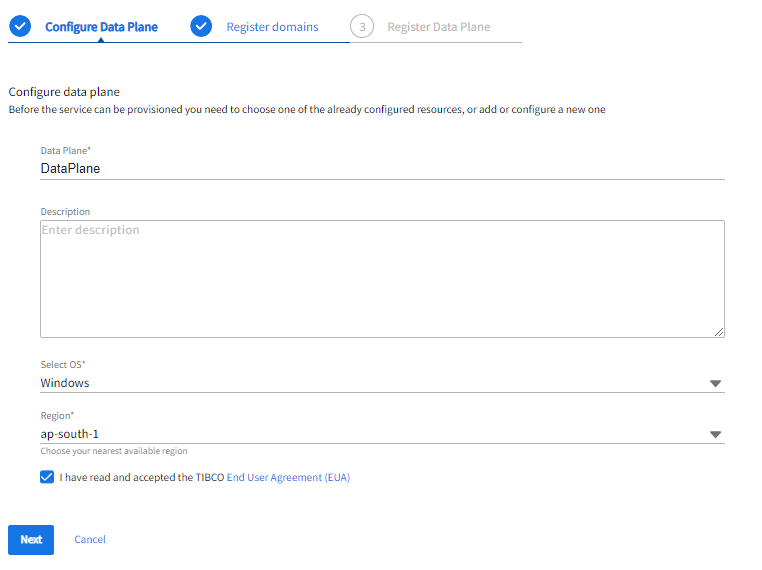
On the Configure Data Plane screen, provide the following information:
-
Select the OS from the dropdown. If you select windows while you Configure Data Plane, then on the Register Data Plane screen you can view only the installation script for windows.
-
Select the Region from the dropdown, you have to choose the nearest location.
-
Select the EUA (End-User Agreement) checkbox, you cannot proceed without accepting it.
-
Click Next.
-
- Register domains
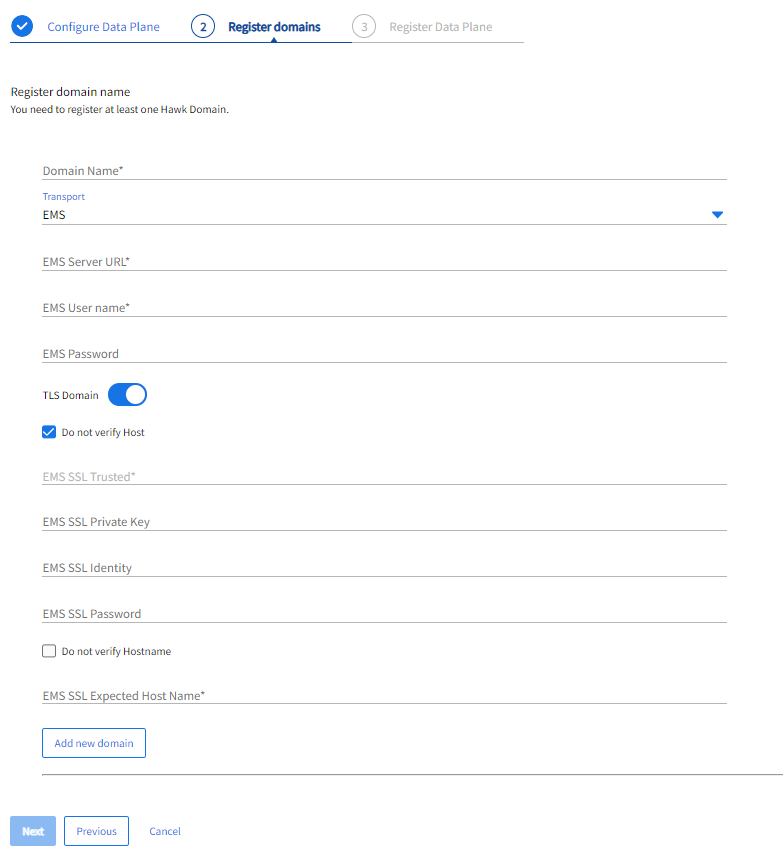
On the register domains page, specify the following information about the Hawk domains.
Fields Description Domain Name The name of the non-kubernetes BusinessWorks TIBCO Administration Domain.
Transport The network transport used by the TIBCO Hawk domain.
Select EMS or RV transport from the dropdown list.
EMS Server URL (for EMS transport) The location of the EMS server.
For example:<tcp/ssl>://<host>:<port#>EMS Username (for EMS transport) The username to log in to the EMS server. EMS Password (optional) (for EMS transport) The password for the EMS username. Hawk RV Service (for RV transport) The RV service instructs the Rendezvous daemon to use this RV service when it conveys the messages on this RV transport. Enter the port number of the service to be used. Hawk RV Network (optional) (for RV transport) The RV network instructs the Rendezvous daemon to use a specific network for all communications involving this transport. The network parameter consists of three parts separated by semicolons: network, multicast groups, and send address. Hawk RV Daemon (for RV transport)
The RV daemon instructs the transport creation function about how and where to find the Rendezvous daemon and establish communication. For remote daemons, specify two parts, Remote host name (optional):Port number.
For example: tcp:<port> or tcp:<remotehost>:<port>
You must register at least one Hawk domain. For more information about these fields, see TIBCO® Operational Intelligence Hawk® RedTail documentation.
Note: You cannot register a TLS Domain if you select RV as transport while registering the domain.To register TLS Domain, click the TLS Domain toggle icon. If the TIBCO EMS server is SSL-enabled, specify the SSL connection fields for TIBCO Enterprise Message Service Transport.
Fields Description EMS SSL Trusted (optional) The file name of the server certificate. This field is disabled, if you select the Do not verify Host checkbox.
EMS SSL Private Key (optional) The private key of the TIBCO Hawk component. EMS SSL Identity The digital certificate of the TIBCO Hawk components. EMS SSL Password The password to decrypt the identity file of the Hawk component.
Note: This field is mandatory only if the EMS SSL Private Key and EMS SSL Identity is provided.EMS SSL Expected Host Name (optional) The name that is expected in the CN field of the server certificates. This field is disabled if you select the Do not verify Hostname checkbox. -
To add the domain configuration, click Add a new domain. You can add multiple domains.
-
Click Next.
- Register Data Plane
-
Finally, click Done.
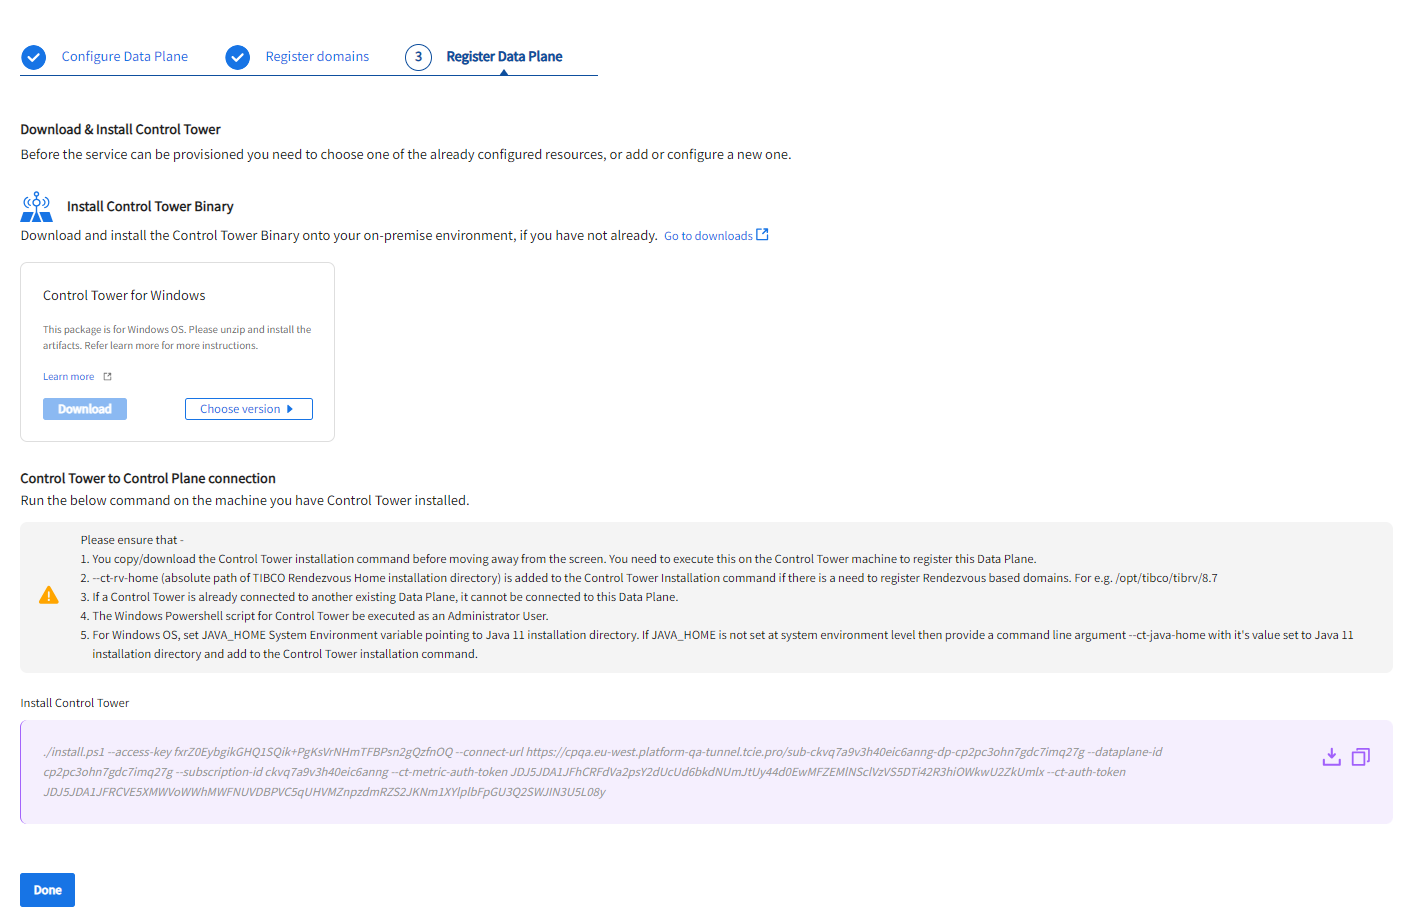
Download and install artifacts for the operating system you have selected while configuring a data plane. For more information, refer Installation .
Click download or copy, the following commands:
For Linux operating system:
sudo chmod +x ./install.sh && sudo ./install.sh --access-key {access-key} --connect-url {connect-url} --dataplane-id {dataplane-id} --subscription-id {subscription-id} --ct-metric-auth-token {metric-auth-token} --ct-auth-token {auth-token} --ct-java-home {java-home} --ct-rv-home {rv-home}For Windows operating system:
./install.ps1 --access-key {access-key} --connect-url {connect-url} --dataplane-id {dataplane-id} --subscription-id {subscription-id} --ct-metric-auth-token {metric-auth-token} --ct-auth-token {auth-token} --ct-java-home {java-home} --ct-rv-home {rv-home}| Argument Name | Description | ||
|---|---|---|---|
--access-key
|
It is the private key used to set up the connection between the data plane and the Control Plane. |
||
--connect-url
|
The public endpoint for the data plane exposed on the control plane to set up the tunnel connection. | ||
--dataplane-id |
This uniquely identifies the data plane. | ||
--subscription-id
|
The Control Plane subscription ID. | ||
--ct-metric-auth-token
|
The metric authentication token. | ||
--ct-auth-token
|
The authentication token. | ||
--ct-java-home (optional) |
The path to Java 11 installation. This parameter needs to be provided if there is a need to provide a custom Java 11 installation. Default value: It uses a system installed Java |
||
--ct-rv-home (optional) |
Path to RV (v8.7.0) installation. This parameter is mandatory when there is a need to register RV-based domains. | ||
|
For Linux operating system |
|||
--ct-certs (optional) |
Path to a directory that contains the certs and private key used for enabling TLS on the HTTP layer of Hawk Console. | ||