Provisioning Subscription through Wizard
In provisioning subscription through the wizard, you need to enter the details on the provided panel.
- Procedure
- On the subscription page, click Provision via Wizard.
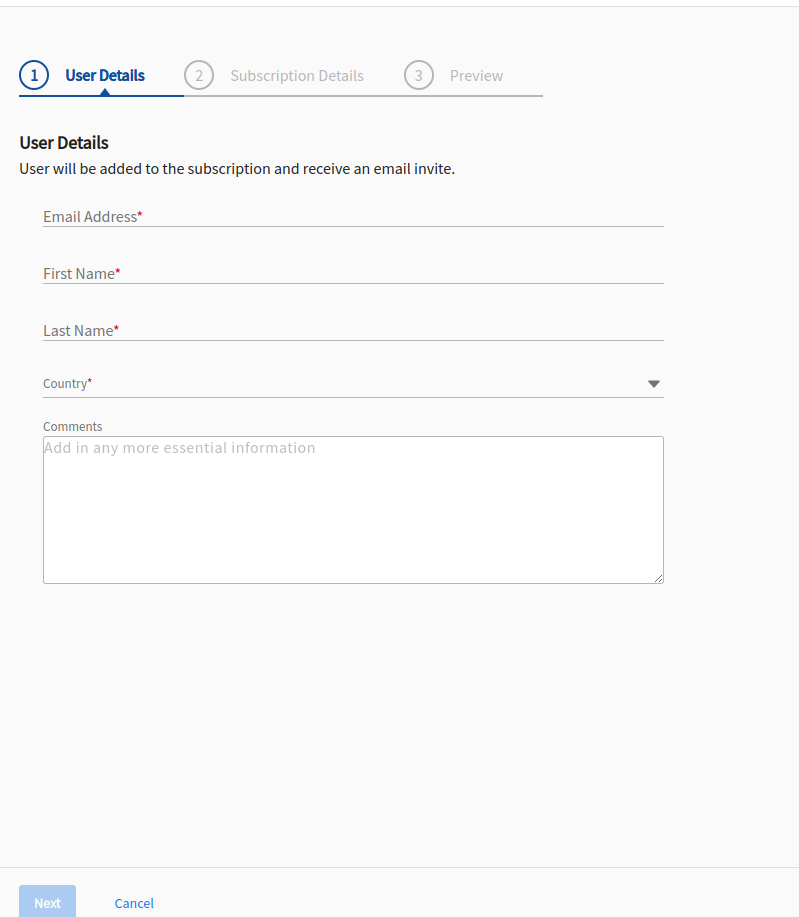
- On the User Details screen, enter the following information and click Next.
- On the Subscription Details page, provide the following details:
- Organization Name: The name of the organization.
- Owners allowed: The number of owners allowed in a subscription. You can have a maximum of 10 owners.
- Host prefix: The unqualified hostname of the TIBCO Control Plane. All TIBCO Control Plane subscriptions are part of the same domain.
- Select Use Default IdP or Configure corporate IdP.
-
(Optional) To use a custom container registry for TIBCO component docker images, specify the container registry details. By default, TIBCO Control Plane uses JFrog registry. This section is to provide the custom container registry details from where to pull the docker images. It is your responsibility to manually download the images from TIBCO default registry and push them to your custom registry. For list of images need to be pushed to your private registry, see Pushing Images to Custom Container Registry.
This configuration is applicable by default to all data planes in the subscription.
Field Description Registry URL URL of the container registry.
Example:
registry.acme.ioRepository Name of the repository Username Username to access the container registry. Password Password to access the container registry. - Click Next to preview the subscription.
- On the Preview page, you can view the user and subscription details. Before provisioning, check the details, click the
 icon to modify them.
 - Click Provision.
For example: <myhostprefix.company.com>.
If you choose the default IdP, when TIBCO Control Plane gets installed, it uses the Default IdP for configuring or adding users. Default Idp is included by default in TIBCO Control Plane. To configure corporate IdP, see Configure IdP.