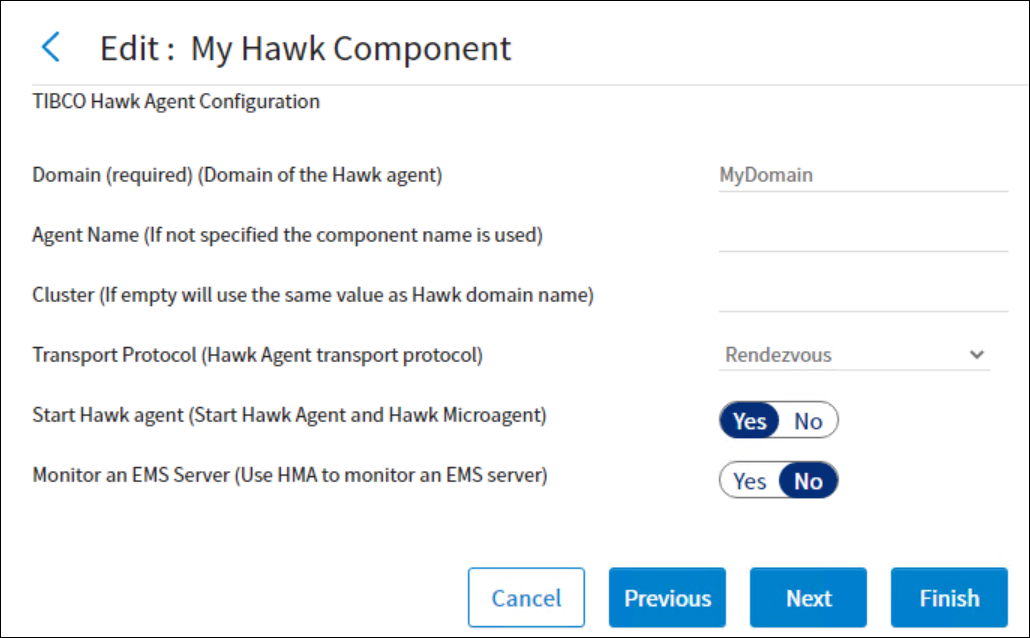
Select Monitor an EMS Server and the Component Wizard will show the
Hawk Micro Agent Settings for TIBCO Enterprise Message Service page to expose configuration settings defining how your TIBCO Hawk Component will connect with a TIBCO EMS. Refer to
Hawk Agent Transport Settings for TIBCO Enterprise Message Service for more information on this setting.
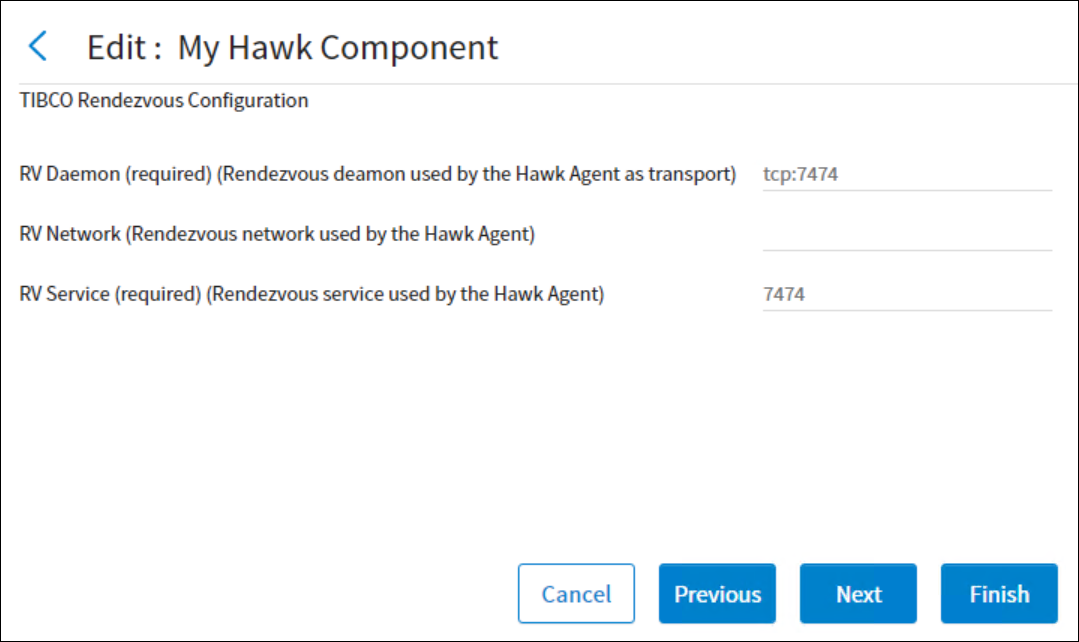
Set the TCP port to configure Hawk to use TIBCO Rendezvous® daemon as a message transport mechanism between the Hawk Agent and HMA.
TIBCO Rendezvous (RV) is used as the transport when your implementation does not use EMS as a transport (TIBCO Hawk Agent Configuration page >
Use EMS as transport is unchecked). The TIBCO Rendezvous
Configuration page provides an interface for configuration of Rendezvous and TIBCO Hawk.
Select the Use dependent EMS Server check box and later set a component dependency.
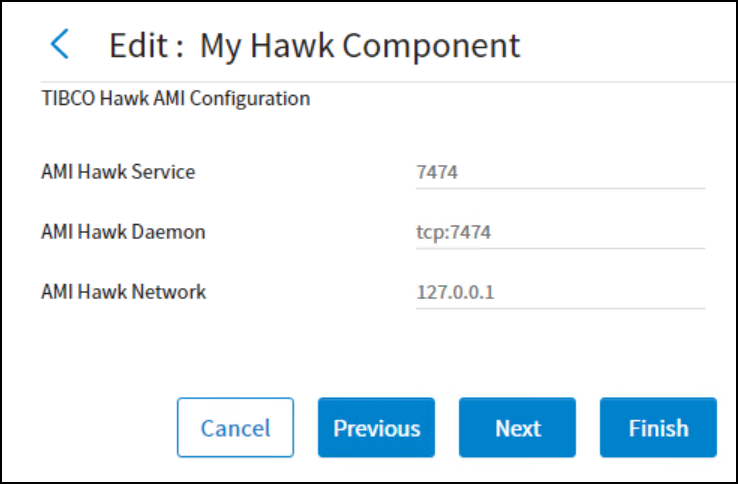
The AMI Hawk Daemon specifies the location of the TIBCO Hawk Daemon. A value of "tcp:yyyy" would correspond to a local Hawk Daemon where "
yyyy" would be the port number. A Hawk Daemon located elsewhere would be specified by a value of the protocol, IP address, and port number: "tcp:
xxx.xxx.xxx.xxx:yyyy".
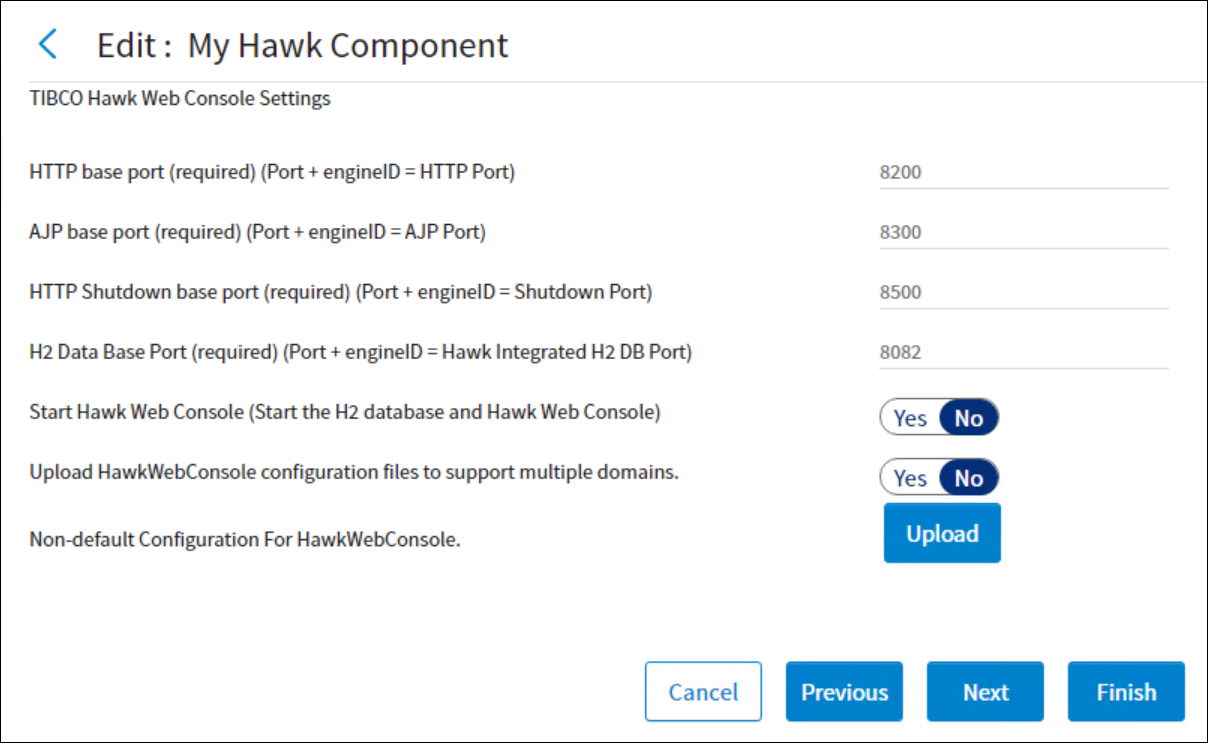
The EngineInstanceValue is the engine number of the TIBCO Administrator.
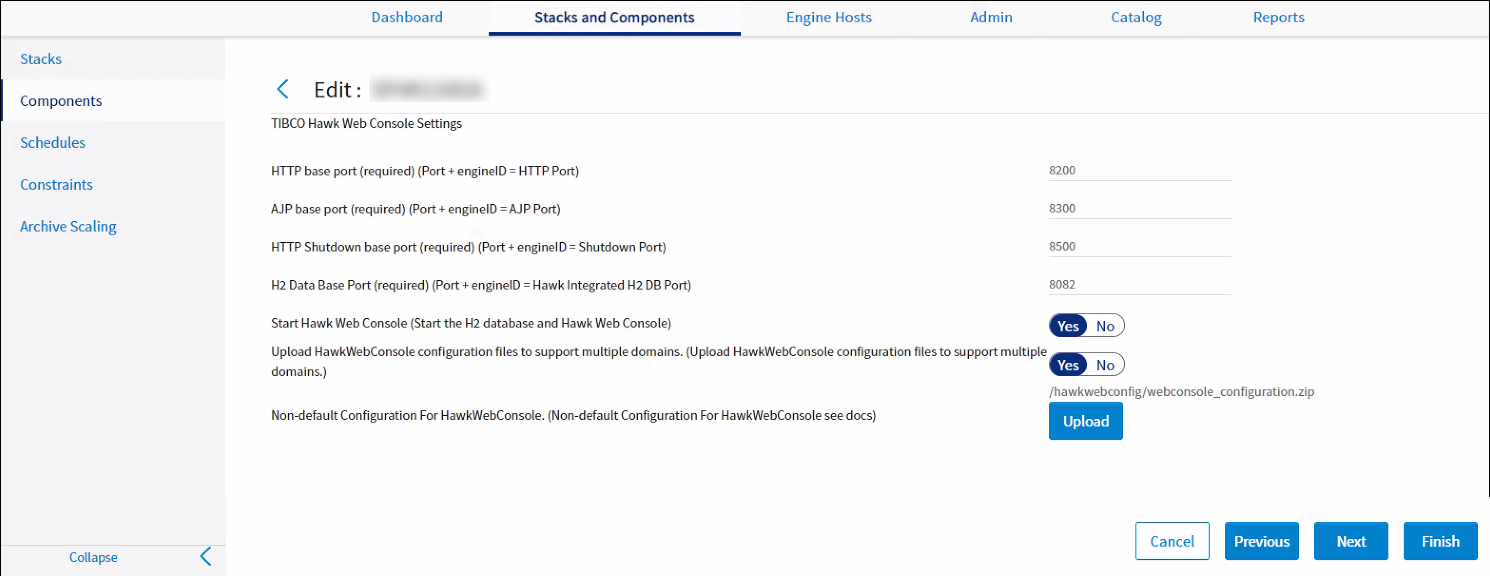
For the default HTTP Base Port setting of
8200, the HTTP ports used would be
8200 and
8201 for the first and second engines respectively.
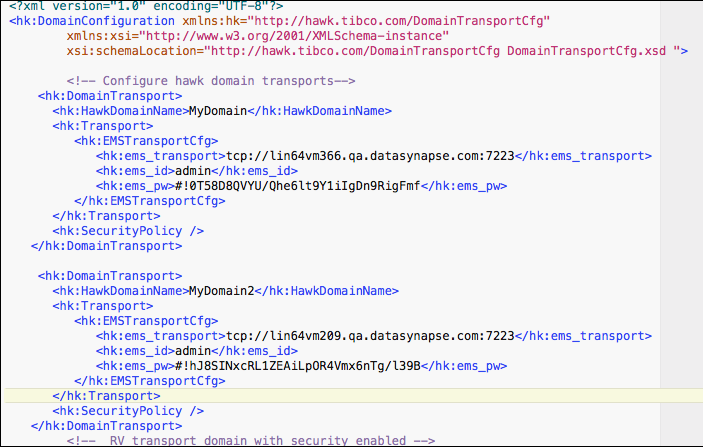
Select Yes to upload HawkWebConsole configuration files that support multiple domains. This option is
No by default.
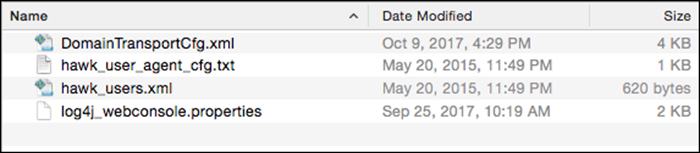
When you select this option, you must provide the configuration files in a .zip file to the component. In the
.zip file , you must include the following files:
After you provide the DomainTransportCfg.xml file, HawkWebConsole displays the information of all the domains.
Click the Upload button, select the
.zip file and click
OK. The name of the file that you upload is displayed.
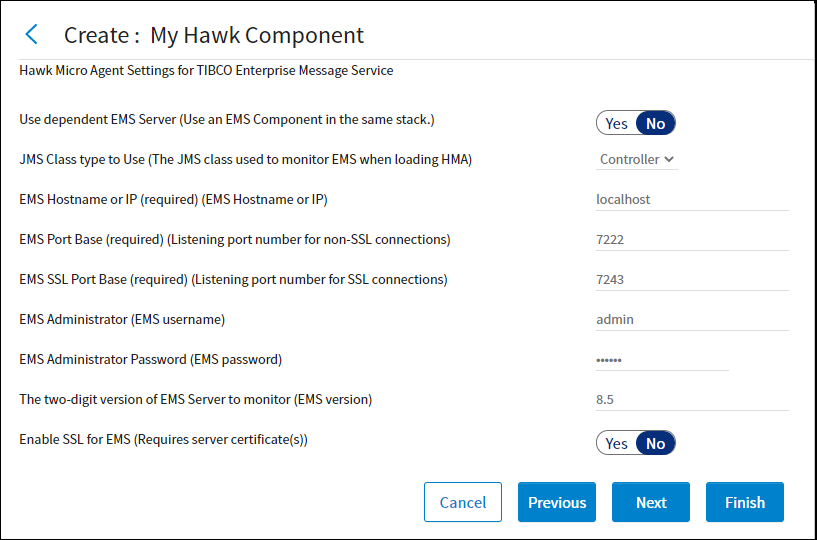
When TIBCO Hawk Agent is set to Monitor an EMS Server, the
Hawk Micro Agent Settings for TIBCO Enterprise Message Service page provides configuration parameters for connection type and specification.
Selecting the Use dependent EMS Server check box means that you will monitor a TIBCO EMS component instance that you will publish in the same stack with this TIBCO Hawk component instance. You must include the TIBCO Enterprise Messaging Service Distribution for TIBCO Silver Fabric using the settings on the
Optional Distribution settings page and you must set a component dependency on that TIBCO EMS component. The EMS location settings will be grayed out and disabled, but the Hawk Microagent can be extended using the
HawkController JMS class. Refer to the
TIBCO Hawk Plug-in Reference Guide for more information.
By default, the Use dependent EMS Server check box is cleared so you can monitor an independently published instance of TIBCO Enterprise Messaging Service. If your TIBCO Hawk component will monitor an independent instance of TIBCO EMS you must specify how and where your TIBCO Hawk Microagent will establish that connection.
You can use either the Listener (
COM.TIBCO.hawk.tibjms.HawkListener class) if you only want to monitor the TIBCO EMS server, or you can specify the
Controller (
COM.TIBCO.hawk.tibjms.HawkController class) if you want to monitor and manage the TIBCO EMS server.
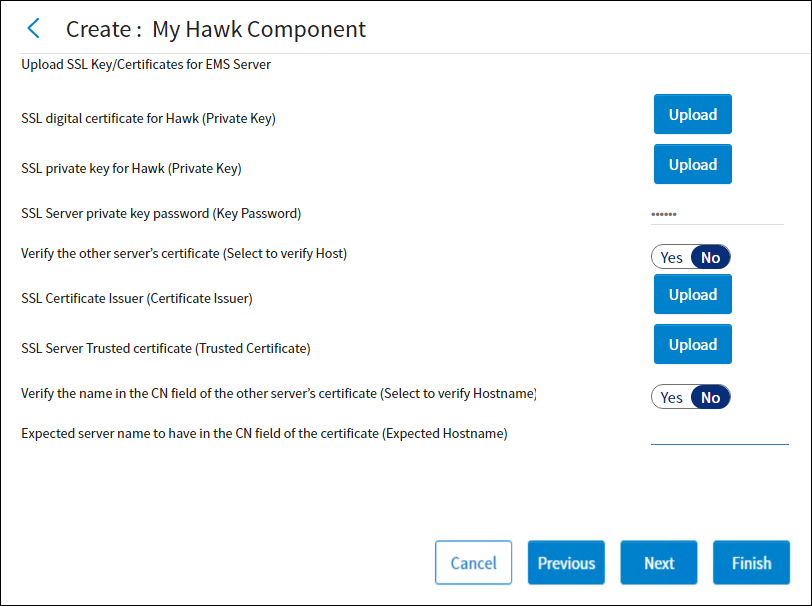
When you check the Enable SSL for EMS check box on the
Hawk Micro Agent Settings for TIBCO Enterprise Message Service page, the Component Wizard displays the
Upload SSL Key/Certificates for EMS Server page to allow you to configure TIBCO Hawk to use SSL when monitoring or controlling TIBCO EMS.
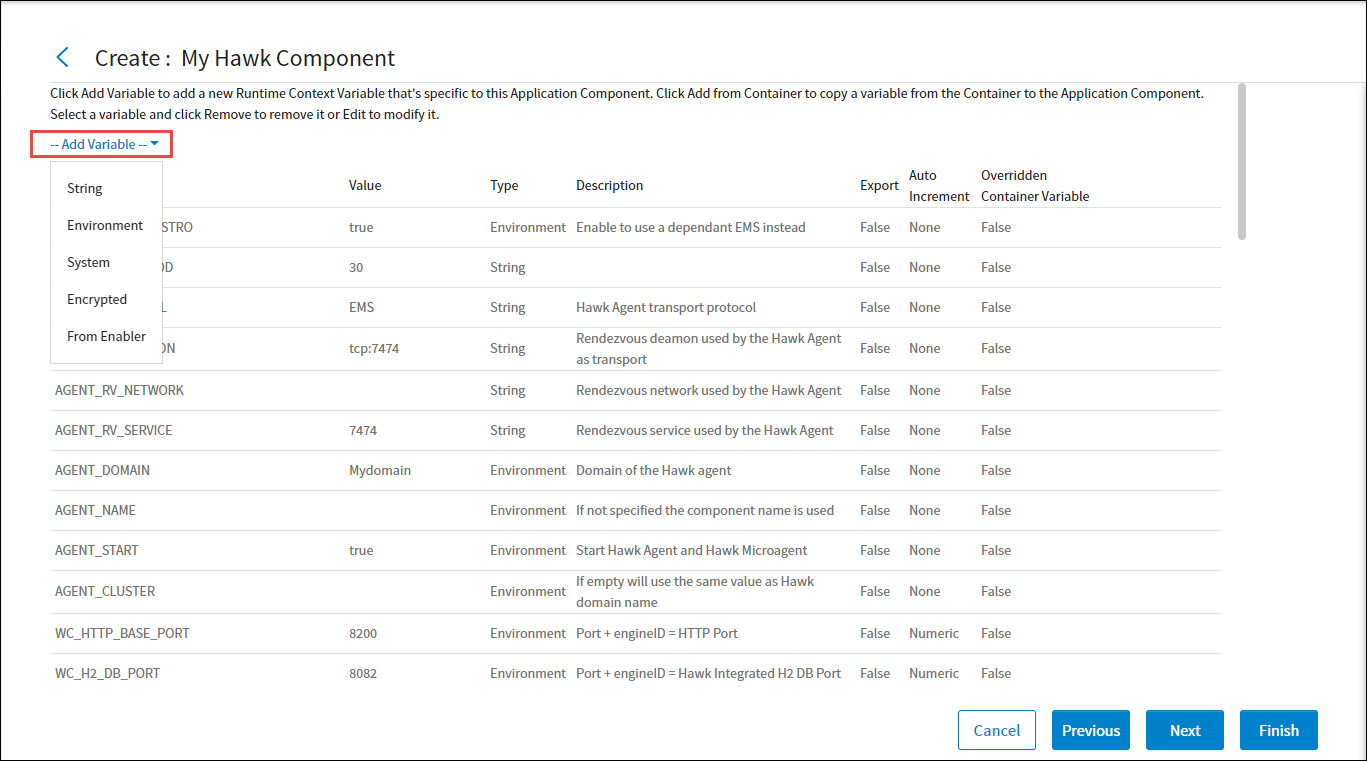
String,
Environment,
System, or
Encrypted variables may be added and changed in the component to define and set runtime specific context variables.
Select a variable type from the Add Variable pull-down list or
Add from Enabler to use a variable from a selected enabler.
One page that must be used only with extreme caution is the Edit the Configuration File page. It should not be used unless the configuration.xml is backed up and specific knowledge about the TIBCO Silver Fabric system is being applied. This interface is being exposed to allow for more advanced customizations and normally it should be left alone.
For more information about what and how the configure.xml might be changed, see the"The configure.xml File" section in the
TIBCO Silver® Fabric Developer’s Guide.
The property, baseDir, in the
<configFiles> element is used to specify the path that includes the file to be updated. It can be modified if needed. For example, if the TIBCO Runtime Administrator (TRA) version was 5.8 instead of 5.7, then the
baseDir value defined in the code snippet would be changed to:
The property, include, in
<configFiles> element is used to specify which file(s) need to be replaced. It can specify whatever files you want to change. The asterisk wild card may be used to represent a string of characters like for instance: "
*.tra" to change all of the
.tra files in
%baseDir%.
The property, pattern, in the
<regex> element is used to specify the contents that need to be replaced within the previously specified files. The value of
pattern can be a regular expression.
The property, replacement, in
<regex> element is used to specify the new contents of the node specified by the
pattern property value.
The remaining screens of the Component Wizard are generic for all Silver® Fabric Enablers. The configuration of these is optional for TIBCO Administrator component.
Refer to TIBCO Silver® Fabric User’s Guide for more information on these configuration screens.
After you click the Finish button, make sure that the component is published to make it available to create a Stack.
To do this, select Publish Component in the Actions drop-down list located at the line of the component you just created.
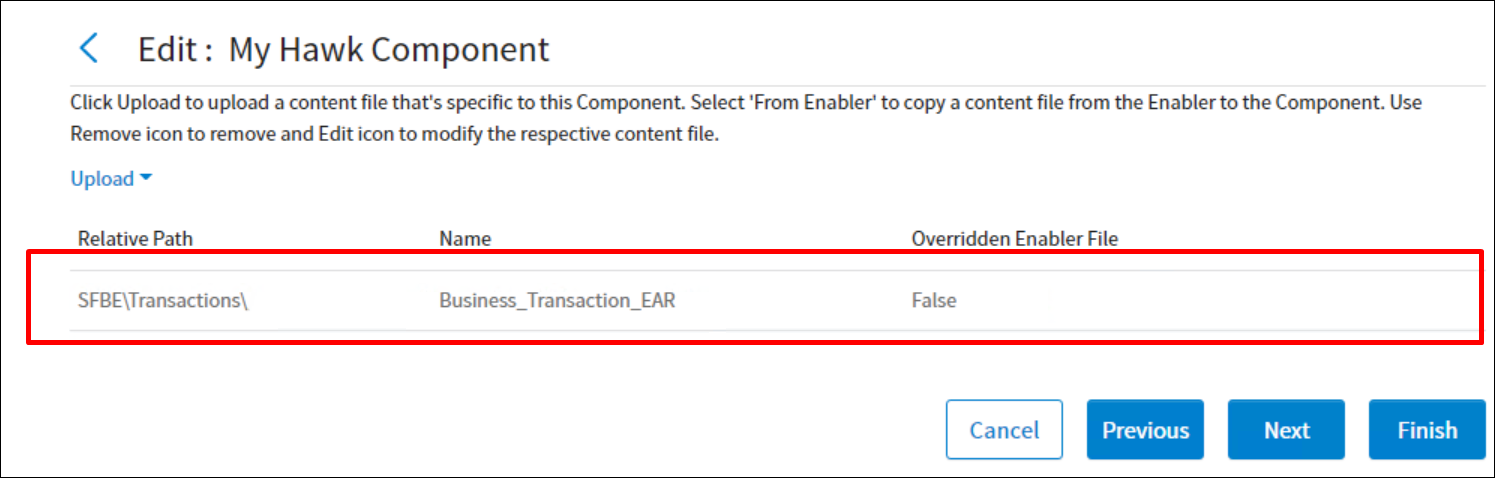
Files included in the .zip file replaces the default files from the product.

HawkWebConsole with Multiple Domains