On the authoring bar, click
Files and data  .
.
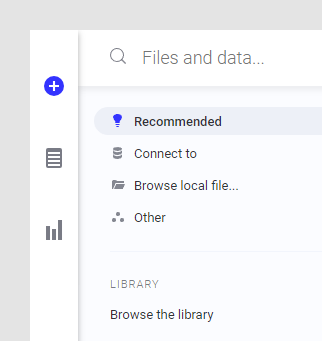
In the flyout, locate the data of interest by searching for a suitable filename or keyword, or by browsing the different categories.
You can search for specific types of data by typing keywords. For example, enter type:dxp (to search for analyses), type:dataconnection (to search for data connections), or, type:query (to search for information links). See Searching the Library for more details.
Click Connect to see a list of all available data connectors.
Click Browse local file to open files from your computer or a network location.
Tip: You can add several local data files simultaneously.
Click Other to Paste data from clipboard, open Information Designer, add a Linked copy to data table in analysis (previously known as "data table from current analysis" or "data table data source"). The Linked copy to data table in analysis option can be used if you want to pivot or otherwise transform the data in an already existing data table but also keep the original data table. The Other section also contains the option Load data with ODBC, OLE DB, or ADO.NET data provider which allows you to open data from databases that currently do not have a native data connector (which otherwise is the preferred option).
Note: When a data connection is added to the analysis, all views in the connection will be available within the analysis until the connection or a view is removed using Data > Data Connection Properties, regardless of whether the view is added as a data table or not. Therefore, you should select a connection under Data connections in current analysis on the Recommended page to add more views from an already used connection, rather than adding another connection to the same source. See What is a Data Connection? for more information.
If a configuration dialog shows up, change any settings to your liking.
Comment: If you open a data connection you may need to log in before you can select the actual data. For Excel files with multiple worksheets you can choose which worksheet to import. If you cannot see all worksheets available in an Excel file at this step, try saving and closing the file in Excel before you open it in Spotfire. See Data Access Concepts in TIBCO Spotfire for more details about different data source types.
Comment: When applicable, look at the preview and make sure that the format of your data looks OK before you continue.
When you have selected your data, you will see a summary view of all data tables that will be added or updated. In many cases, you can make changes to the default recommendations by clicking on the sources and edit settings. See Choosing How to Load the Data for more information.
When you are satisfied, click OK.