The background of the markers in a map chart does not have to be geographical; you can position markers on any spatial background. You can, as the background to the markers, simply use an image layer instead of a map layer. To exemplify, your image in the image layer can represent a human body, where you place markers showing medical data, or a drawing of a hotel, where the room occupancy or other data is displayed. To position markers on top of an image layer requires that your data contains appropriate X and Y coordinates.
Example
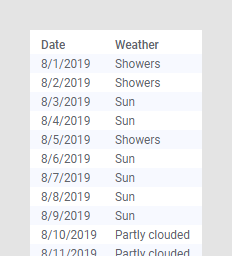
In the data table below, weather data at a certain location during August is available. The weather types are Sun, Partly clouded, and Showers.
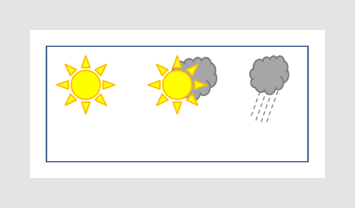
Assume you want to use the image below to illustrate the weather types, and, below the illustrations, place markers that indicate the total number of sunny, partly clouded, and rainy days, respectively.
The following explains how you place the markers where you want them on the image. The key is to let the image and markers use a common coordinate reference system.
To do so, imagine a coordinate system on top of the image as shown below. You can specify any X and Y ranges provided that the same scale is used on both axes. In this imagined coordinate system, the X values range from 0 to 10, and the Y values from 0 to 5.
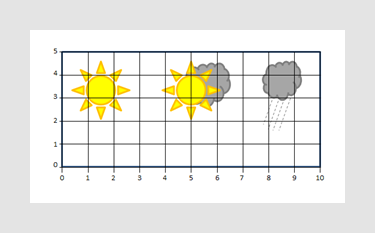
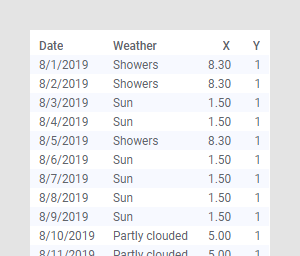
Then use this imagined coordinate system to assign coordinates to your marker positions, and add them as X- and Y columns to the data table. The 'Sun' marker is placed at (1.5,1), the 'Partly clouded' marker at (5,1) and the 'Showers' marker at (8.3,1).
Now all is set for creating the map chart, where markers are positioned on top of an image:
Load the data table, and create a map chart.
Right-click the map chart, select Properties, and go to the Layers page.
Select the Map Layer, and click Remove.
Go to the Appearance page, and make sure the Coordinate reference system is set to None.
Go to the Layers page, click Settings for the marker layer, and on the opened Data page, make sure the Coordinate reference system is set to None.
Go to the Layers page once again, click Add and select Image Layer.
Response: The Data page in the Image Layer Settings dialog opens.
Click Browse, and select the image to use for the background.
Make sure the Coordinate reference system is set to None.
Beneath Position settings, enter the values you have used when specifying the imagined coordinate system, and press Enter.
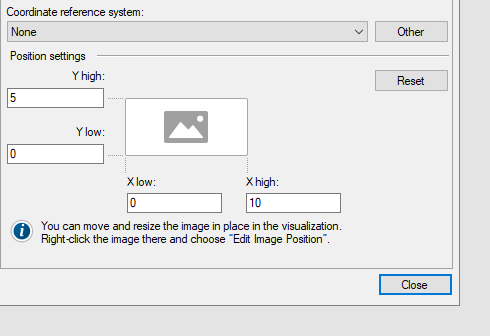
Click Close.
The result is shown below. You might need to click Zoom to filtered items in the navigation control.
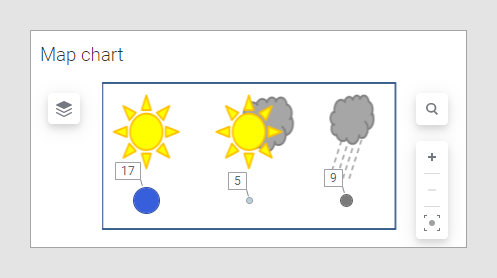
Moreover, the labels and the size of the markers are set to Count(Weather).
See also: