Creating, Copying, and Editing Rules

From the Rules card, you can create, copy, and edit rules.

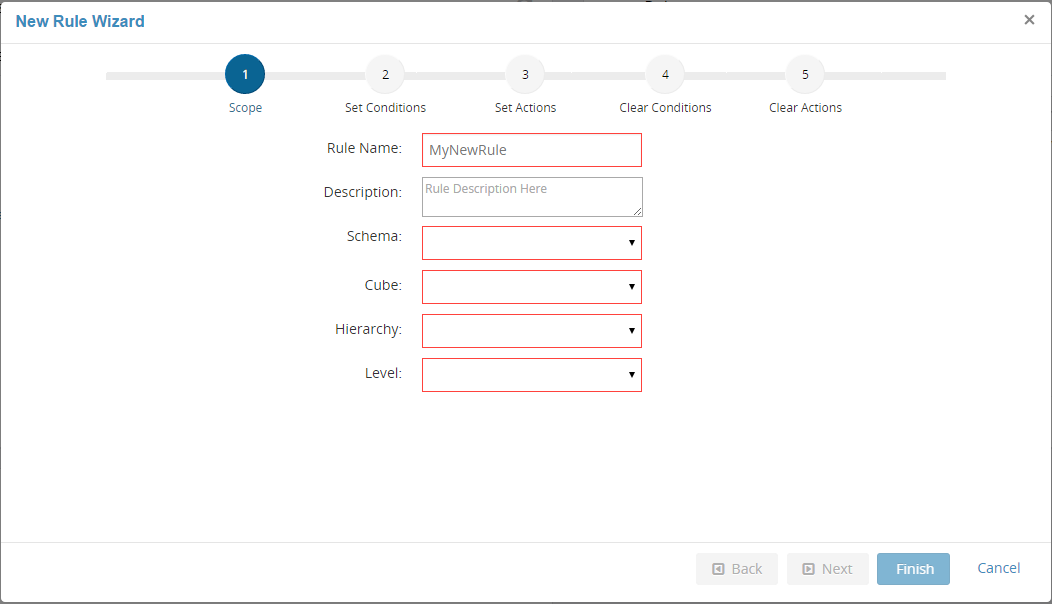
If you want to create a new rule, you can use the Create New button. If you want to create a rule that is similar to an existing rule, you can click the Copy Rule button next to the existing similar rule. This creates a copy of the existing rule with auto-populated filter conditions and actions. You can then make the necessary changes and create a new rule. You can also edit an existing rule by clicking the Edit Rule button next to a rule. All these tasks are similar to each other, and require you to define the structure of the rule in the same fashion.
Warning: While editing a rule, do not edit the existing constraints. It is recommended to create a new rule if you need to change the constraints.

Procedure

  1. On the Scope page of the wizard, define the scope of the rule.
    Creating a New Rule
    Type the rule name and description. Select the schema, cube, hierarchy, and level for the new rule.
    1. In the Rule Name field, enter a name for the rule. The name must be compliant to Java naming conventions.
    2. In the Description field, enter the details of the rule.
    3. In the Schema field, select the schema from the list.
    4. In the Cube field, select the cube from the list.
    5. In the Hierarchy field, select the hierarchy names from the list.
    6. In the Level field, select the level for aggregation. Based on the level that you select, the rule scope is defined for the selected measurement and dimension.
    7. Click Next to specify the set condition. After you select the hierarchy of attributes to apply the rule, you can specify the metrics to be monitored.
  2. On the Set Conditions page of the wizard, specify the set condition that triggers the rule.
    1. In the Measurement field, select a metric for measurement. The metrics are available for measurement based on the Hierarchy that you selected.
    2. Select an Operator as ==, >, >=, <=, < to define a condition.
    3. Enter Value to satisfy the condition.
    4. In the Dimension field, select values for the displayed fields from the adjacent lists. The dimensions are available for selection based on the selected hierarchy.
    5. Click Next to set an action.
  3. On the Set Actions page of the wizard, set an action to be performed when a rule condition is met. The available actions are:
    • Email-action: you can send an email to specified users.

      For further details, see Email Action Customization.

    • Log-action: you can log alerts in the SPM_HOME\actionlogs\logaction.log file in the XML or TEXT format.
    • No-Action: does not take any action, except for sending alerts to the Alerts card.
    1. In the Alert Severity list, select the level of severity.
    2. In the Action Name list, select the type of action. If you select Email-Action, a few additional fields are displayed such as To, CC, BCC, Subject, and Body. The email action is completed as per the details you specify here.
    3. In the Constraint area, define the frequency at which the action needs to be performed. The available options are:
      • Once: performs action only once.
      • Recurring: Repeats action every <number> seconds, for <number> more times. Note that the total count of alerts is always <maximum number + 1> as the first alert is triggered immediately after the rule condition is met, followed by the execution of alert at the specified <number> of times.
      • Always: performs the action whenever the specified condition is met.
      Important: Do not change the rule constraints (that is, condition or action) while editing the rule. For example, change an action constraint from (Once/Recurring/Always) to another. We recommend creating a new rule if you need to change the constraint.
    4. Click Next to specify the clear condition.
  4. On the Clear Conditions page of the wizard, specify the condition that clears the action. The clear condition is automatically set to the reverse value of the already specified rule condition. If you want, you can change the clear condition.
    1. Change the Measurement and Value as per your monitoring requirements.
    2. Click Next to set the clear action.
  5. On the Clear Actions page of the wizard, set the action to occur when the clear condition is met. The clear action is set automatically and is similar to the action specified on the Set Action page. However, you can change it to any of the actions as specified in the step for set action.