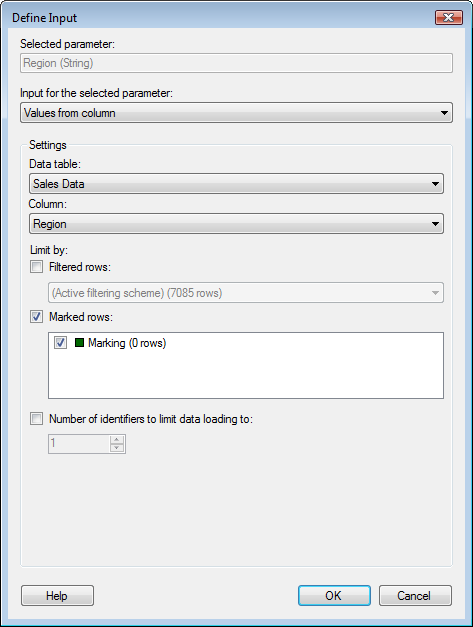
This dialog is used to tie the selected parameter to a specified value or a range from the perspective of the analysis.
To reach the Define Input dialog:
Select File > Add On-Demand Data Table....
Browse to the information link holding the desired data and select it in the list.
Click OK.
Select the parameter for which you want to create a condition and click Define Input....

Option |
Description |
Selected
parameter |
Shows the name of the parameter that was selected in the Add On-Demand Data Table dialog in a previous step. |
Input
for the selected parameter |
Allows you to select whether to retrieve the input for the parameter from values or a range. See a description of the various options below. |
Values
from column |
Use this option to set the conditions for the parameter from the values in a column already in the analysis. The data retrieved for the on-demand data table can be based on filtered or marked rows, or a combination of both. See below for details. |
Range
from column |
Use this option to set the conditions for the parameter from the range of a column already in the analysis. The resulting range will be the min and the max values from the selected column. |
Values
(fixed/properties/expression) |
Use this option if you want to specify fixed values or connect the parameter to a property. You can also calculate the values with an expression. |
Range
(fixed/properties/expression) |
Use this option if you want to specify a fixed range or connect the parameter range to properties. You can also calculate the values with an expression. Note: This option can also be used to set a single limit for a range, either an upper or a lower limit, such as loading only "Sales < 100". |
Values from column/Range from column settings

Option |
Description |
Data
table |
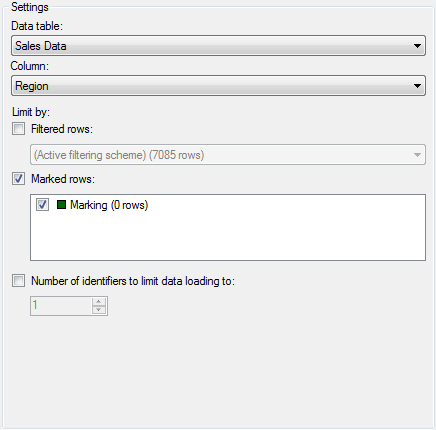
Select the data table where the column of interest is located. |
Column |
Select the column from which the input values should be picked. |
Limit
by |
Use a combination of filtering and markings to limit the loaded data to rows matching the specified settings only. If more than one option is selected then data will be retrieved for rows matching the intersection of the selected filtering and markings only. Leave both the Filtered rows and the Marked rows check boxes blank to retrieve data for all rows. |
Filtered
rows |
Select this check box to retrieve data for values remaining after filtering with the specified filtering scheme. |
Marked
rows |
Select this check box to retrieve data for values marked by the selected markings. If more than one marking is available in your analysis you need to determine which marking or markings to control the loading. If more than one marking is selected, then data will be retrieved for rows matching the intersection of the markings. |
Number
of identifiers to limit data loading to |
Available for the Values from column option only. Use this check box to determine whether the on-demand data should be loaded regardless of how many identifiers have been marked or whether there should be a limit to how many identifiers one can retrieve data for. The purpose of this option is to be able to limit the amount of data loaded from the server. If more identifiers than the specified number are marked and this check box has been selected, the data table will be empty. |
Values (fixed/properties/expression) settings

Option |
Description |
Fixed
value |
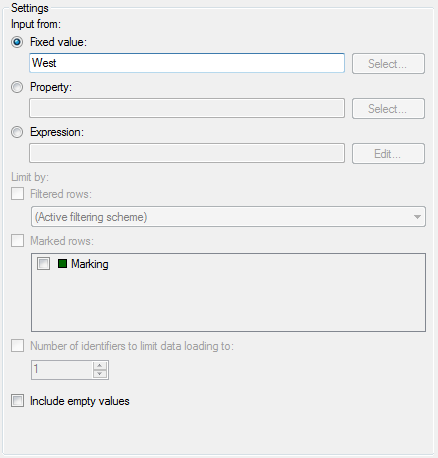
Select this option to type a value to use as input for the parameter. |
Select... |
Opens the Select Value dialog where you can pick a value available in the selected column element to use as a fixed value. This may be helpful when you are uncertain of which values are valid for the specified information link. The button will not be available if your information link is parameterized. If the selected parameter is a date or a datetime
column, you will be able to select a date by clicking on the calendar
icon instead, |
Property |
Select this option to tie the parameter value to a property value. Property values can easily be changed if you add a property control to a text area. See Using Properties in the Analysis for more information. |
Select... |
Opens the Select Property dialog where you can specify a property to tie to the selected parameter. |
Expression |
Select this option if you need to perform some calculation to obtain the desired input parameter value. For example, if the input is to be affected by multiple columns and properties, these can be defined in an expression. |
Edit... |
Opens the Edit Expression dialog where you can specify the expression to control the input parameter. |
Limit
by |
Use a combination of filtering and markings to limit the loaded data to rows matching the specified settings only. If more than one option is selected then data will be retrieved for rows matching the intersection of the selected filtering and markings only. Leave both the Filtered rows and the Marked rows check boxes blank to retrieve data for all rows. |
Filtered
rows |
Select this check box to retrieve data for values remaining after filtering with the specified filtering scheme. |
Marked
rows |
Select this check box to retrieve data for values marked by the selected markings. If more than one marking is available in your analysis you need to determine which marking or markings to control the loading. If more than one marking is selected, then data will be retrieved for rows matching the intersection of the markings. |
Number
of identifiers to limit data loading to |
Use this check box to determine whether the on-demand data should be loaded regardless of how many identifiers have been marked or whether there should be a limit to how many identifiers one can retrieve data for. The purpose of this option is to be able to limit the amount of data loaded from the server. If more identifiers than the specified number are marked and this check box has been selected, the visualization will be empty. |
Include
empty values |
Select this check box to also include rows that do not contain any data for the specified column. |
Range (fixed/properties/expression) settings

Option |
Description |
Fixed
value |
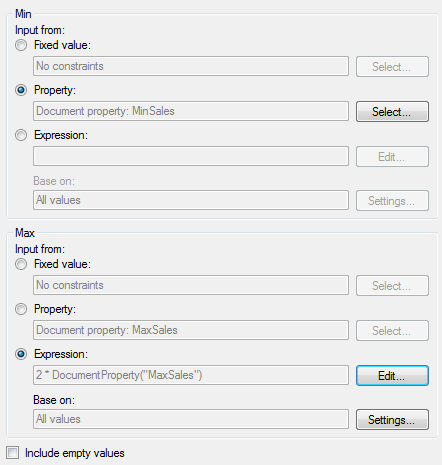
Select this option to type a value to use as input for the parameter. |
Select... |
Opens the Select Value dialog where you can pick a value available in the selected column element to use as a fixed value. This may be helpful when you are uncertain of which values are valid for the specified information link. The button will not be available if your information link is parameterized. If the selected parameter is a date or a datetime
column, you will be able to select a date by clicking on the calendar
icon instead, |
Property |
Select this option to tie the parameter value to a property value. Property values can easily be changed if you add a property control to a text area. See Using Properties in the Analysis for more information. |
Select... |
Opens the Select Property dialog where you can specify a property to tie to the selected parameter. |
Expression |
Select this option if you need to perform some calculation to obtain the desired input parameter value. For example, if the input is to be affected by multiple columns and properties, these can be defined in an expression. |
Edit... |
Opens the Edit Expression dialog where you can specify the expression to control the input parameter. |
Base
on |
Displays whether the calculations will be based on All values, Filtered values or Marked values. |
Settings... |
Select this option to define whether to base the calculations on All values, Filtered values or Marked values. |
Include
empty values |
Select this check box to also include rows that do not contain any data for the specified column. |
It is not necessary to specify both a min and a max input value for a range, one is sufficient.
See also: