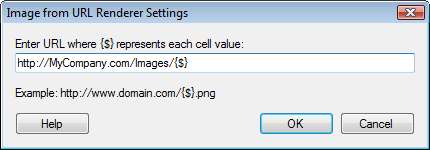
To reach the Image from URL Renderer Settings dialog:
In the Table Properties Columns page, click to select a column that uses the Image from URL Renderer, then click Settings... .
OR
Click Settings... in the Scatter Plot Properties or Map Chart Properties Labels page, or in the Add Tooltip dialog, when Show as: Image from URL has been chosen.
OR
Click Settings... in the Add/Edit Default Renderer dialog when the Image from URL Renderer has been chosen.
Note: If you apply renderer settings from the visualization properties, the settings are applied to that visualization only. If you apply renderer settings from the Add/Edit Default Renderer dialog, the settings are applied to all new visualizations.

Examples:
If the images are available on the internet and the link is entered as the example in the dialog, http://www.domain.com/{$}.png the result would be:
|
Cell value |
URL |
|
a |
http://www.domain.com/a.png |
|
b |
http://www.domain.com/b.png |
|
c |
http://www.domain.com/c.png |
|
d |
http://www.domain.com/d.png |
|
e |
http://www.domain.com/e.png |
If the requested images reside on a company network location you could also specify the path to the folder:
Q:\MyCompany\Images\{$}
Note: Since local network paths may be unavailable to other users, the recommended procedure is to use a URL rather than a local network path when publishing analyses to the library.
Width and Height
If the website allows, you can also specify the width and height of the rendered image (in pixels): http://MyCompany.com/Images/{$}/image?width={$width}&height={$height}
If $width and $height are included in the link template, the image will be rendered using the width and height specified by your current table row height/column width, or, in the case of labels or tooltips, by the size set using the size slider. If not included, the default size will be rendered and changing the size will simply enlarge or shrink the default image.
See also: