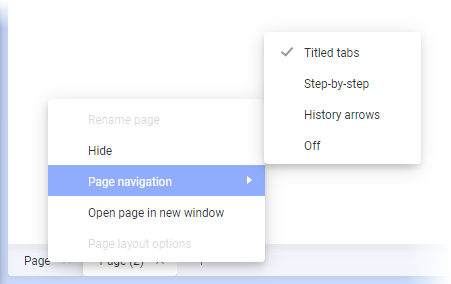
Changing page navigation method in an analysis
You can add many pages to an analysis, each of them containing one or more visualizations. There are different methods to handle how to navigate among the pages.
Titled tabs
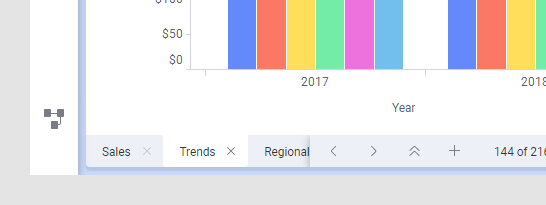
The pages are indicated by titled tabs at the bottom of the analysis, and you click these tabs to switch pages. You use this method when you want to see the titles of the pages and to be able to easily locate a certain page by its title.
If the analysis contains too many tabs to be shown at the same time, a double arrow is shown to the left of the plus sign. Click the double arrow to get a drop-down list of all pages in the analysis, from which you can select the wanted page. Moreover, the left and right arrow make it possible to scroll horizontally through the pages.
Step-by-step
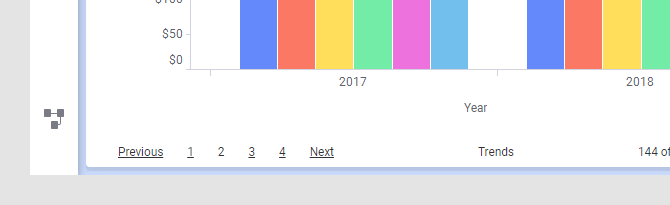
The pages are shown as numbered links, supplemented with Next and Previous links. This method can be useful when the order of the pages is important, and you want to present the analysis in a step-by-step flow.
History arrows
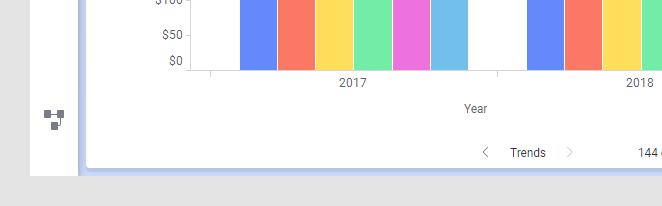
An analysis that is created in Spotfire Analyst might guide the user through the pages via various action controls in form of buttons or links in text areas and certain visualizations. When the navigation is handled this way, the History arrows method might be suitable to use. You see only the name of the current page, and you proceed to another page via an action control. However, the page history arrows next to the page title makes it possible to return to a previously visited page.
Off
You can also turn off all navigation, meaning that neither tabs, links nor arrows will be available. Hence, it is required that the analysis workflow is handled using action controls in the same way as described in History arrows (the analysis must have been created in Spotfire Analyst). You get a cleaner look, which might be beneficial when, for example, there is only one page in the analysis, or you want less cluttered dashboards.