Exporting to PDF
You can export what is visualized in an analysis to a PDF document using the Export to PDF dialog.
The dialog is accessed by selecting on the menu bar.
From the dialog, you can
- do an ad-hoc, basic export of the content in an analysis, and get a nice PDF output.
- prepare customized reports to be exported. When you prepare such reports, you have access to export settings that are more advanced. You can, for example, apply bookmarks and filters in the report to mirror certain interactivity in the analysis.
In both cases, a preview of the PDF output is provided.
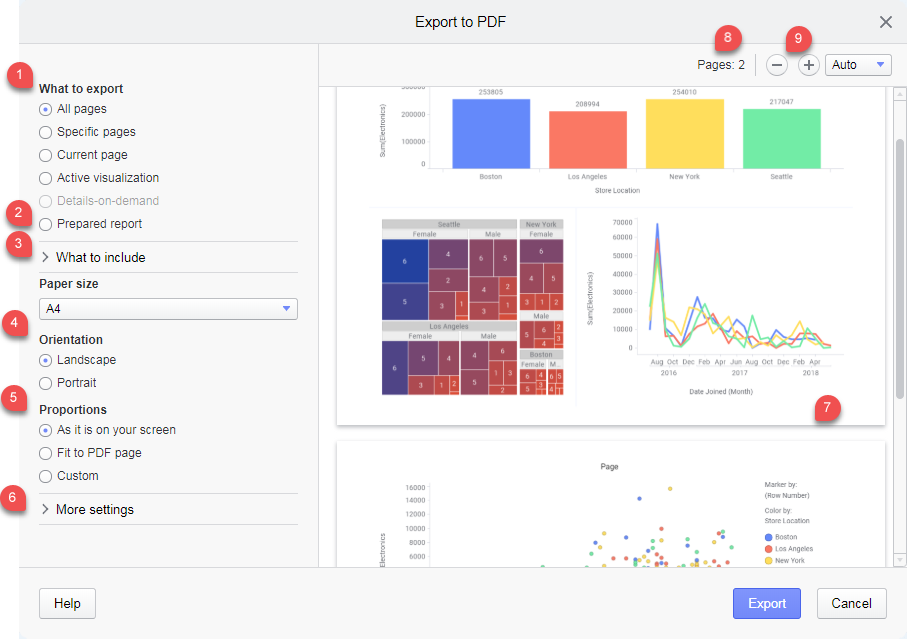
An example of a Export to PDF dialog is shown above.
Beneath What to Export (1), you can select to export the entire analysis (All pages), parts of it, or prepared analysis reports (2). A simple click on Export in the lower right corner returns the PDF output. You can, though, before clicking Export, modify the appearance of the PDF output using various settings. Which modifications you can do depend on what you select to export.
The lower left part of the dialog contains settings that are general to the different What to export options (Prepared report is an exception). You can
- beneath What to include (3), decide whether page titles, page numbers, date, and annotations should be included in the export.
-
define the Paper size and page Orientation (4), and customize the Proportions of the content on a page (5). The option As it is on your screen keeps the proportions used in the analysis. It is, however, possible to change the Aspect ratio, that is, the relations between width and height of the content of the pages using the Custom option. If you want to directly adapt the proportions so the entire PDF page is utilized, the option Fit to PDF page is available.
When you specify other proportions than are used in the analysis itself, you can also adjust the size of the texts on the page. This can be useful, for example, when the preview shows that some visualization text is truncated. If you decrease the text size, the text can be fully visible.
The preview (7) represents the final PDF pages. It reflects what is currently selected to be exported, and the settings made. Above the preview, the number of PDF pages that are created in the export is displayed (8), and you can use the scroll bar to navigate among them. Buttons for zooming in and out in the preview are available (9). By zooming out, for example, you get an overview of the pages.