Example 11: Constructing a D-Optimal Split Plot Design
The terminology for split-plot designs arose from their original application in agricultural experiments – a factor that only varies between separate plots of land is called a whole-plot factor (hard-to-change factor), and a factor whose levels vary within each plot is called a subplot factor (easy-to-change factor). Today, split plot experiments are commonly used in industrial and manufacturing experiments.
Consider a problem in which there is one hard-to-change factor and three subplot factors. All factors have two levels, each with the number of whole plots equal to eight and the whole plot size being equal to two. We want Statistica to create an optimal design, one in which the estimates of the coefficients are uncorrelated and thus create an orthogonal design.
- Designing the Experiment
- Start the Experimental Design (DOE) analysis:
Ribbon bar. Select the Statistics tab, and in the Industrial Statistics group, click DOE to display the Design & Analysis of Experiments dialog box.
Classic menus. On the Statistics - Industrial Statistics & Six Sigma submenu, select Experimental Design (DOE) to display the Design & Analysis of Experiments dialog box.
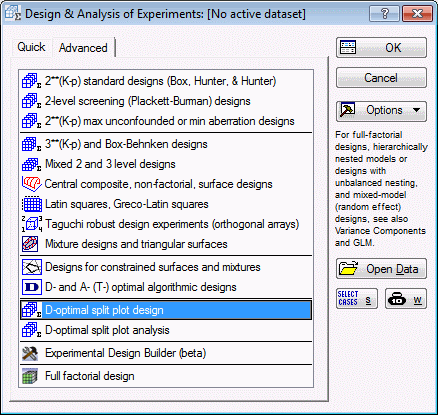
Select the Advanced tab, and select D-optimal split plot design.
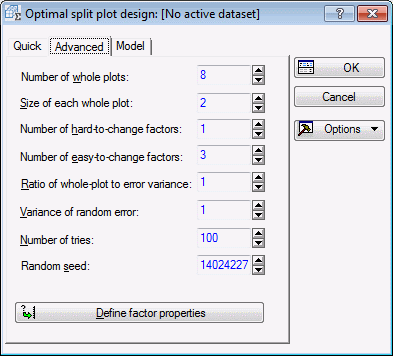
Click the OK button to display the Optimal split plot design dialog box. On the Quick tab, enter the following information:
- 8 as the Number of whole plots,
- 2 as the Size of each whole plot,
- 1 as the Number of hard-to-change factors
- 3 as the Number of easy-to-change factors
Next, click the Define factor properties button to display the Optimal Split Design dialog box, where you can enter the factor property information. You can enter Factor Name, Number of levels, an E/H Easy or Hard label, and a C/Q Cont. or Qual. (continuous/qualitative) label. If the factor is continuous, you will need to enter a low and high value [columns Low value (Cont.) and High value (Cont.)], which define the range of the factor. Since, all factors are qualitative with two levels, we do not need to edit this dialog box.
Click OK to return to the Optimal split plot design dialog box.
Select the Advanced tab.
Notice that in order to compute an optimal design matrix, you need to make assumptions about the data. First, you need to provide the ratio of the whole plot variance to the error variance. In addition, you need to specify the variance of the random error.
Two additional options remain. The first is the number of tries to consider. The number of tries relates to the number of random starting design matrices to use. By default, Statistica will go through 100 random starting design matrices. For each one, the design will be optimized. Statistica records the best design from this random design and then tries another one and the process begins again.
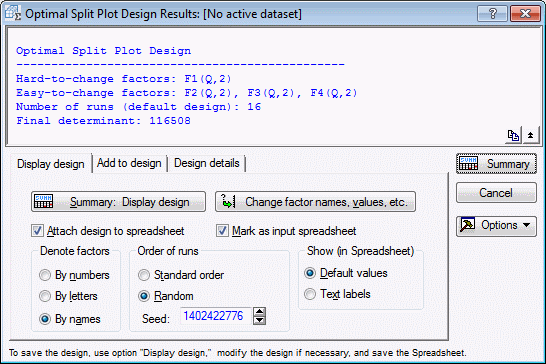
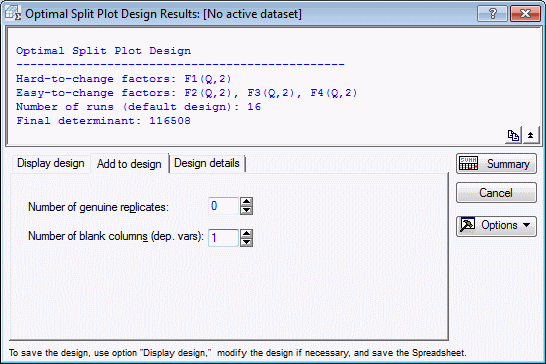
Click OK in the Optimal split plot design dialog box to compute the optimal split plot design. The algorithm should quickly converge, displaying the Optimal Split Plot Design Results dialog box. The determinant for the final design should be 116508.4444 as indicated in the Summary Box.
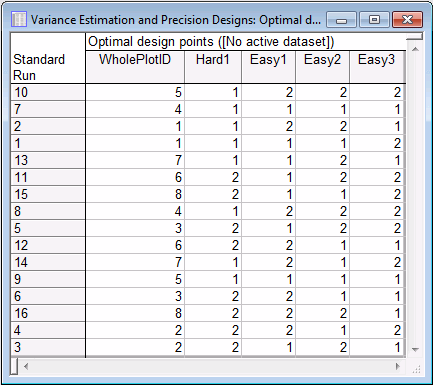
On the Display design tab, click the Summary: Display design button. Your design might be a little different from this one, because by default Statistica randomizes the runs within the whole plot.
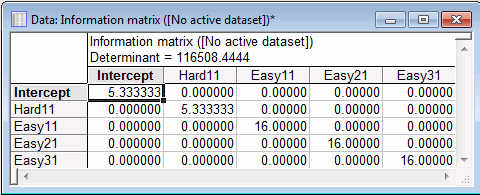
Next, select the Design details tab, and then click the Information matrix button. It is this matrix whose determinant is maximized by the D-Optimal split plot algorithm.
Notice the 0s on the off diagonals. This indicates that the parameter estimates are uncorrelated. Technically, there might be some very small values that are close to 0 on the off diagonals; however, they are too small to be significant, and can be ignored for all practical purposes.
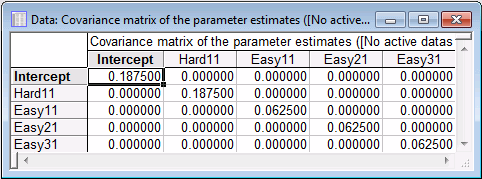
Next, click the Variance of the Estimates button to produce the covariance matrix of the parameter estimates. Notice that the diagonal elements are the reciprocals of the diagonals of the information matrix. Assuming the variance ratio and variance of the random error are both 1, you would have the following optimal covariance matrix.
You can also view the covariance matrix of the responses and the design matrix by clicking the Variance of Responses and Design matrix X buttons, respectively. In addition, if you are going to analyze the design using GLM, you will need to generate the design syntax for this model. Click the Design syntax (GLM) button to output the design syntax to a report.
You can then copy and paste this directly into the GLM Syntax Editor. Note that GLM within Statistica performs the split plot analysis in the following manner: it uses the ANOVA method to estimate the whole plot and the subplot error terms and bases the comparisons of means using ordinary least squares (that is, both sources of error are NOT taken into account when comparing means. Only the subplot error is used, in essence ignoring the split plot design structure).
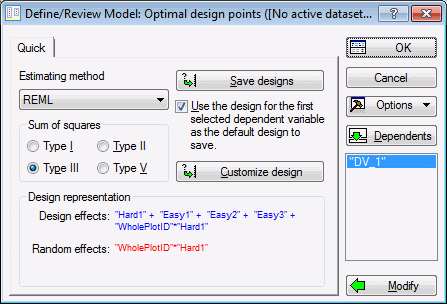
In order to use the restricted maximum likelihood method, or REML, to estimate variance components and perform a generalized least squares analysis (that is, incorporate both sources of error when comparing means), perform the analysis using the Statistica Variance Estimation and Precision module. If you do not already have a license for Variance Estimation and Precision, contact Statistica for more information.
To continue with this example and illustrate the analysis using Variance Estimation and Precision, you will need to add a blank column. Select the Add to design tab. Enter the value of 1 in the Number of blank columns (dep. vars) field.
Select the Display design tab, and then click the Summary: Display design button. The same design will be displayed, but this time with an additional blank column that can be used to store the dependent variable values once they are observed.
The blank variable (DV_1) must be filled with data (random numbers will suffice) before the data set can be analyzed by Variance Estimation and Precision.
Double-click on the column named DV_1 to display the Variable 6 dialog box. Click the Properties button to display the Variable Properties dialog box. The Variance Estimation and Precision properties that have been appended to this blank column are listed.
Open the Variance Estimation and Precision analysis module:
Ribbon bar. Select the Statistics tab, and in the Advanced/Multivariate group, click Variance to display the Variance Estimation and Precision dialog box.
Classic menus. From the Statistics menu, select Variance Estimation and Precision to display the Variance Estimation and Precision dialog box.
Variance Estimation and Precision automatically recognizes the design and the appropriate variables for you. Click OK to complete the analysis