Example 10: Setting Up a Data Entry Setup
When STATISTICA Enterprise is used in conjunction with Web-Based Data Entry, users can enter data via a web browser. Then that data can be analyzed in Analysis Configurations, just as with data queried from a database.
To prepare for that use case, we must create a Data Entry Setup. A Data Entry Setup is another type of object we can create in the STATISTICA Enterprise Manager, analogous to a Data Configuration.
Once the Data Entry Setup has been created, users can enter data into it via a web browser. Then that Data Entry Setup can be used in the STATISTICA Enterprise Manager in place of a Data Configuration. So an Analysis Configuration can be pointed to the Data Entry Setup to analyze the data that was input via the web. Reports, Tasksets, and Dashboards will also operate as usual, based on data from a Data Entry Setup instead of a Data Configuration.
A Data Entry Setup contains two types of objects: Characteristics and Labels. So we must first create Characteristics and Labels that will be inserted into Data Entry Setups.
Characteristics are objects that define numerical data, and Labels are objects that define text data.
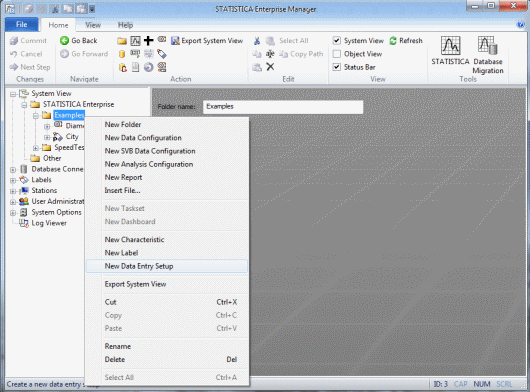
To create a Label, right-click on a folder, and select New Label.

A new Label object will be displayed in the tree view beneath that folder.
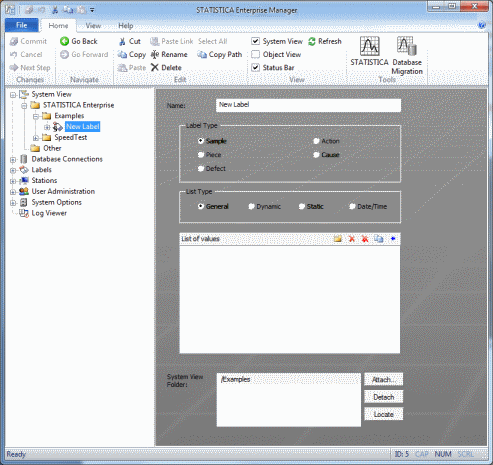
Give the new Label a name.
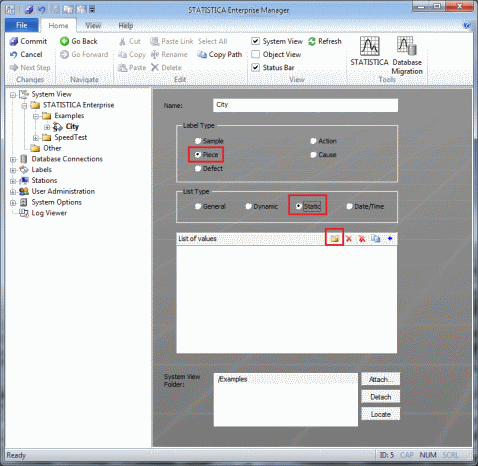
There are several kinds of Labels. For this example, we will create a Piece Label, so select the Piece option button. There are also several possible List Types. For this example, select Static.
Now we need to specify the different possible label values from which users may choose. Click the yellow folder icon at the upper-right of the List of values box.
Now you can add a label value.

Repeat the process to add all the possible label values.
Next, create a new Characteristic object. Right-click on the folder in the tree view, and select New Characteristic.
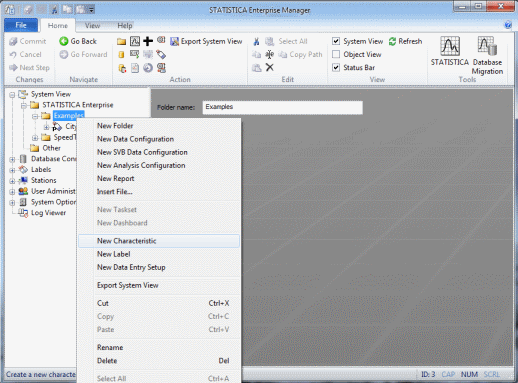
A new Characteristic object will be displayed beneath the folder.
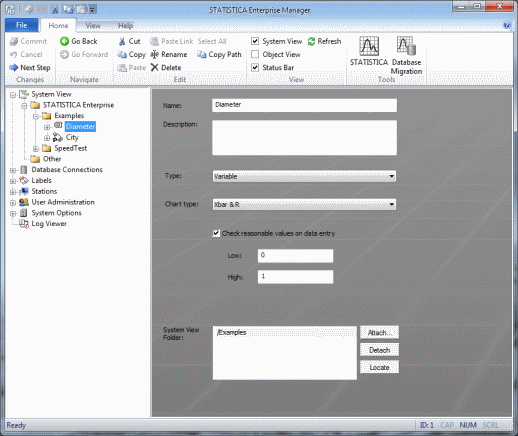
We can edit the name and specify the type of Characteristic and the chart type. We can also select the option to prompt users if they input a value outside specified reasonable limits. For this example we will change the name, and otherwise accept all default settings.
Now that we have a Label and a Characteristic, we are ready to create a new Data Entry Setup. Right-click on the folder, and select New Data Entry Setup.
A new Data Entry Setup object will be displayed beneath the folder. Give it an appropriate name.
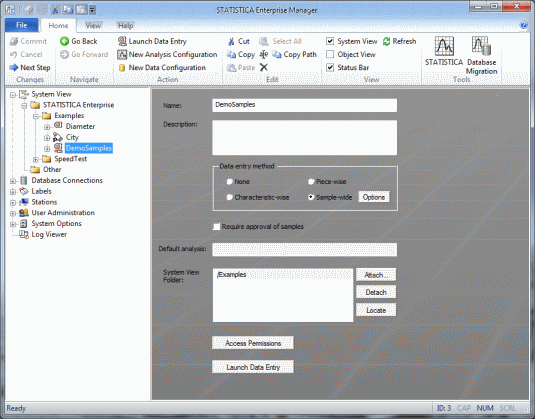
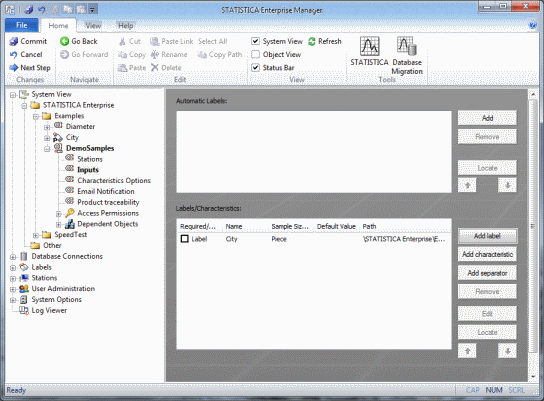
Expand the Data Entry Setup node by clicking on the “+” sign, and select the Inputs node.
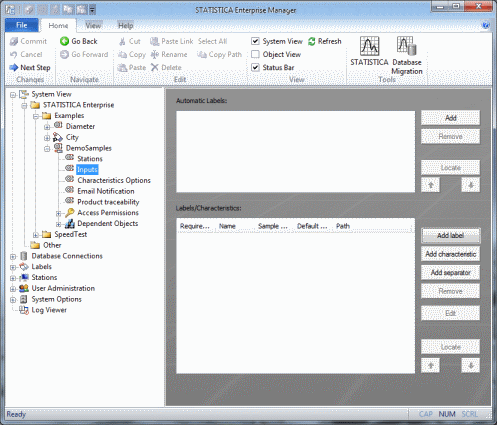
Use these options to specify which Labels and Characteristics to put into this Data Entry Setup. Click Add label to select a Label. Select the City Label created earlier.
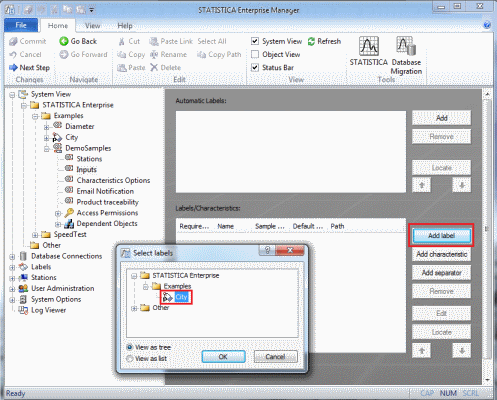
The selected Label will be displayed in the Labels/Characteristics list box.
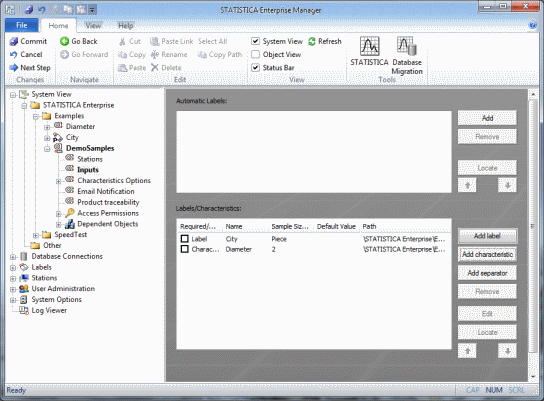
Click Add characteristic to select a Characteristic object. Select the Diameter Characteristic created earlier.
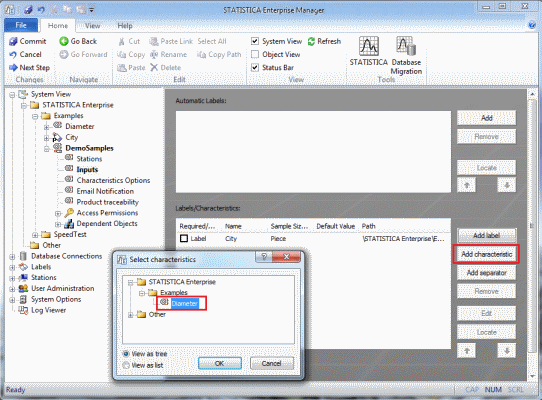
The selected Characteristic will be displayed in the Labels/Characteristics list box.
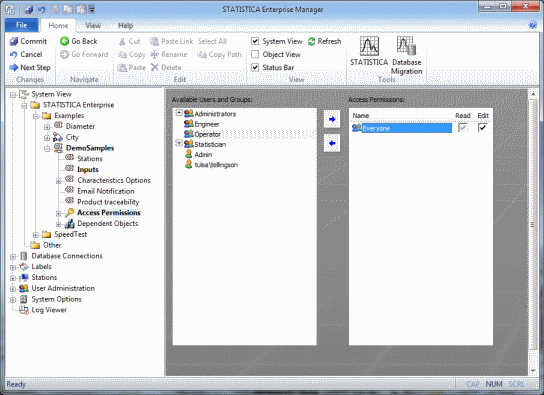
As with Data Configurations, we must also specify Access Permissions.
Save the new Data Entry Setup by clicking the diskette icon at the upper-left of the application.
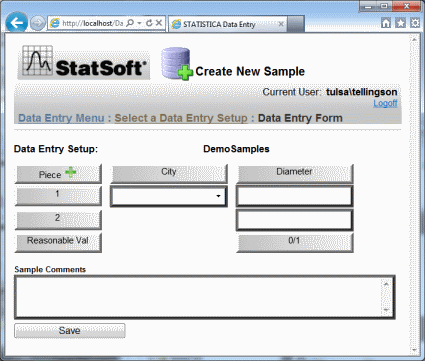
When we log on to the Web Data Entry site via the web and select the Data Entry Setup just created, we will see that the Label and Characteristic objects we specified in the Inputs node are now available for data input in the web UI.
Let’s compare the web UI with the Data Entry Setup object Inputs node.
The web UI:
The Data Entry Setup object’s Inputs node:
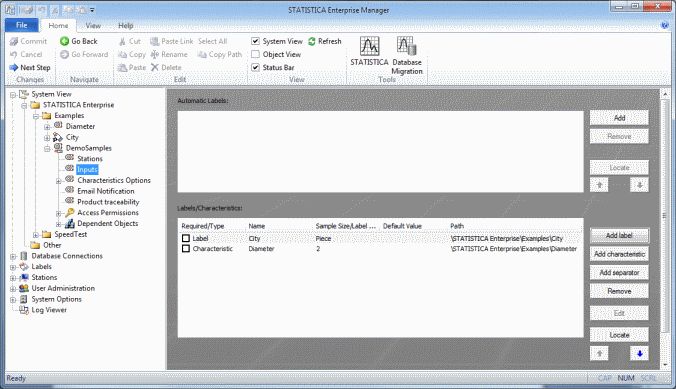
Notice the Label and Characteristic are present in both places, and in the same order.