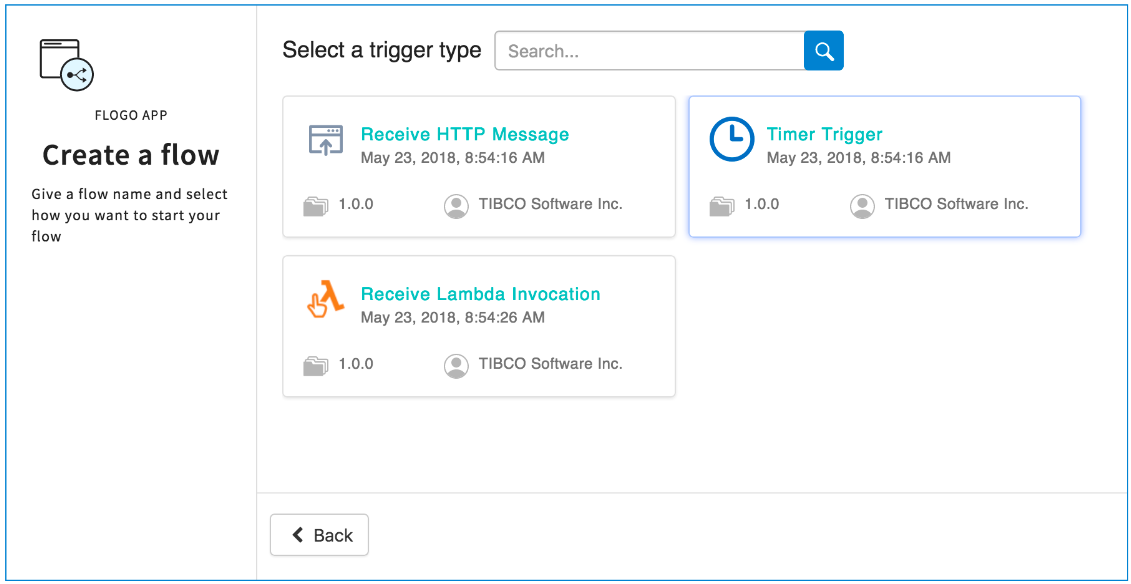
Creating a Flow with a REST Trigger (Receive HTTP Message)

A REST flow starts with a REST trigger.

To create a REST flow, do the following:

Procedure

  1. Click an app name in the Apps page in TIBCO Cloud Integration- Flogo (PAYG) to open its page.
  2. Click the Create Flow button.
    The Create a Flow dialog opens.
  3. Enter a name for the flow in the Flow Name text box.
    Flow names within an app must be unique. An app cannot contain two flows with the same name.
  4. Optionally, enter a brief description of what the flow does in the Description text box and click Next.
  5. Click Select a trigger to start.
  6. Click Receive HTTP Message under Select a trigger type.

    1. Select the REST operations you want to implement by clicking on the box for each operation under Method.
      Note: If you are creating a REST trigger for a blank flow, you must select only one operation per REST trigger. You can create multiple REST triggers for a blank flow and each trigger can be configured with a different REST operation. Two REST triggers cannot have an identical port, path, and method combination. Each REST trigger needs to differ from the other REST triggers for the same flow with either a unique port, path, or operation (GET, PUT, POST, DELETE).
    2. Enter a resource path in the Resource Path text box.
    3. Enter the JSON schema or JSON sample data for the operation in the Enter a JSON Schema or an example of your JSON message. This will be the schema for both input and output.
  7. Click Finish.
    A separate flow will be created for each operation that you selected with the operation name appended to each flow.

    Whenever you create a REST flow, for each REST flow along with the ReceiveHTTPMessage trigger a ReplyToHTTPMessage activity gets created by default.

  8. Click on the flow name to open the flow page.
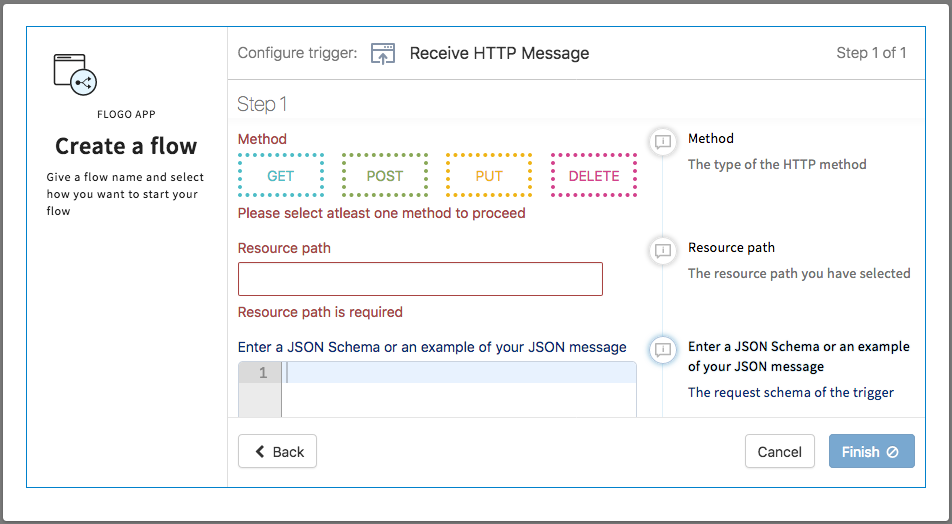
    For flows created with a trigger: If you created the flow with a trigger, the flow is displayed with the ReceiveHTTPMessage trigger and the ReplyToHTTPMessage activity tiles created. You can create activities in between the two by dragging-and-dropping the ReplyToHTTPMessage activity tile to the right in between any plus icons such that one or more icons move in between ReceiveHTTPMessage trigger and the ReplyToHTTPMessage activity. Now you can click a icon to create an activity.

    For blank flows: When you add the ReceiveHTTPMessage trigger to a blank flow, you can configure the reply in the Reply Settings tab of the trigger itself. You need not explicitly add add a ReplyToHTTPMessage activity in the flow.

  9. Click the ReceiveHTTPMessage trigger tile and configure its properties. See Receive HTTP Message for details.
  10. Click ReplyToHTTPMessage activity tile and configure its properties. In a blank flow, the output fields configured in the Flow Inputs & Outputs dialog must be mapped to the input parameters of the ReplyToHTTPMessage activity.
    See Reply to HTTP Message for details.