Creating a Blank Flow without a Trigger
A Flogo App, can contain a flow that is independent of one or more triggers that will eventually activate the flow. This method of creating a flow is useful when you have the logic for the flow but do not know yet what action should cause the flow to activate. You can start by creating a flow first and attach one or more triggers to the flow at a later time. A blank flow is akin to a function that has input parameters and return parameters.
The output of a trigger provides the input to the flow. Hence, it must be mapped to the flow input. In the absence of a trigger, when creating a flow, there must be a well defined contract within the flow which specifies the input to the flow and the output expected after the flow completes execution. You define this contract in the Flow Inputs & Outputs dialog. The Flow Inputs & Ouputs contract works as a bridge between the flow and the trigger, hence every trigger has to be configured to map its output to the Input parameters defined in Flow Inputs & Ouputs.
If any trigger needs to send a response back to a server, its output must be mapped to the output of the Return activity.
Procedure
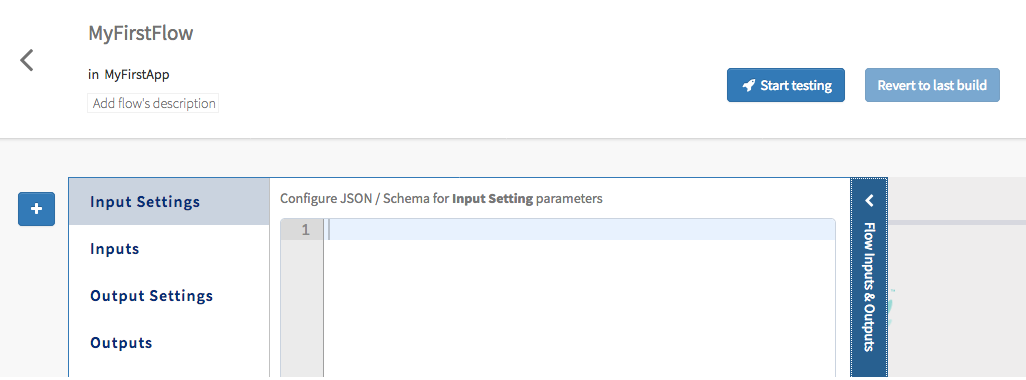
- If you selected Create a blank flow in the Create a flow dialog, the flow gets created and you will be prompted to either start from a trigger or configure your flow contract. Select Configure Flow Inputs & Outputs. The page opens displaying the Inputs and the Outputs tabs.
-
Hover your mouse over the shaded square to expose the add activity button (
 ). Click the add activity button to add an activity.
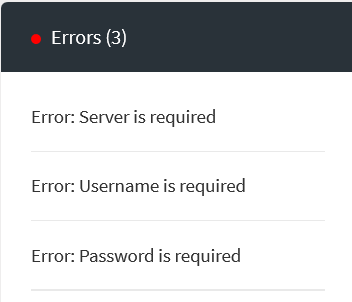
After adding an activity, be sure to configure its properties by clicking on the activity tile. If one or more activities are not configured properly in a flow, the Errors panel on the lower right of the page shows the number of errors in the flow. Click the Errors panel to see the errors.
). Click the add activity button to add an activity.
After adding an activity, be sure to configure its properties by clicking on the activity tile. If one or more activities are not configured properly in a flow, the Errors panel on the lower right of the page shows the number of errors in the flow. Click the Errors panel to see the errors.Fix the errors before proceeding.
-
Continue adding activities by clicking the successive () buttons. To add an activity in between two exisiting activities, you can drag the activities to the right in order to make room for the new activity then click the
button to add the new activity.
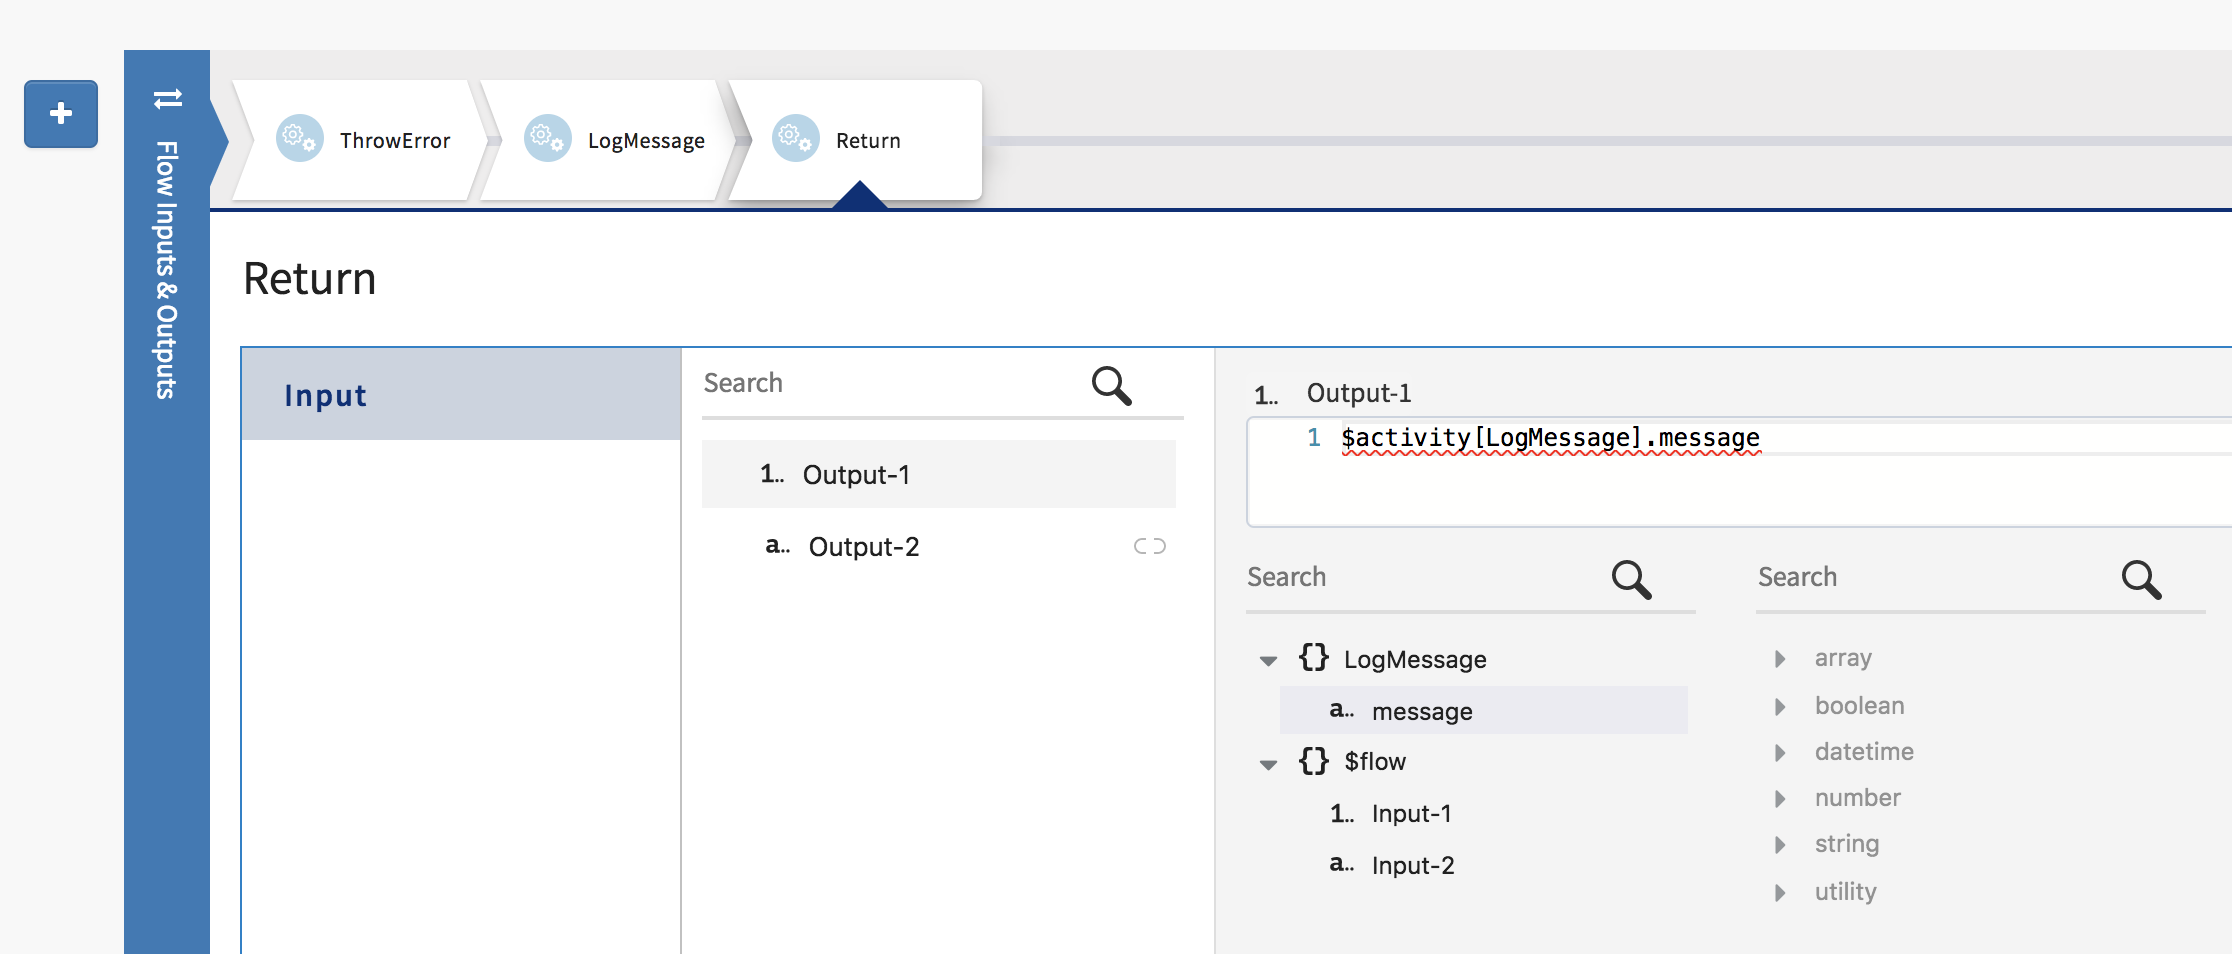
- Click the Return activity to configure the parameters that the flow outputs after completing execution. The Input tab of the Return activity displays the parameters that you had configured in the Output tab of the Flow Inputs & Outputs dialog. Be sure to map the Return activity Input parameters to parameters that you want the flow to return.