Creating a Flow Execution Branch

Activities in a flow can have one or more branches. If you specify a condition for a branch, the branch executes only when the condition is met. You also have the option to create an error branch from an activity. The purpose of the error branch is to catch any errors that might occur during the execution of the activity. Branching is also supported for Error Handler flows, which serve the purpose of catching all errors at the flow level.

Note: You cannot create a branch from a trigger or a Return activity.

A Return activity ends the flow execution. So, regardless of whether the flow execution encounters a Return activity in a branch or at the end of the flow itself, as soon as the flow execution encounters a Return activity anywhere, it exits the flow from that location.

Note: A Return activity is not added by default. Depending on your requirements, you must add the Return activity manually. For example, if any trigger needs to send a response back to a server, its output must be mapped to the output of the Return activity in the flow.

Procedure

  1. From the Apps page, click the app name then click the flow name to open the flow details page.
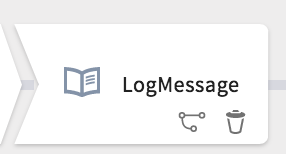
  2. Hover your mouse cursor over the activity to expose the icons for adding a branch and deleting the activity in the bottom right of the tile.
  3. Click the Add Branch icon ().
    A branch gets created and the Add Activity dialog opens.
    Each branch has a label associated with it. The label has the following format:
    • When branching to an empty activity:

      <Name of activity in main flow>to

      For example, LogMessageto.
    • When branching to a specific activity:

      <Name of activity in main flow>to<Name of activity in branch>

      For example, LogMessagetoInvokeRESTService.
  4. Add activities to the branch flow as you would do to any other flow by clicking on the button.
  5. If you want the flow execution to terminate after this branch executes successfully, be sure to add and configure the Return activity at the end of the branch. If you do not want the flow execution to terminate, do not add a Return activity at the end of the branch.
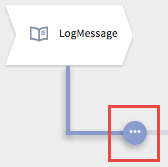
  6. Hover your mouse cursor to the end of the branch until you see a button with three dots placed horizontally.

  7. Click the button to expose the following options:

  8. Click the branch settings button ().
    The Branch Mapping Settings dialog opens.
  9. Select a branch condition: Success, Success with condition, or Error.
    See the section, Types of Branch Conditions, for details on the three conditions.
  10. Click Save.
  11. Add condition to a branch as need be. See Setting Branch Conditions for details.