Docker Deployment
This section provides prerequisites and describes how to deploy ibi Data Quality using Docker Compose.
Prerequisites
Without Docker Desktop
To install WLS2 and Ubuntu, follow the instructions found on the following website:
https://ubuntu.com/tutorials/install-ubuntu-on-wsl2-on-windows-10#1-overview
To run Docker Container without Docker Desktop on Windows (Windows 2022 server)
- Make sure VM support is enabled in th BIOS of the windows instance.
- Launch PowerShell console as administrator.
- In Powershell Console,
issue the command:
PS>wsl -- install
This will require you to reboot the machine. - Once reboot is complete, the system will automatically install Ubuntu WSL2 environment.
- Once the Ubuntu installation process completes successfully, the system will bring up the console of Ubuntu WSL2 prompting you to set up username and password.
- In Ubuntu console, issue
commands to install docker engine in WSL2 environment:
$ sudo apt-get update

$ sudo apt-get install ca-certificates curl gnupg

$ sudo install -m 0755 -d /etc/apt/keyrings

$ curl -fsSL https://download.docker.com/linux/Ubuntu/gpg | sudo gpg --dearmor -o /etc/apt/keyrings/docker.gpg

$ sudo chmod a+r /etc/apt/keyrings/docker.gpg


$ echo "deb [arch="$(dpkg --print-architecture)" signed-by=/etc/apt/keyrings/docker.gpg] https://download.docker.com/linux/Ubuntu "$(. /etc/os-release && echo "$VERSION_CODENAME")" stable" | sudo tee /etc/apt/sources.list.d/docker.list > /dev/null


$ sudo apt-get update

$ sudo apt-get install docker-ce docker-ce-cli containerd.io docker-buildx-plugin docker-compose-plugin
- On the Ubuntu console, use
following commands to grant the user permission to use docker:
$ sudo groupdadd docker

$ sudo usermod -aG docker $USER

$ newgrp docker
- On the Ubuntu console,
issue this command to start docker engine:
$ sudo service docker start
. Note:This step will need to be repeated every time the WSL2 environment is restarted - On the Ubuntu console, find
the WSL2 internal IP by issuing the command:
$ ip addr show dev eth0 | grep -oP "(inet\s+)\K\S+"
- the IP of the WSL2 is the string before "/" from the command output.
- Save the IP which will be referred to in the later step.
- The IP of the WSL2 might change between restart
- Once the docker engine is up, regular docker commands such as docker run hello-world or docker compose up can be run in WSL2.
- Follow the steps described in the iDQ install guide to install the Docker version of iDQ
- Once the iDQ docker
services are up, the services by default will start on ports 9543, 9800, 9801,
9803 and 9807 inside the WSL2. To expose these services outside WSL2, configure
the portproxy and Firewall of the Windows instance as described below:
- In PowerShell console,
issue the following commands to enable the portproxy:
PS> netsh interface portproxy add v4tov4 listenaddress=0.0.0.0 listenport=9543 connectaddress=<IP_OF_THE_WSL2> connectport=9543

PS> netsh interface portproxy add v4tov4 listenaddress=0.0.0.0 listenport=9800 connectaddress=<IP_OF_THE_WSL2> connectport=9800

PS> netsh interface portproxy add v4tov4 listenaddress=0.0.0.0 listenport=9801 connectaddress=<IP_OF_THE_WSL2> connectport=9801

PS> netsh interface portproxy add v4tov4 listenaddress=0.0.0.0 listenport=9803 connectaddress=<IP_OF_THE_WSL2> connectport=9803

PS> netsh interface portproxy add v4tov4 listenaddress=0.0.0.0 listenport=9807 connectaddress=<IP_OF_THE_WSL2> connectport=9807
In PowerShell console, open the ports on Firewall for WSL2 services:
 PS> netsh advfirewall firewall add rule name="Open Port 9543" dir=in action=allow protocol=TCP localport=9543

PS> netsh advfirewall firewall add rule name="Open Port 9800" dir=in action=allow protocol=TCP localport=9800

PS> netsh advfirewall firewall add rule name="Open Port 9801" dir=in action=allow protocol=TCP localport=9801

PS> netsh advfirewall firewall add rule name="Open Port 9803" dir=in action=allow protocol=TCP localport=9803

PS> netsh advfirewall firewall add rule name="Open Port 9807" dir=in action=allow protocol=TCP localport=9807
- In PowerShell console,
issue the following commands to enable the portproxy:
Docker Desktop or Docker Engine with Compose
Install Docker as documented for your environment.
To install Docker Desktop, follow the instructions found at https://docs.docker.com/get-docker/ .
Loqate Linux install with data packs
This is an optional installation step only applicable if you intend to use the default address cleansing service named Cleanse Address Using Loqate shipped with the product.
Note:
-
In order to install Loqate, you will need an active license key. Please contact product support if you do not have a license key.
-
If you are running ibi Data Quality containers on a Linux machine, you will need to install and configure Loqate on that same machine.
-
If you are running ibi Data Quality containers on a Windows machine, you will need to install the Loqate software on another Linux machine, zip the contents of the install folder, copy them over to the host Windows machine and extract the files to your desired folder.
-
As a final step, you will need to set the LOQATE_HOME environment variable located in the install/.env
For example, if you have installed Loqate on the host Linux machine in a folder called /software/loqate then set this variable to
LOQATE_HOME=/software/loqate
For example, if you have extracted the contents of Loqate install to a folder named C:/Software/Loqate_Linux on your Windows machine then then set this variable to
LOQATE_HOME=C:/Software/Loqate_Linux
To install Loqate on Linux platforms:
-
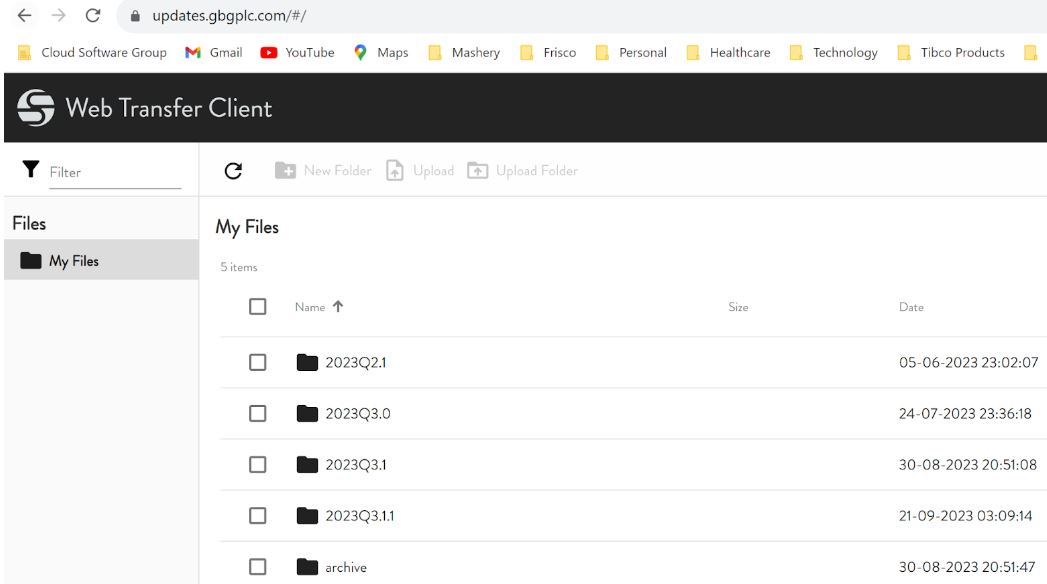
If you have requested a Loqate license key, you will receive an email with instructions to download the software.
-
Click on the download link, login using the credentials provided in the email.
-
Select the folder for the latest version.
-
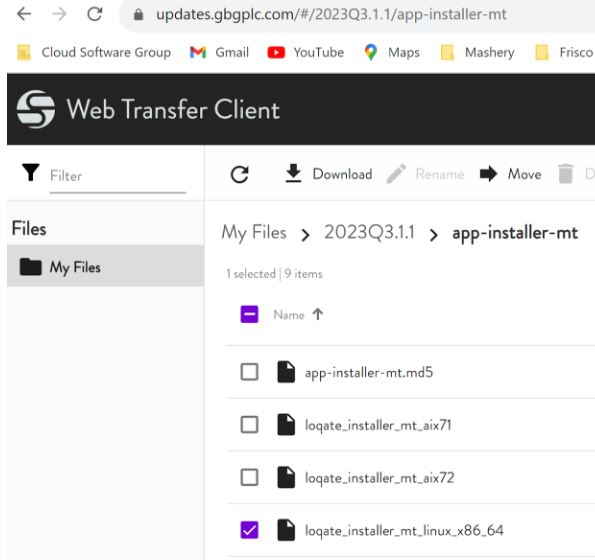
Go to the app-installer-mt folder and download the linux installer as shown below:
-
Place the install file in the desired directory of the host linux machine.

-
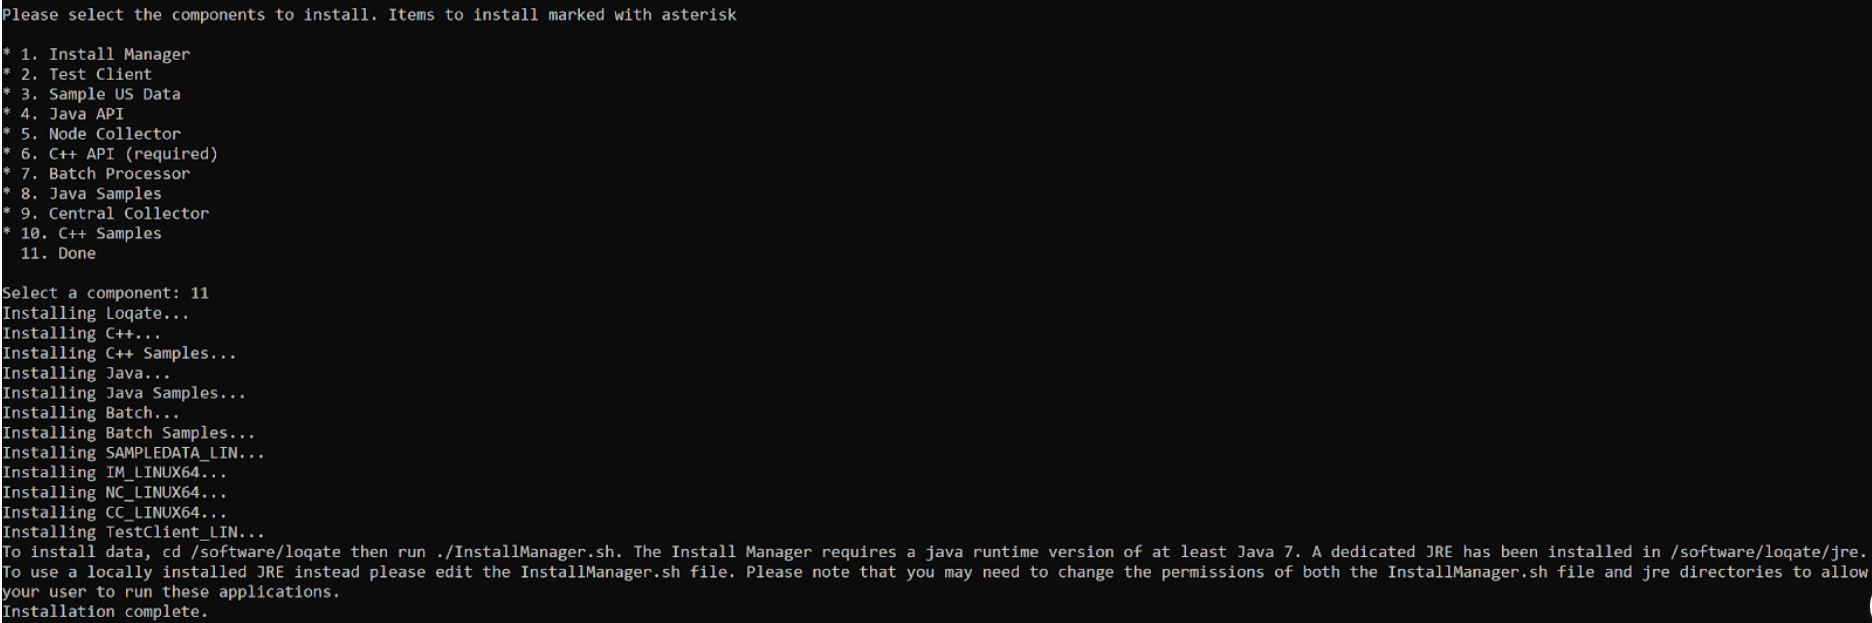
Run the installer and provide the install location.

-
Select 11 to accept the default options and begin the installation.
-
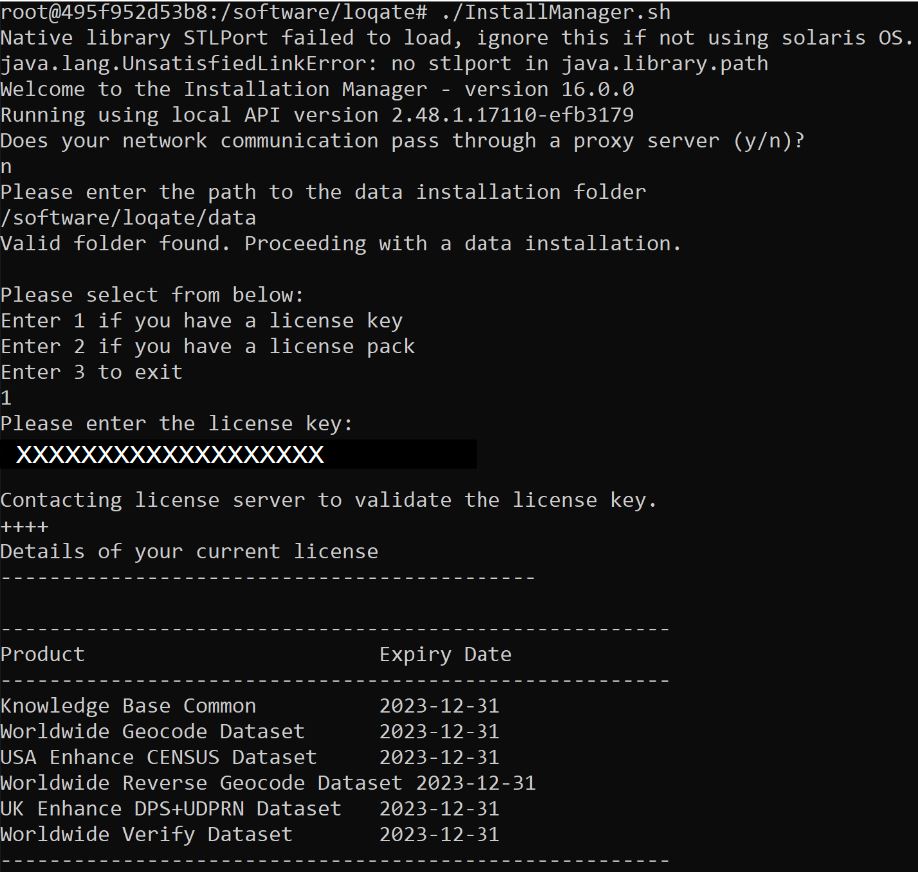
Navigate to the directory where you have installed the software and run InstallManager.sh. Provide the installation folder and the license key.
-
Then select option 2 and provide the location to download the data packs.
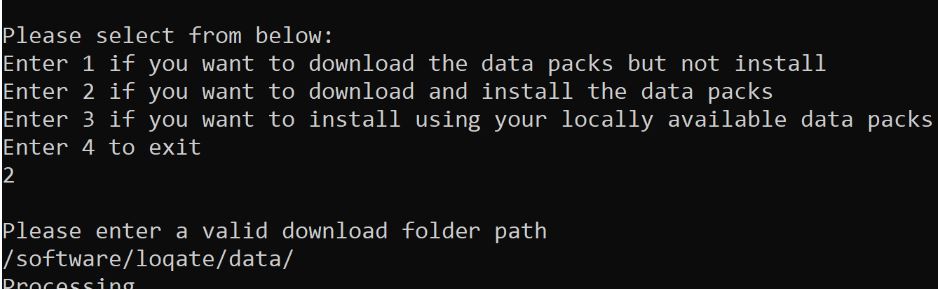
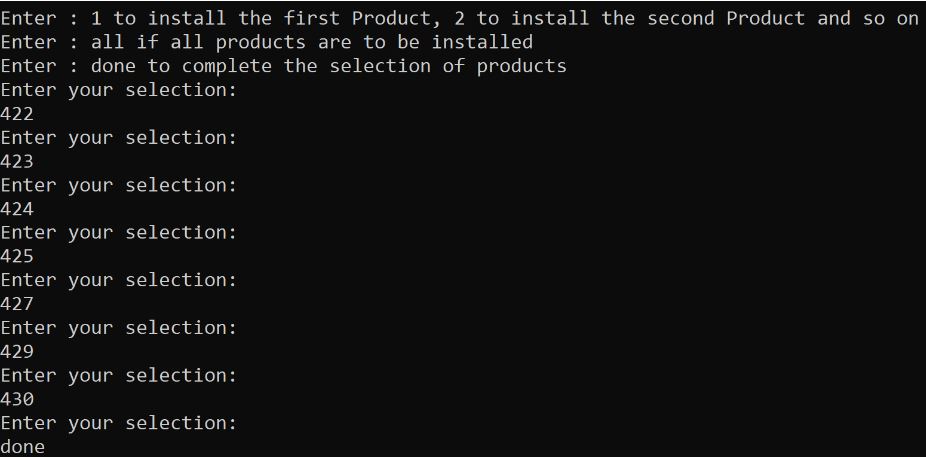
-
Select the data packs as shown in the example below. Depending on the number of data packs, the size of the data packs and the network bandwidth, it may take several mins to several hours for the install to complete.
-
On Linux, edit the .env file in the iDQ installation directory so the value of LOQATE_HOME is the path to the directory where you installed Loqate.
-
For iDQ on Windows, you will need to copy a Linux installation of Loqate to the Windows machine where iDQ is running, then edit the .env file in the iDQ installation directory and set LOQATE_HOME to the location where you copied the Loqate install.
WebFocus DSML Services - Container Edition Software
Steps to download and configure
- On a web browser, open the following link to TIBCO eDelivery:https://edelivery.tibco.com/storefront/view-component-download.ep?partNumber=01014451
- Select version 1.0.3, then select Linux, Accept EULA, then select Individual software Download.
- Download
TIB_dsmlce_1.0.3_linux_x86_64.tar

- Untar the file to a local directory.
Note: You may build all the DSML container images following the DSML Services documentation, but ibi Data Quality only requires the metadata service.
Build Metadata Service Image
- Using the command line, change directory to the TIB_dsmlce_1.0.2_linux_x86_64/dsml-build-context/metadata directory.
- Run the following command:
docker build --no-cache -t ibi2020/webfocus:metadata-9.2-1.0.3 .
Note: The dot (.) at the end is part of the command and must be included.
- If you are no longer
running earlier versions of ibi Data Quality, you can delete older versions of
this image. To verify that the image has been built, execute the following
command:
$ docker image ls ibi2020/webfocus

REPOSITORY         TAG                  IMAGE ID       CREATED       SIZE

ibi2020/webfocus   metadata-9.2-1.0.3   fd19b79b06d8   3 weeks ago   295MB
Installing ibi Data Quality
To install ibi Data Quality:
- Download and unzip the ibi_tdq_{product_version}_container.zip file.
- Edit the
install/.env
file.
- Change the HOSTDOMAIN. This is required if you intend to access ibi Data Quality from a machine other than the one where it is installed.
- Change the location of your
Loqate Linux installation. This is required if you intend to use the Loqate
address cleansing services.
For example, if you extracted a Linux installation of Loqate in the C:\Loqate_Linux folder, then change the value of LOQATE_HOME in the .env file to:
LOQATE_HOME=C:/loqate_linux
- By default, ibi Data Quality
starts three replicas of the
dq-profiler container. This improves performance and
scalability when profiling large data sets, at the cost of increased resource
use. If you do not expect to profile large data sets, then you can limit
resource consumption by setting PROFILER_SCALE to 1 or 2.
Note: If you are using Docker Compose version 2.x and require profiler scaling, then you must edit the docker-compose.yaml file.
By default, the docker-compose.yaml file sets the scaling properties used by Docker Compose version 1.x:
dq-profiler:

    build:

	...

    scale: ${PROFILER_SCALE}

#   comment scale and use deploy section instead for compose

#   version 2.x

#    deploy:

#      mode: replicated

#      replicas: ${PROFILER_SCALE}
For Docker Compose version 2.x, edit this section in the docker-compose.yaml file as follows:
dq-profiler: build: ... # scale: ${PROFILER_SCALE} # comment scale and use deploy section instead for compose # version 2.x deploy: mode: replicated replicas: ${PROFILER_SCALE} - Other settings in the .env file should not be changed.
- Open Windows PowerShell or any Linux shell.
- Change your directory to the folder where you extracted the ibi_tdq_5.2.0_container.zip file.
- Change your directory to the /install folder.
- Run the following command:
docker-compose up --build
- Wait to confirm that WSO2 Identity Server is started and running.
- Open the WSO2 console at
https://localhost:9801and accept the self-signed certificate.Note: The ibi Data Quality is packaged with a self-signed certificate for HTTPS. It is recommended that you replace this with your own certificate. If you have a signed certificate and key, replace tdq-cert.crt and tdq-cert.key in the install/dq-nginx/dockerRoot folder with your own files, using those file names. If OpenSSL is available, then you can generate your own self-signed certificate by editing tdq-nginx-cert.conf and executing the command found in the gen-cert-script.txt file.
-
Open a web browser and go to the ibi Data Intelligence Home Page at https://localhost:9808/
-
Login using default credentials: dqadmin/dqadmin. Note - we recommend you change the default user's password in the User Management Console. For more information, refer to the Manage Existing Users section of this document.
-
Click “Profile and Analyze” under Data Quality Management.
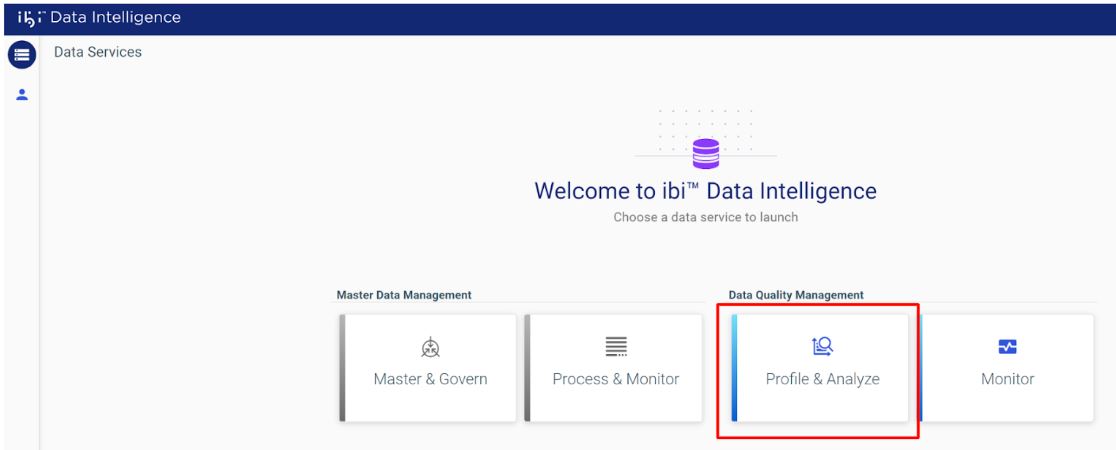
You will be redirected to the ibi Data Quality Home Page.

- To restart ibi Data Quality
after the first time, remove the
–buildswitch from the command line. Simply run:docker-compose up