Managing Data Classes
A data class represents a real-world entity (for example Credit Card, Email, Phone Number, etc.). When a user uploads a data set and submits a request for data profiling, the Profiler uses the definitions of known data classes from the Knowledge Hub to classify and tag those data variables with their corresponding data classes.
Packaged (Built-in) Data Classes
The following table lists and describes the built-in data classes that are recognized by the Profiler.
|
Name |
Description |
Sensitive Flag |
|---|---|---|
|
address_city |
Address City |
FALSE |
|
address_country |
Address Country |
FALSE |
|
address_line |
Address Line |
FALSE |
|
address_postal_code |
Address Postal Code |
FALSE |
|
address_state |
Address State |
FALSE |
|
airport_code |
Airport Code |
FALSE |
|
date |
Date |
FALSE |
|
|
Email Address |
TRUE |
|
gender |
Person Gender |
FALSE |
|
iban |
International Bank Account Number |
TRUE |
|
person_first_name |
Person First Name |
FALSE |
|
person_full_name |
Person Full Name |
FALSE |
|
person_last_name |
Person Last Name |
FALSE |
|
person_name_prefix |
Person Name Prefix |
FALSE |
|
person_name_suffix |
Person Name Suffix |
FALSE |
|
phone_number |
Phone Number |
TRUE |
|
time |
Time |
FALSE |
|
us_company_name |
United States Company Name |
FALSE |
|
us_dea |
United States Drug Enforcement Agency assigned Prescriber Identifier |
TRUE |
|
us_npi |
United States National Provider Identifier |
TRUE |
|
us_ssn |
United States Social Security Number |
TRUE |
|
vin |
Vehicle Identification Number |
TRUE |
The following image shows the built-in data classes exposed through the web UI.
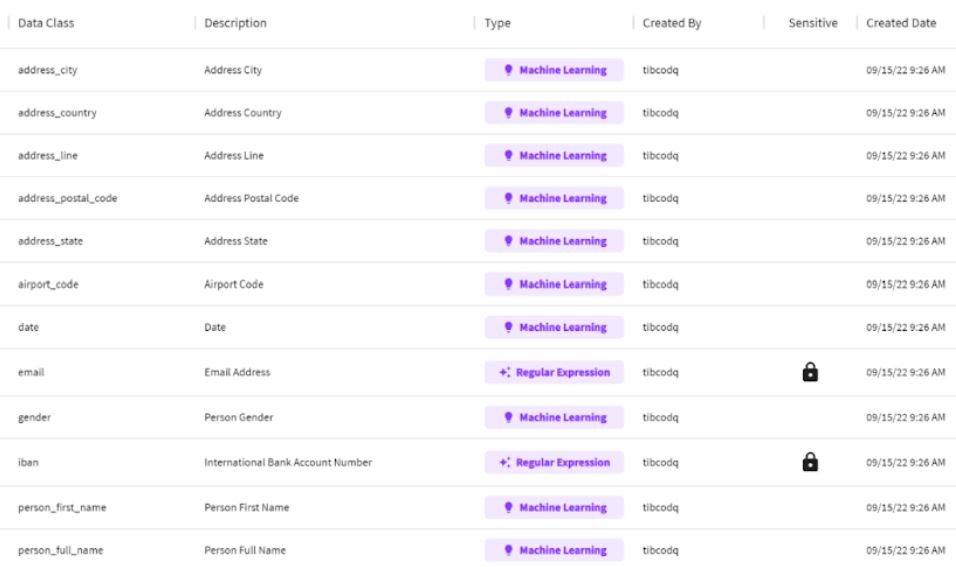
Tip: User-defined data classes are shown in blue, as shown in the following image.

Defining New Data Classes
Users can use the Data Class Editor to add definitions for new data classes.
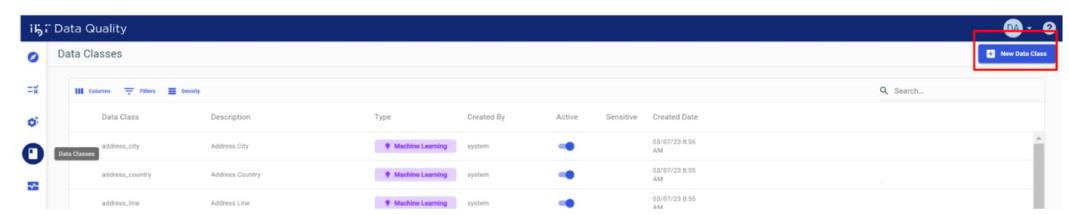
- Go to the Data Classes tab and click New Data Class.
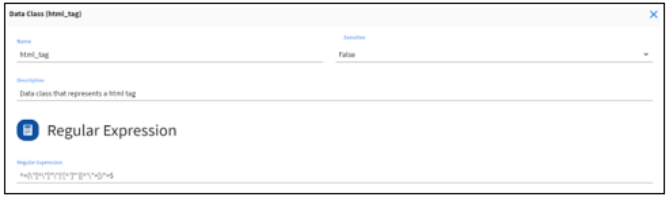
The Add Data Class dialog opens, as shown in the following image.
- Select one of the following options:
- Regular Expression. If you have a regular expression that can be used to match input data values.
- Lookup. If you have a CSV data set reference data values.
- Mask. If you have run the profile for the data set, you can choose to select one or more masks from the profile.
- Pattern. If you have run the profile for the data set, you can choose to select one or more patterns from the profile.
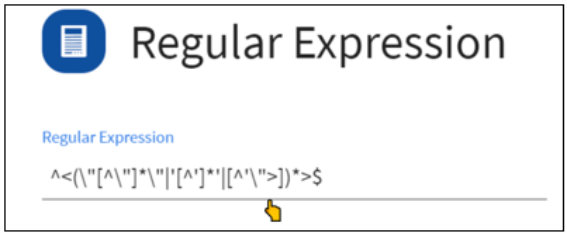
Regular Expression
Use this option when you have a valid regular expression to identify a new class of data.
- Enter a unique name for the data class.
- Set the Sensitive data flag to True or False.
- Provide a description for the new data class.
- Enter a valid regular expression.
Pattern or Mask
Use this option when you have generated a data profile and want to use the patterns and masks discovered by the profiler to define a new data class. The following steps apply to patterns and masks:
- Enter a unique name for the data class.
- Set the Sensitive data flag to True or False.
- Provide a description for the new data class.
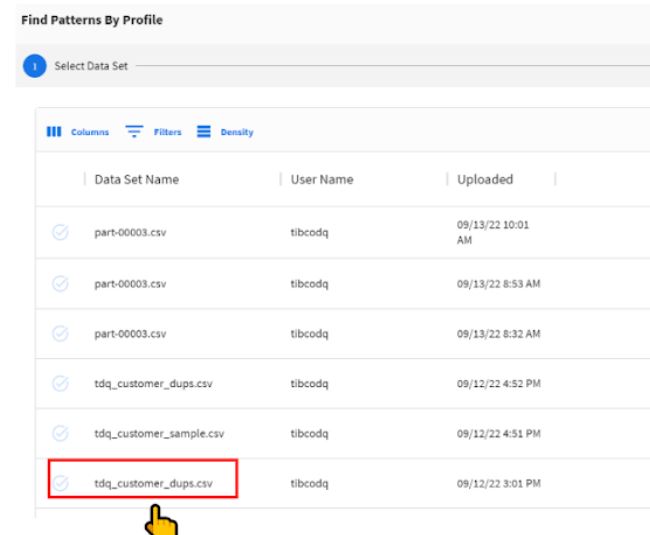
- Click Find Profile Patterns or Find Profile Masks to select pattern(s) or mask(s) from a previously generated data profile, as shown in the following image.

- Search and select the data set name of the profile you are going to use, as shown in the following image.
- Select the appropriate variable from the data profile, as shown in the following image.
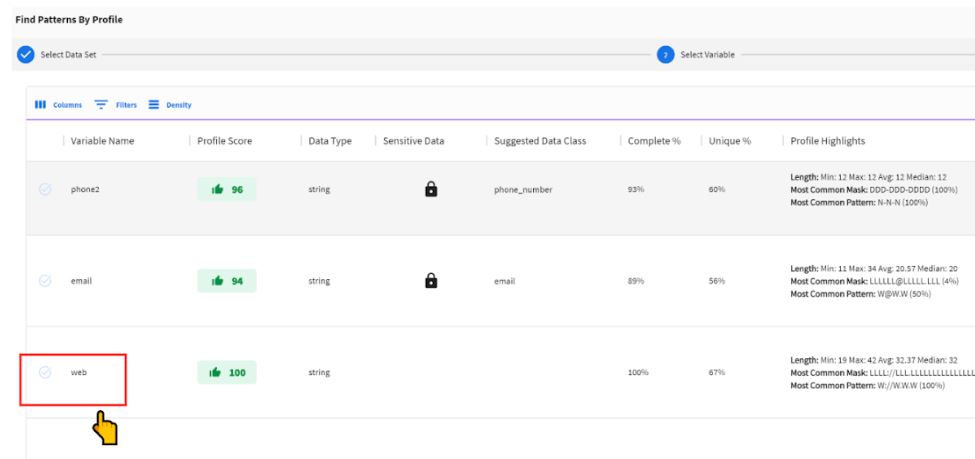
- Select up to a max of five different Patterns or Masks, and then click Finish.

Lookup
Use this option if you have an enumerated list of values that represent the new class of data.
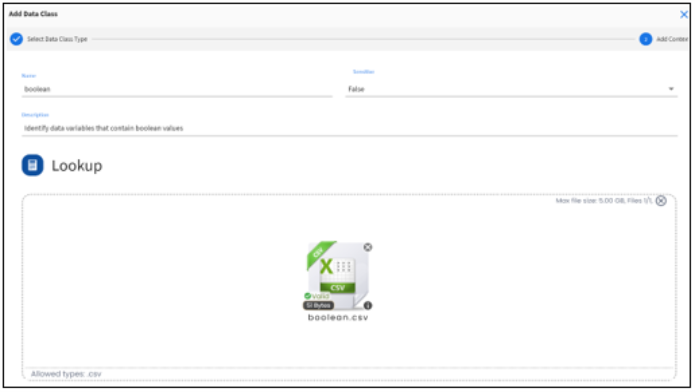
- Create a CSV lookup file that meets the following specifications:
- The CSV file requires a header row.
- The CSV file contains only one column of data values.
- The CSV file contains a max of up to 1000 values.
- Enter a unique name for the data class.
- Set the Sensitive data flag to True or False.
- Provide a description for the new data class.
Verifying New Data Classes
To verify new data classes:
- Go to the Data Classes tab and verify that the newly created data class definition is successfully published into the Knowledge Hub, as shown in the following image.

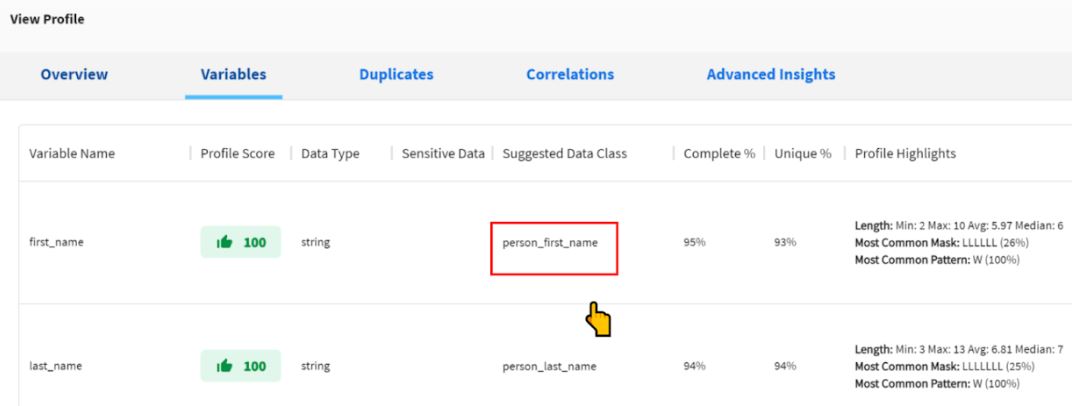
- Upload data and re-profile that data to verify the newly created data class is identified by the profiler, as shown in the following image.

Editing Data Classes
Users can edit the data classes they have created.
- Go to the Data Classes tab and click the edit icon next to the data class name, as shown in the following image.

- You can either change the definition, such as replacing it with a new Regular Expression, add/remove masks and patterns, or replace it with a new lookup file.
You can change the data class definition type from the existing type to a new type, such as changing a Pattern-based definition to a Regular Expression, etc.

Disabling Data Classes
If you have the appropriate privileges, you can disable a data classification rule by following these steps.
Note - If you disable a data class, the Profiler will not classify any data attribute with this data class irrespective of who uploads the data. A class data can either be enabled or disabled universally for all users of a given ibi Data Quality instance.
Steps:
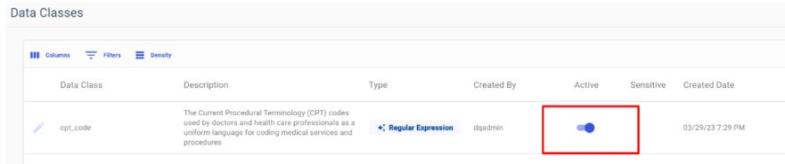
Open the Data Classes Tab.
Search and find the “Data Class” you want to disable.
Use the toggle button to disable a “Data Class”.