Uploading Data
Once signed in, the ibi Data Quality UI offers different navigational views to get you started.
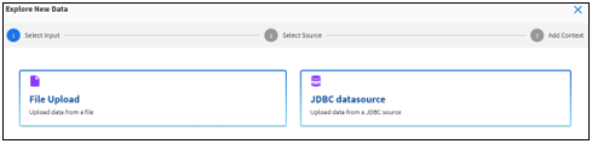
To upload data, click Explore New Data in the upper-right corner of the Home Page, as shown in the following image.

The Explore New Data dialog opens, as shown in the following image.
You can upload data from a text file or JDBC data source (PostgreSQL, SQL Server, etc.).
Click either File Upload or JDBC datasource.
Uploading Data From a Text File
To upload data from a text file (for example, .csv):
-
Drag an input text file to the upload window or browse to the local file system and select an input text file. File upload supports text files up to max 5GB.
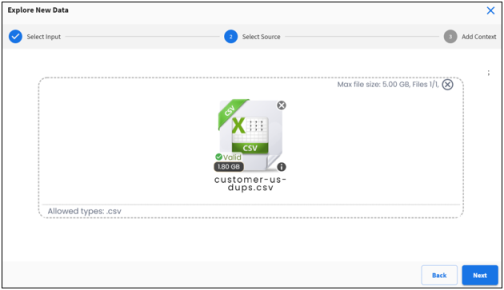
Note: Your input data set cannot have a column name “dq_recid”. This column name is reserved for the system to automatically assign unique row identifiers for each row in the input data set.
- Click Next.
The Add Context pane opens, as shown in the following image.
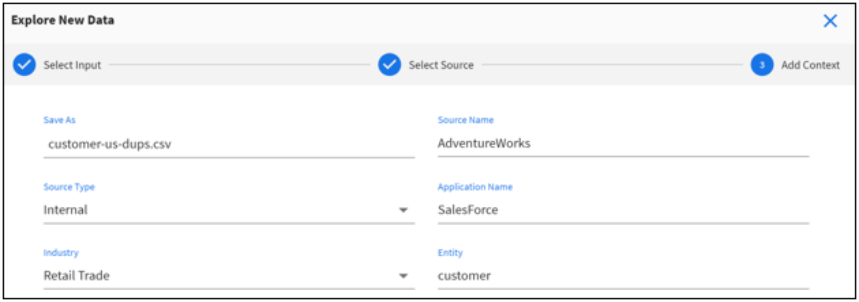
- Add business context for your input data.
Tip: Setting up the right business context helps users filter DQ statistics and metrics in the ibi Data Quality Watchdog App.
Property
Description
Save As
Data set name if different from file name.
Source Name
Name of the data source.
Source Type
Is the data source considered internal or external to the organization.
Application Name
Name of the application that generated the input data.
Industry
Select an industry represented by the data.
Entity
Name of the business entity the data represents (e.g., customer, partner, supplier, office).
- Provide parsing options for your input data.

Property
Description
File character set
Character encoding, supported types are UTF-8, UTF-16, or ISO-8859-1.
File has header
True if file has a header column, False otherwise.
File Delimiter
Field delimiter, supported delimiters are Comma (,), Pipe(|), Semicolon (;), Space, or Tab.
Quote Character
Define the enclosing character if text within a field includes the delimiter character. Supported characters are double quote (“) or grave accent (`).
Uploading Data From a JDBC Data Source
This section describes how to upload data from a JDBC data source.
New JDBC Connection
To upload data from a JDBC data source using a new JDBC connection:
- Provide the SQL select statement to read data from a table or a view.
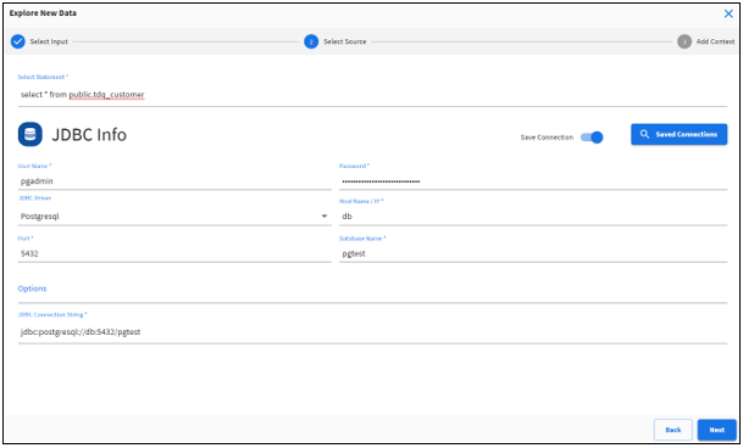
- Provide the source database user name and password.
- Select a JDBC driver from the list of available drivers.
- Provide the hostname, port, and database name.
- Provide any optional JDBC connection parameters as required.
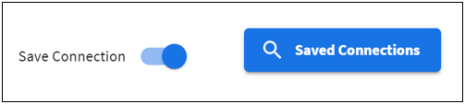
- Toggle Save Connection if you intend to save and reuse this JDBC connection.
- Click Next to continue with the rest of the data upload steps.
Existing JDBC Connection
To upload data from a JDBC data source using an existing JDBC connection:
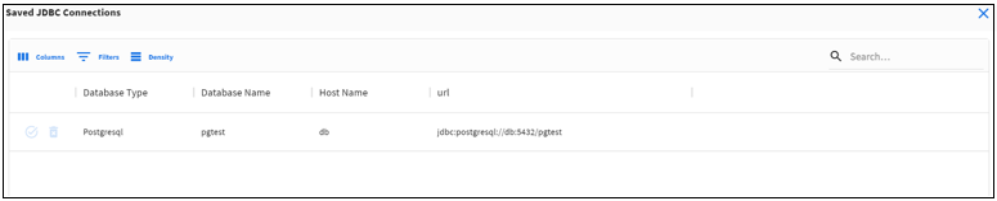
- If you want to reuse an existing JDBC connection, click Saved Connections and select from the list of available JDBC connection strings.
- Provide the SQL select statement to read data from a table or a view.
- Click Next to continue with the rest of the data upload steps.
Sample JDBC Connection Strings
The following provides sample JDBC connection strings for reference purposes.
jdbc:sqlserver://[serverName[\instanceName][:portNumber]]
jdbc:sqlserver://localhost:1433;databaseName=AdventureWorks
Database: Postgre SQL
jdbc:postgresql://host:port/database
jdbc:postgresql://localhost:5432/AdventureWorks
Database: Oracle
jdbc:oracle:thin:@host:port:database
jdbc:oracle:thin:@localhost:1521:AdventureWorks
Database: MySQL
jdbc:mysql://localhost:port/database
jdbc:mysql://localhost:3306/AdventureWorks
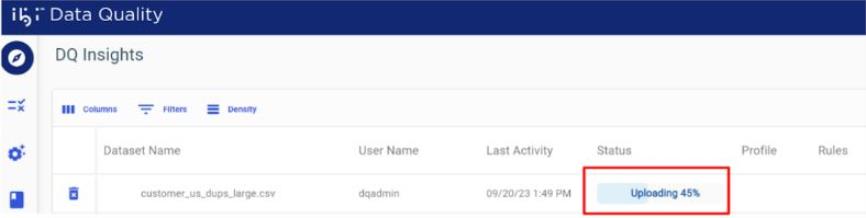
Tracking Upload Progress
The upload progress bar displays the current upload status, as shown in the following image.