Creating a New Table Filter
A table filter determines what rows are displayed based on the rules you specify for the data in the table columns.
To create a new filter
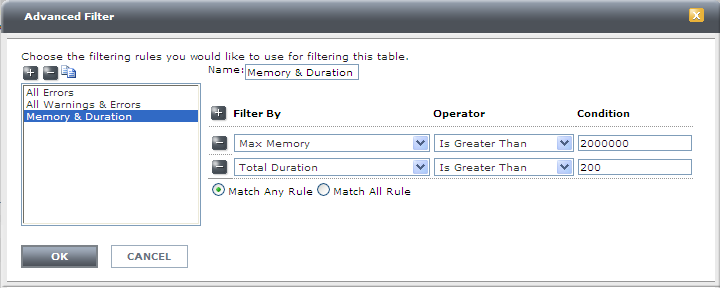
1. Above any table in Manager, choose <Edit Filters...> from the Filter drop-down menu. The Advanced Filter dialog is displayed:
2. Click Add Filter above the list of existing filters.
3. In the Name field, type a unique name for your filter.
4. Specify a rule for your filter using these fields:
Field | Value to specify |
Filter By | a column in the table on which to apply the rule. The drop-down menu lists all the columns displayed in the table view. |
Operator | the operator for the rule. The drop-down lists all available operators for type of data in the column (numeric, text, list of values, and so on). |
Condition | the value or condition the data in the column must match. |
5. To specify another rule, click Add Rule.
6. To remove any rule, click Remove Rule to the left of the rule definition.
7. Select Match Any Rule or Match All Rules to specify how you want the filter to work.
— Match Any Rule - the filter is applied if any one of the rule conditions are met.
— Match All Rules - the filter is applied only if all of the rule conditions are met.
8. Click OK.