Set Git Options
You can set the Git Options AUTHOR and EMAIL in order to associate a user with any Git commit action, or when files from the local Git repository are pushed to remote Git repositories.
You can set these options from the WebFOCUS Reporting Server browser interface or the ibi Data Migrator desktop interface.
Make sure you have configured the Adapter for Git.
- Procedure
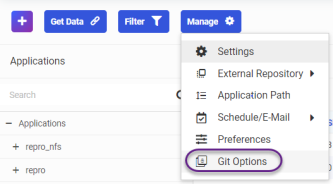
- On the WebFOCUS Reporting Server browser interface Applications page, click Manage, then Git Options or, in the ibi Data Migrator desktop interface navigation pane, right-click Application Directories, point to Manage, and click Git Options.
The following image shows how to select Git Options in the WebFOCUS Reporting Server browser interface.
The Change Settings for GIT panel opens, as shown in the following image.
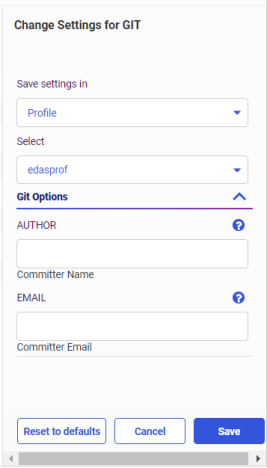
- Select a profile in which to save the options.
The default profile is the server profile, edasprof. However, you can select any profile configured in the server from the Select dropdown list.
- Enter a user name in the AUTHOR entry field and the email address of the user in the EMAIL entry field, as shown in the following image.
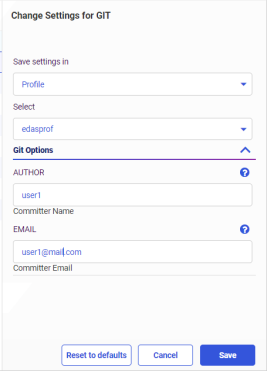
- Click Save.
- Create an empty application directory to receive the files from the central Git repository.
This application directory is referred to as the local repository. The recommended best practice is to create this local repository under the homeapps directory of the user.
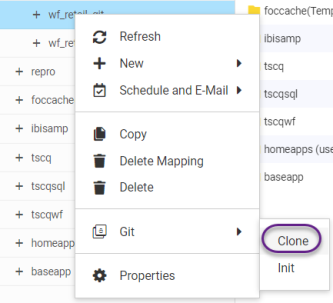
- Right-click the local repository, point to Git, and click Clone, as shown in the following image.
The Clone panel opens, as shown in the following image.
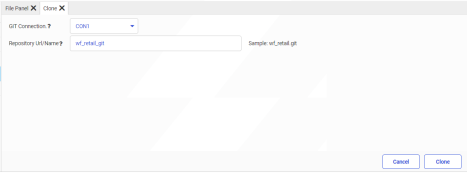
- Select a connection from the Git Connection dropdown list, enter the name or URL of the Git repository in the Repository Url/Name entry field, and click Clone.
This transfers the files from the central Git repository to the local repository on the server.
- To exclude profile files from Git tracking, right-click the local repository, point to Git, and click Ignore, as shown in the following image.
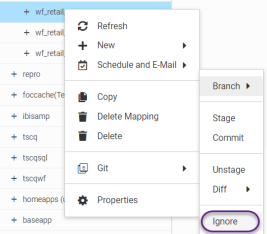
The Git Ignore panel opens, as shown in the following image.
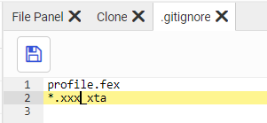
- Enter the names or patterns that define the files to ignore, and click the Save icon, then close the tab using the X icon.
- Make the necessary changes to any of the files in the local repository, and save the changes.
- Right-click the local repository, point to Git, and click Stage, as shown in the following image.

The Git Stage panel opens, as shown in the following image.

- After you verify that the correct files are staged, click Stage.
This places the files from the local repository into the Git staging area prior to committing the changes.
- Right-click the local repository, point to Git, and click Commit, as shown in the following image.
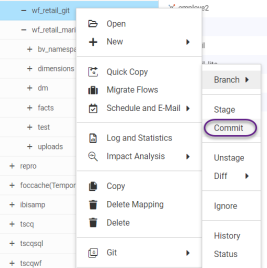
The Git Commit panel opens, as shown in the following image.
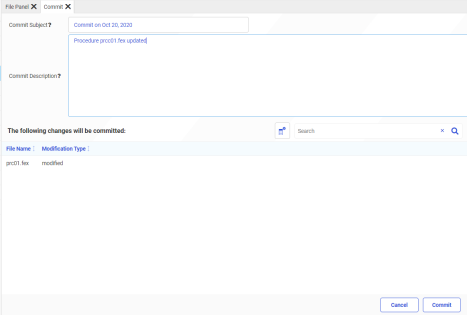
- Enter any subject and comment text that you want to be associated with this commit, and click Commit.
The Git Status panel opens, as shown in the following image.
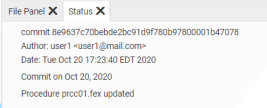
The panel shows the status of the commit, as well as the subject and comments you entered on the Git Commit panel, and the AUTHOR and EMAIL options you configured. You can close the Status tab using the X icon.
- Right-click the local Git repository, point to Git, and click Push, as shown in the following image.
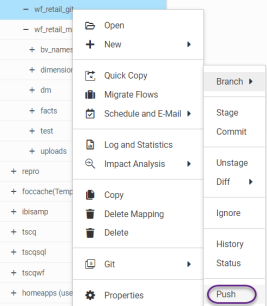
This transfers the local repository files to the central Git repository.
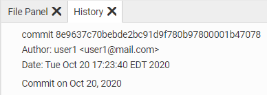
- To verify that your Git Options were used, right-click the local repository, point to Git, and click History, as shown in the following image.
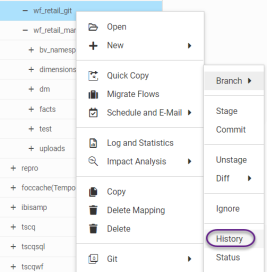
The history panel opens showing the information about the commit, including the AUTHOR and EMAIL Git Options you configured, as shown in the following image.
You can close the History tab using the X icon.