Configuring the Adapter for SharePoint
This section describes how to configure the SharePoint adapter.
SharePoint is in the XML Based Adapter category.
Configure the Adapter for SharePoint
- Procedure
- Ensure that you are Signed Out of the SharePoint Online account to be used in the configuration.
- Access the WebFOCUS Reporting Server browser interface using the host name and port that you specified in the Redirect URIs field of the Azure Active Directory Application.
For example:
https://host.ibi.com:8121
For more information, see Creating an App in the Microsoft Azure Active Directory.
- From the WebFOCUS Reporting Server browser interface Applications page, click Get Data.
The Get Data page opens showing your configured adapters.
- Click the plus sign (+) button, and find the adapter on the page.
On the WebFOCUS Reporting Server browser interface, you can select a category of adapter from the drop-down list (SharePoint is in the XML Based category), or use the search option (magnifying glass) to search for specific characters.
- Right-click the SharePoint node and select Add connection.
The Add Connection for SharePoint pane opens, as shown in the following image for the simple mode of Get Data.

- Select a Security authentication method.
Select from the following options:
- OAuth. Authenticates to SharePoint Online.
- NTLM. Authenticates to SharePoint 2016/2019 (used for SharePoint Drive only).
- Trusted. Authenticates to SharePoint 2016/2019 secured for Kerberos (Used for SharePoint Drive only).
- Enter the value for the Graph API URL.
Example:
https://graph.microsoft.com/v1.0
- Depending on your authentication method, enter the security attributes.
- For OAuth authentication, enter values for the Authorization URL, Token URL, and Application ID as defined by the Azure Active Directory application project.
- For Trusted authentication, enter the value for the Kerberos Service Principle Name (SPN).
For more information, see Connection Attributes for SharePoint.
- For OAuth authentication, click Get Refresh Token.
If you are not already signed into a SharePoint Online account, a Sign in dialog opens to authenticate to SharePoint.
The Permissions Consent page opens, as shown in the following image.
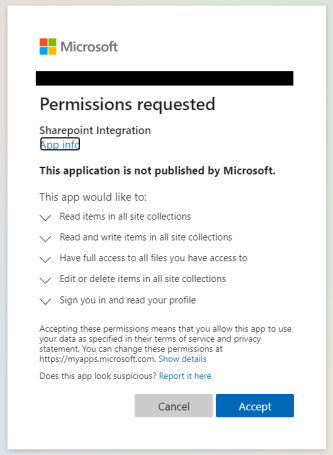
- For OAuth authentication, click Accept.
You are returned to the Add Connection for SharePoint pane, where the Refresh Token field is now populated, as shown in the following image.
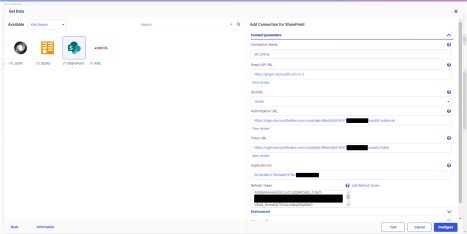
If the Refresh token is not populated, sign off from your SharePoint account and clear the browser cookies.
- Click Configure.
The SharePoint Connection is added as an icon of configured SharePoint Connections.