Filtering and Sorting on SharePoint Lists
In order for the Graph API to filter on a SharePoint List column, the column must be indexed within SharePoint. SharePoint Online has a limitation on filtering with an OR condition on multiple columns.
For example the filter expression, WHERE COLUMN4 EQ 'New York' OR COLUMN5 EQ 'TX'; will result with the following error returned in the report:
(FOC45640) Request Failed. HTTP Status : 429 Too Many Requests
(FOC45641) HTTP Response :  {
"error": {
    "code": "throttledRequest",
    "message": "The request has been throttled",
    "innerError": {
      "date": "2020-08-14T07:30:29",
      "request-id": "83a0eabb-b472-4da1-a115-e4de8cbe508b"
    }
  }
}
If this type of filter is required, it is possible to have the WebFOCUS Reporting Server engine perform the filtering by setting EXPAND_FILTER=NO.
This would return all of the records from the SharePoint List to the WebFOCUS Reporting Server, which would also increase the retrieval time.
By default the WebFOCUS Reporting Server engine performs sorting on a SharePoint List column using the SORT fieldname attribute in the Access (.acx) File. For example:
FIELD=TITLE, SORT=NO, $
In order for the Graph API to perform the sorting, the SharePoint List column must be indexed within SharePoint and SORT=YES must be set in the fieldname definition within the Access (.acx) File.
It is recommended to keep SORT=NO for the field definition within the Access (.acx) File, as it has been found that, on occasion, SharePoint Online returns the error Request Failed. HTTP Status : 429 Too Many Requests, when more than one sort is defined in the report.
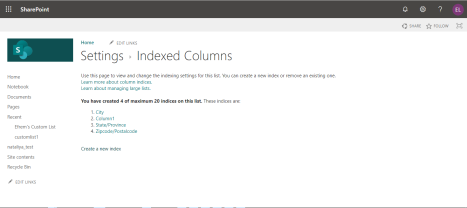
You can index a particular SharePoint List column by going to List Settings for the particular list, and clicking Indexed columns from within SharePoint Online.
The Settings - Indexed Columns page opens, as shown in the following image.
To create a new Index for a SharePoint List column, click Create a new index.
The Indexed Columns - Edit Index page opens, as shown in the following image.
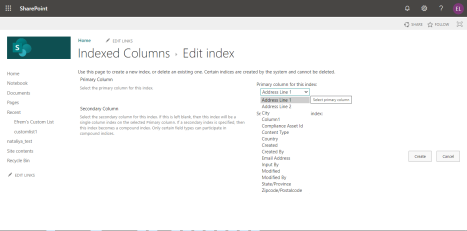
Select a column from the drop-down list and click Create.