The Data Flow Interface
The Data Flow interface consists of:
- The workspace, where you build your data flows to extract and move data from data source objects to data target objects. Arrows connect the objects and support the flow.
- Three tabs under the workspace, Data Flow, Process Flow, and Text View, which provide different views of the flow.
- The Flow tab in the ribbon, which enables you to set data flow properties, run flows, and arrange flow objects. The same tab is active when you create process flows.
- The navigation
pane, where you choose and stores flow components. It contains the following folders:
- The Application Directories folder provides access to flows, procedures, and reports that can be generated from a flow. It also provides access to synonyms that describe data. You can use them as data sources or data targets in your flow.
- The Adapters folder allows you to add and configure adapters.
- The Resource Management folder is used with Resource Analyzer and Resource Governor.
- The Workspace folder allows you to configure the server.
As shown in the following image, when you create a new flow, the Data Flow tab opens by default, with an SQL object in the workspace to anchor the flow. By default, the Flow tab is also active.
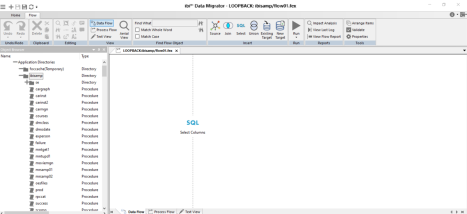
You can add data source objects and data target objects, and use the SQL object to establish rules for extracting and moving data between them.
For more information on the Data Flow Interface, see Working in the ibi Data Migrator Desktop Interface.
Manage Scheduled Flows
- Procedure
- Right-click Application Directories or
an individual application directory, point to Schedule
and E-mail, and then click Scheduler Agents.
The Scheduler Agents for window opens, as shown in the following image.

- Select or clear the checkboxes for any flow you want to make active or inactive.
- On the Report tab, from the Tools group, click Activate Selected or Deactivate Selected.
Advanced Filter
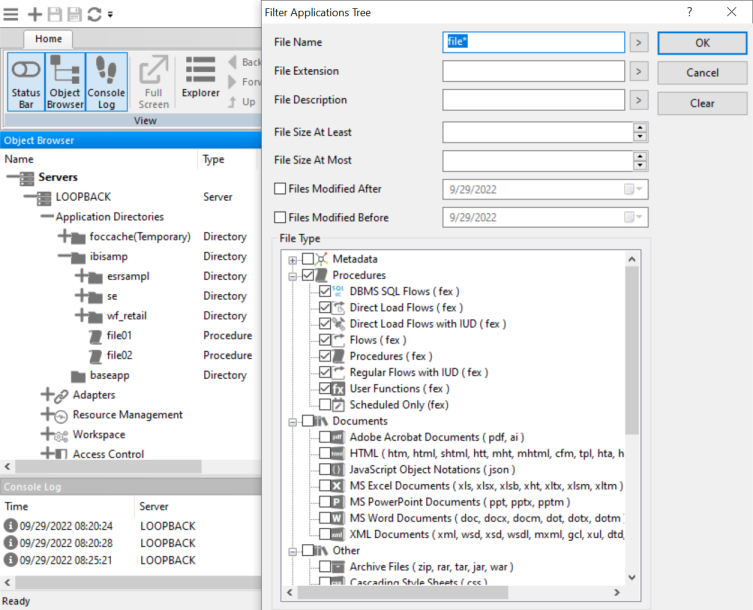
The Advanced Filter gives you finer control over the file types that appear in the navigation pane. For example, you could specify that you only want to see synonyms for the MS SQL Server tables. It also lets you restrict display to files with specified names (using wildcards) or descriptions, files modified in a specific time period, or those of a specified size.
On the Home tab, from the Filter group, click Advanced. The Filter Applications Tree dialog opens.
The following example shows a filter, using a wildcard (*), to display procedures that begin with the letters file.