Configuring Microsoft IIS
This section describes how to configure WebFOCUS on a Windows machine that is using Microsoft IIS version 10. As a prerequisite, ensure that the Microsoft IIS web server is already installed, along with the ISAPI Extension and ISAPI Filters components.
During the WebFOCUS installation, the Select Components to install screen opens, as shown in the following image.

Select Configure Apache Tomcat and click Next to continue with the installation.
The installation configures WebFOCUS by using the Microsoft IIS web server and Tomcat as the application server.
WebFOCUS installs the IIS Tomcat plugin, isapi_redirect.dll, in the
following location:
C:\Program Files\Apache Software Foundation\Jakarta Isapi Redirector\bin\
Manually Configuring Microsoft IIS Version 10
When installing the WebFOCUS Client, if you have Configure Apache Tomcat connector for IIS selected, and you receive a message that you must configure the IIS Tomcat plug-in, finish the installation, and then perform the following procedures.
Manually Configure Microsoft IIS Version 10
To manually configure Microsoft IIS version 10 on a Windows server:
- Procedure
- Open the
Windows Server Manager on your system.
The Server Manager Dashboard opens, as shown in the following image.
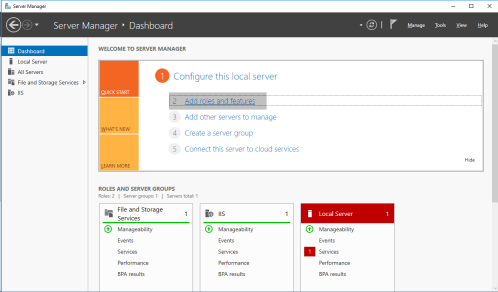
- In the upper right on the banner, click
Manage
and
then select
Add Roles and Features.
The Add Roles and Features Wizard opens, as shown in the following image.
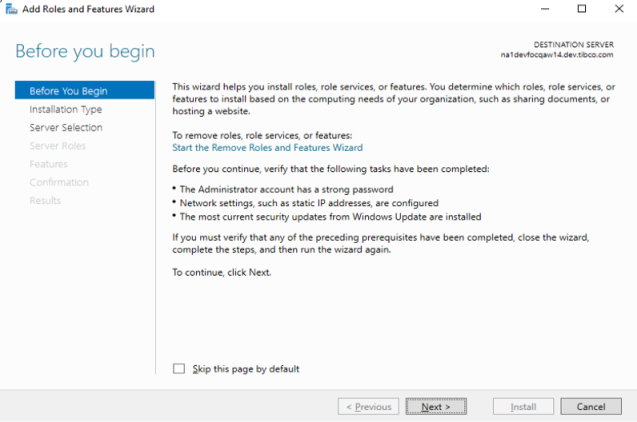
- Continue clicking Next, until you get to the Server Roles page.
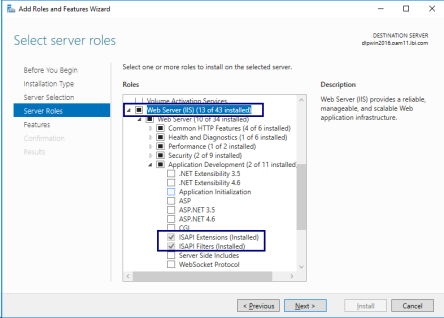
- On the Select server roles dialog, ensure that the following components are installed:
- Web Server (IIS)
- Under the Web Server/Application Development section:
- ISAPI Extensions
- ISAPI Filters
The Select server roles dialog is shown in the following image.
- After the
selected services are installed, open the Internet Information Services
(IIS) Manager.
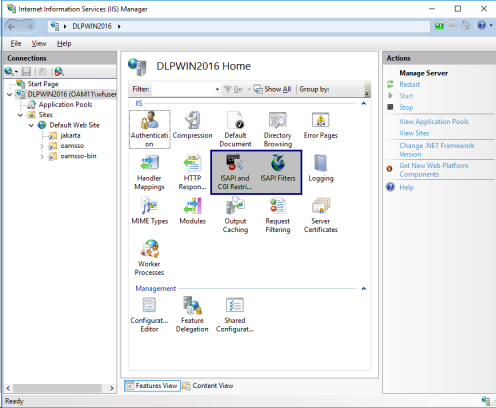
- Ensure that
the following services are available:
- ISAPI and CGI Restrictions
- ISAPI Filters
- In the left
pane, expand the Sites node, as shown in
the following image.
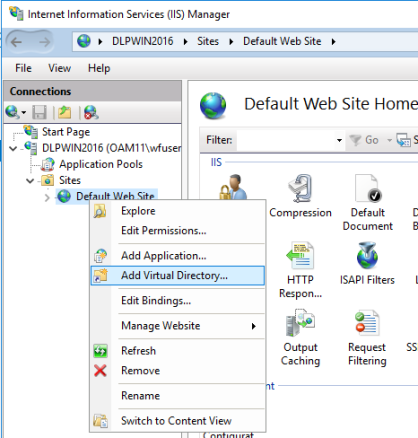
- Right-click Default
Web Site and select Add Virtual Directory from
the context menu.
The Add Virtual Directory dialog opens, as shown in the following image.

- In the Alias field, type jakarta.
- In the Physical
path field, navigate to the location of the isapi_redirect.dll file. WebFOCUS installs this file in the following directory:
C:\Program Files\Apache Software Foundation\Jakarta Isapi Redirector\bin
- Click OK.
- In the left
pane, select the Site node that will be used to access WebFOCUS, as
shown in the following image.
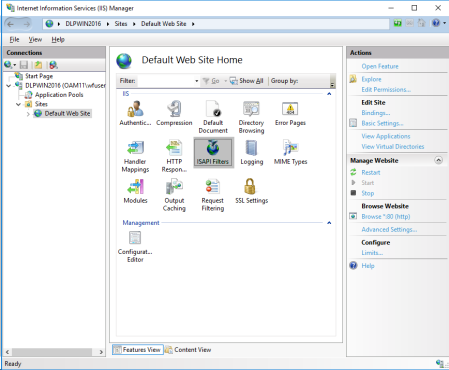
- Double-click ISAPI
Filters.
The ISAPI Filters pane opens, as shown in the following image.

- Click Add in
the Actions pane. You can also right-click the ISAPI Filters pane
and select Add from the context menu.
The Add ISAPI Filters dialog opens, as shown in the following image.
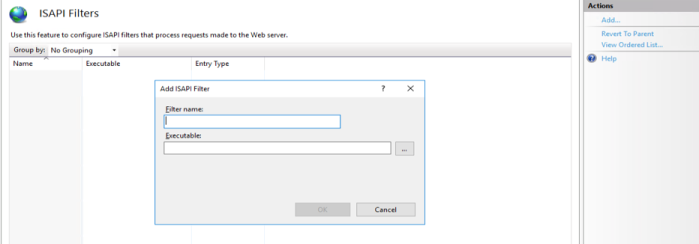
- In the Filter name field, type the name of the ISAPI filter.
- In the Executable field, navigate to the location of the isapi_redirect.dll file. WebFOCUS installs this file in the following directory:
C:\Program Files\Apache Software Foundation\Jakarta Isapi Redirector\bin
- Click OK.
- In the left
pane, expand the Web Site node used for WebFOCUS and
select the jakarta node, as shown in the
following image.
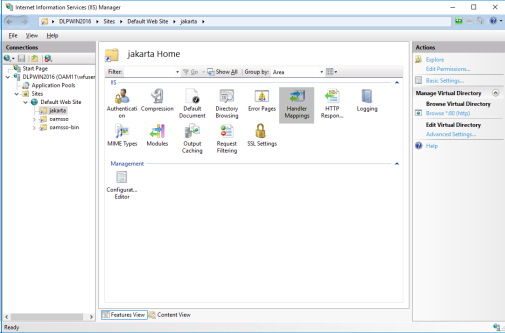
- Double-click Handler
Mappings.
The Handler Mappings pane opens, as shown in the following image.
If the ISAPI module is not already available, then perform steps 20 through 28.

- Click Add
Module Mapping in the right pane.
The Add Module Mapping dialog opens, as shown in the following image.
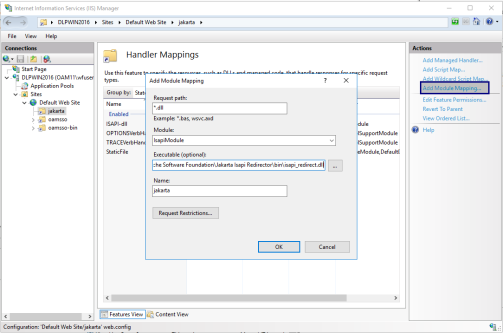
- In the Request path field, enter *.dll.
- From the Module dropdown list, select IsapiModule.
- In the Executable
(optional) field, navigate to the location of the isapi_redirect.dll
file, which is located in the following directory:
C:\Program Files\Apache Software Foundation\Jakarta Isapi Redirector\bin
- In the Name field, type jakarta.
- Click OK.
- When prompted, click Yes to allow this ISAPI Extension.
- Click Edit
Feature Permissions in the right pane, as shown in the
following image.
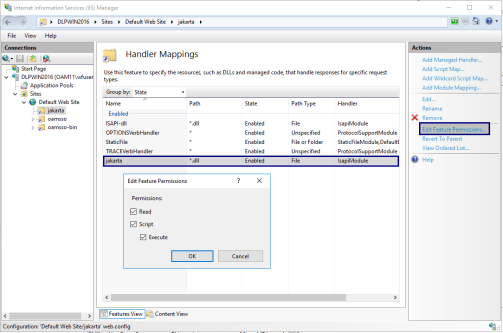
The Edit Feature Permissions dialog opens.
- Enable the Read, Script, and Execute permissions.
- Click OK.
- In the left pane, select the main host name node.
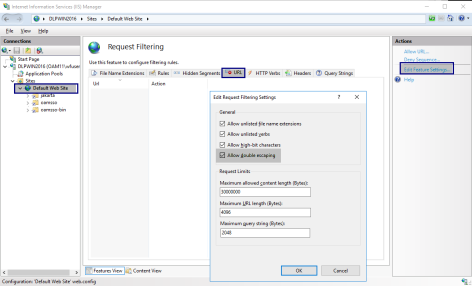
- WebFOCUS uses double escaping to run URLs. As a result, you need to configure the Allow double escaping setting in IIS.
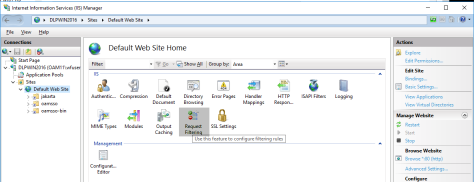
- Select your web site.
- Double-click the Request Filtering icon, as shown in the following image.
- Select the URL.
- Select Edit Features Settings and in the dialog that opens enable the option to Allow double escaping, as shown in the following image.
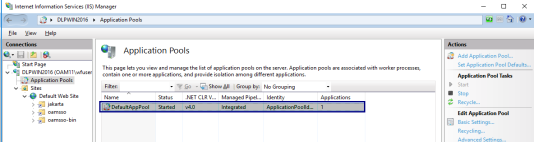
- For IIS configurations using Applications Pools .NET CLR Version v.4.0, there are restrictions enabled, by default, to not allow processing of requests with special characters, such as <, >, &, %, \, and ?. This prevents requests with special characters from being processed, as shown in the following image.
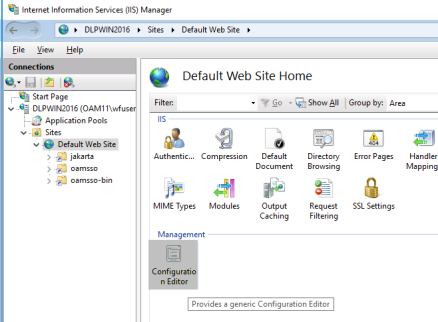
- To remove this restriction, perform the following steps. For your default web site, click Configuration Editor, as shown in the following image.
- From the Section dropdown list, select System.web/httpRuntime for requestPathInvalidcharacters under Deep Path, add a space as the value, and Save.
- To remove this restriction, perform the following steps. For your default web site, click Configuration Editor, as shown in the following image.
- Recycle Apache Tomcat and Microsoft IIS.
- Start Apache Tomcat and Microsoft IIS.
- Open the
WebFOCUS Hub in a web browser by entering the following URL:
http://hostname:port/ibi_apps/